Table 20. Removal steps of keyboard bezel (continued)
When installing:
Make sure that all the claws are attached firmly.
1130 LCD assembly
For access, remove these FRUs in order:
•“1010 Digitizer pen” on page 61
•“1020 Battery pack” on page 61
•“1050 Hinge caps” on page 66
•“1060 Keyboard” on page 67
•“1070 Palm rest” on page 70
•“1090 PCI Express Mini Card for wireless LAN/WiMAX” on page 74
•“1100 PCI Express Mini Card for wireless WAN” on page 76
•“1120 Keyboard bezel” on page 79
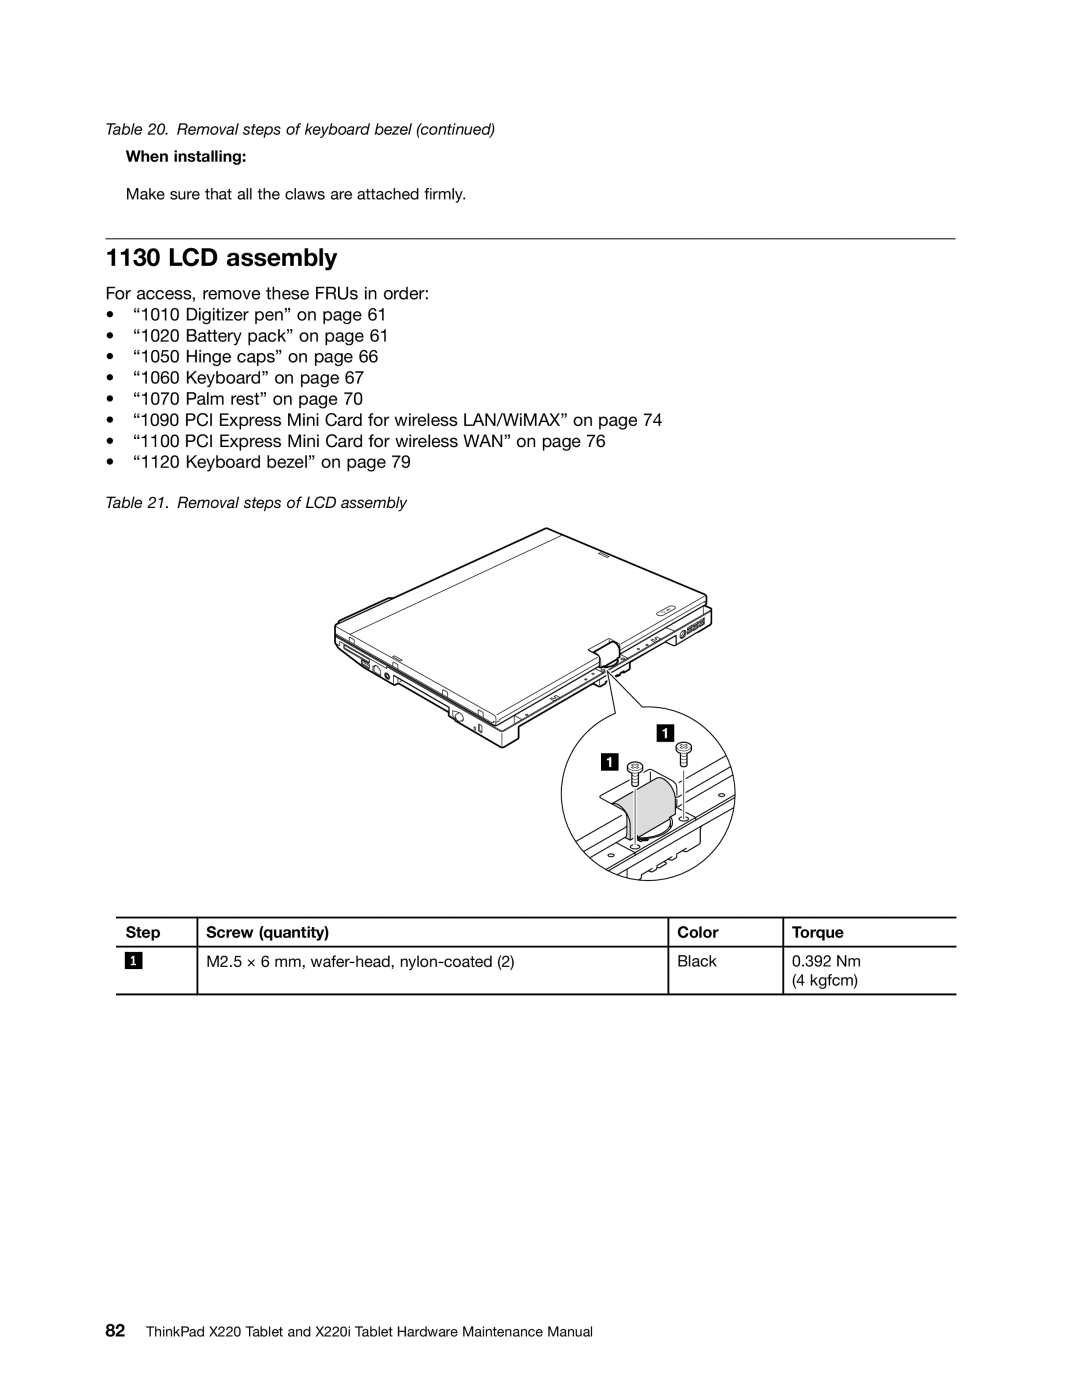
Table 21. Removal steps of LCD assembly
| Step | Screw (quantity) | Color | Torque | |
|
|
|
|
|
|
|
|
| M2.5 × 6 mm, | Black | 0.392 Nm |
| 1 |
| |||
|
|
|
|
| (4 kgfcm) |
|
|
|
|
|
|
82ThinkPad X220 Tablet and X220i Tablet Hardware Maintenance Manual