Table 20. Removal steps of keyboard bezel (continued)
| Step | Screw (quantity) | Color | Torque | |
|
|
|
|
|
|
|
|
| M2 × 2 mm, | Black | 0.181 Nm |
| 3 |
| |||
|
|
|
|
| (1.85 kgfcm) |
|
|
|
|
|
|
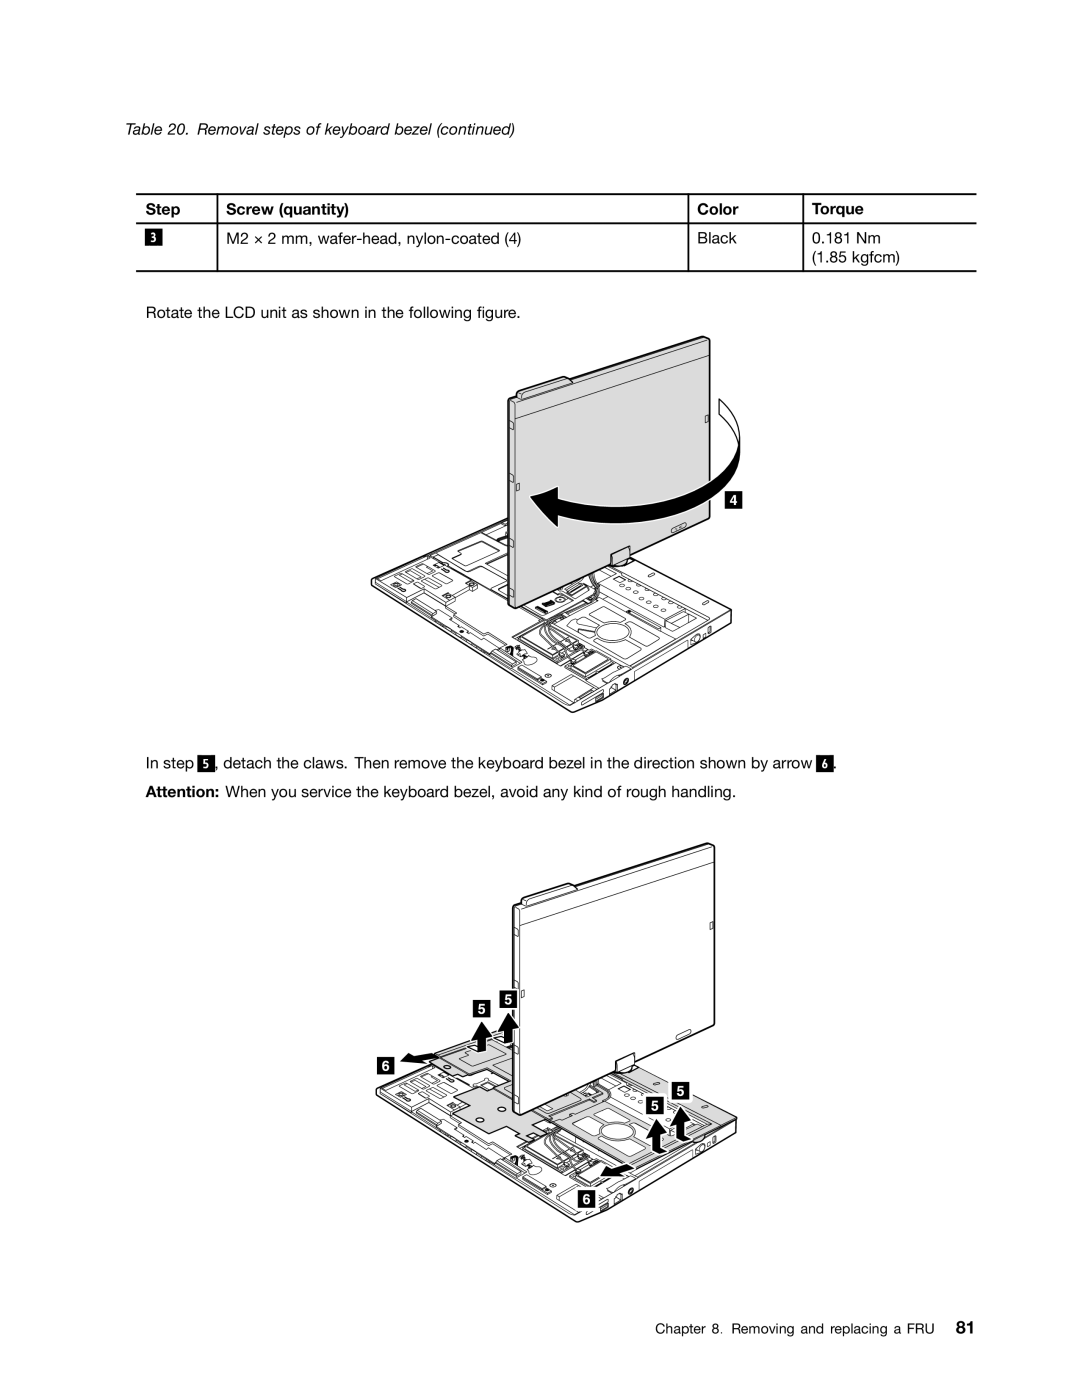
Rotate the LCD unit as shown in the following figure.
In step 5 , detach the claws. Then remove the keyboard bezel in the direction shown by arrow Attention: When you service the keyboard bezel, avoid any kind of rough handling.
6.
Chapter 8. Removing and replacing a FRU 81
