Connecting cables
4.2 Connecting signal cables
There are two methods to input an image to the Sub projector (18, 19):
-Inputting image from the MONITOR OUT port on Main to Sub.
-Inputting an image to Sub and Main individually.
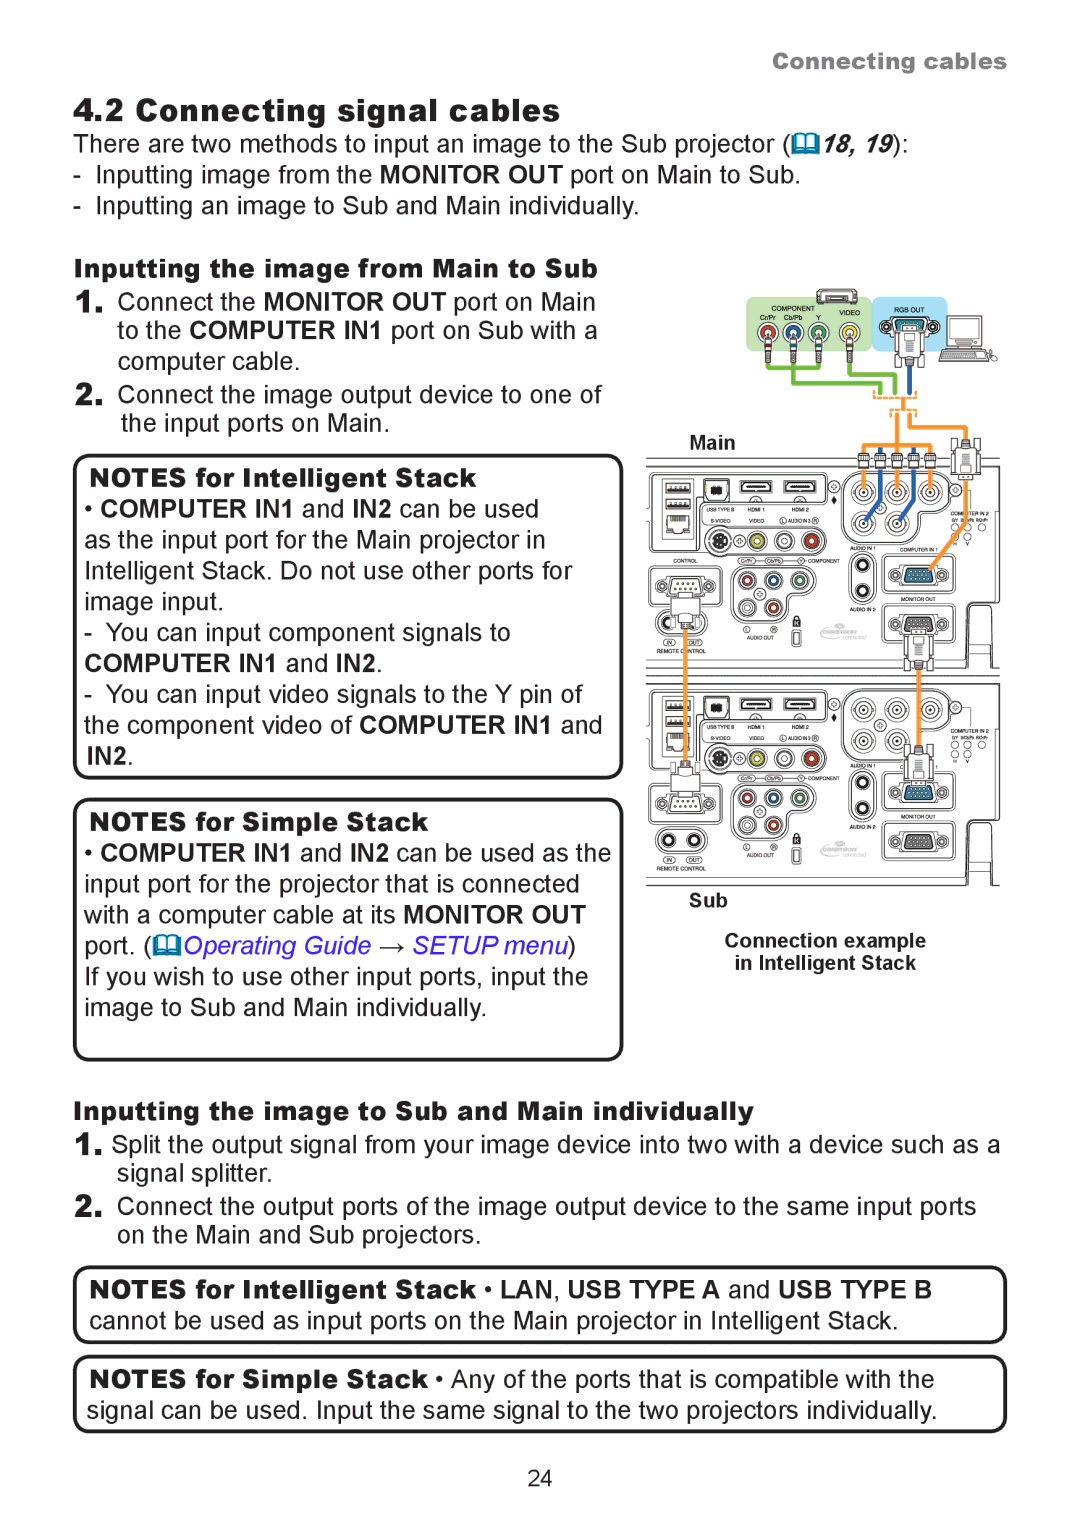
Inputting the image from Main to Sub
1.Connect the MONITOR OUT port on Main to the COMPUTER IN1 port on Sub with a computer cable.
2.Connect the image output device to one of the input ports on Main.
NOTES for Intelligent Stack
•COMPUTER IN1 and IN2 can be used as the input port for the Main projector in Intelligent Stack. Do not use other ports for image input.
- You can input component signals to
COMPUTER IN1 and IN2.
- You can input video signals to the Y pin of the component video of COMPUTER IN1 and IN2.
NOTES for Simple Stack
•COMPUTER IN1 and IN2 can be used as the input port for the projector that is connected with a computer cable at its MONITOR OUT port. (Operating Guide → SETUP menu)
If you wish to use other input ports, input the image to Sub and Main individually.
Main
Sub
Connection example
in Intelligent Stack
Inputting the image to Sub and Main individually
1.Split the output signal from your image device into two with a device such as a signal splitter.
2.Connect the output ports of the image output device to the same input ports on the Main and Sub projectors.
NOTES for Intelligent Stack • LAN, USB TYPE A and USB TYPE B cannot be used as input ports on the Main projector in Intelligent Stack.
NOTES for Simple Stack • Any of the ports that is compatible with the signal can be used. Input the same signal to the two projectors individually.
24