Installation
2.3 Installing the second projector (Set B)
Deciding the installation position
Decide the position of Set B and its projection angle. (User’s Manual (concise)
→Arrangement and Adjusting the projector’s elevator)
![]() WARNING ►For IN5142, IN5144, IN5144a and IN5145 only: You can install the projector in any direction with specified mounting accessories. Consult with your dealer for that type of installation.
WARNING ►For IN5142, IN5144, IN5144a and IN5145 only: You can install the projector in any direction with specified mounting accessories. Consult with your dealer for that type of installation.
NOTE • Set the tilt angle of Set B within 9 degrees of the level line.
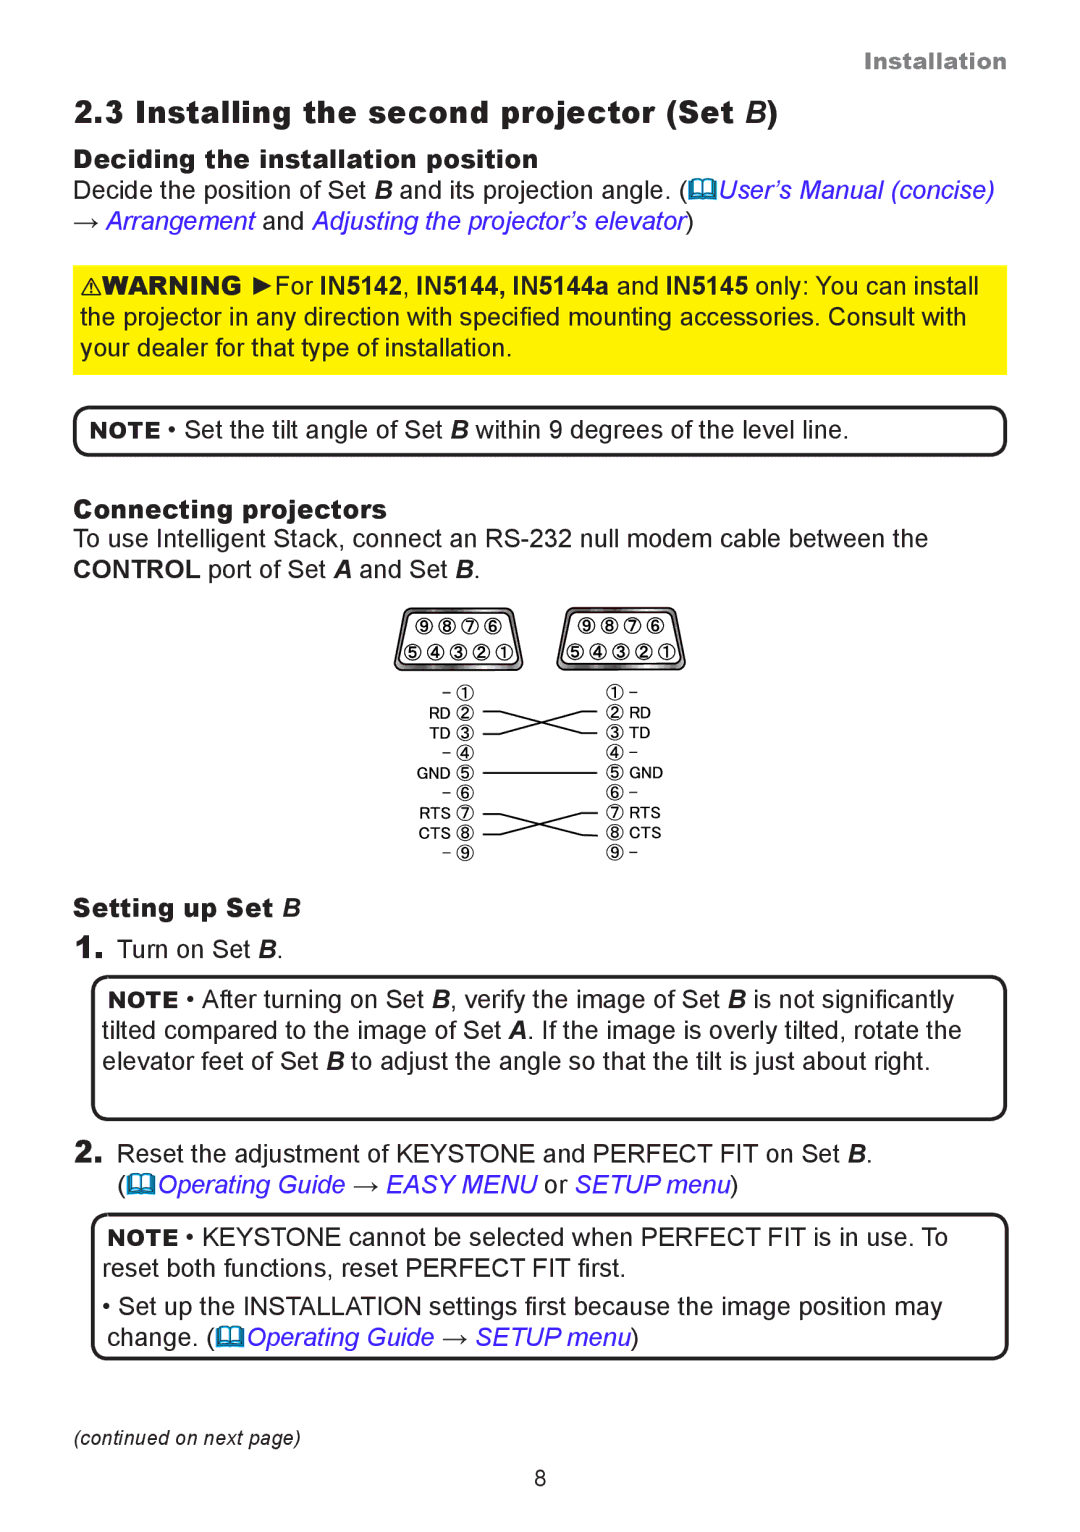
Connecting projectors
To use Intelligent Stack, connect an
Setting up Set B
1.Turn on Set B.
NOTE • After turning on Set B, verify the image of Set B is not significantly tilted compared to the image of Set A. If the image is overly tilted, rotate the elevator feet of Set B to adjust the angle so that the tilt is just about right.
2.Reset the adjustment of KEYSTONE and PERFECT FIT on Set B.
(Operating Guide → EASY MENU or SETUP menu)
NOTE • KEYSTONE cannot be selected when PERFECT FIT is in use. To reset both functions, reset PERFECT FIT first.
•Set up the INSTALLATION settings first because the image position may change. (Operating Guide → SETUP menu)
(continued on next page)
8