PROCEDURE 5 | SEAT | |
|
|
|
SEAT
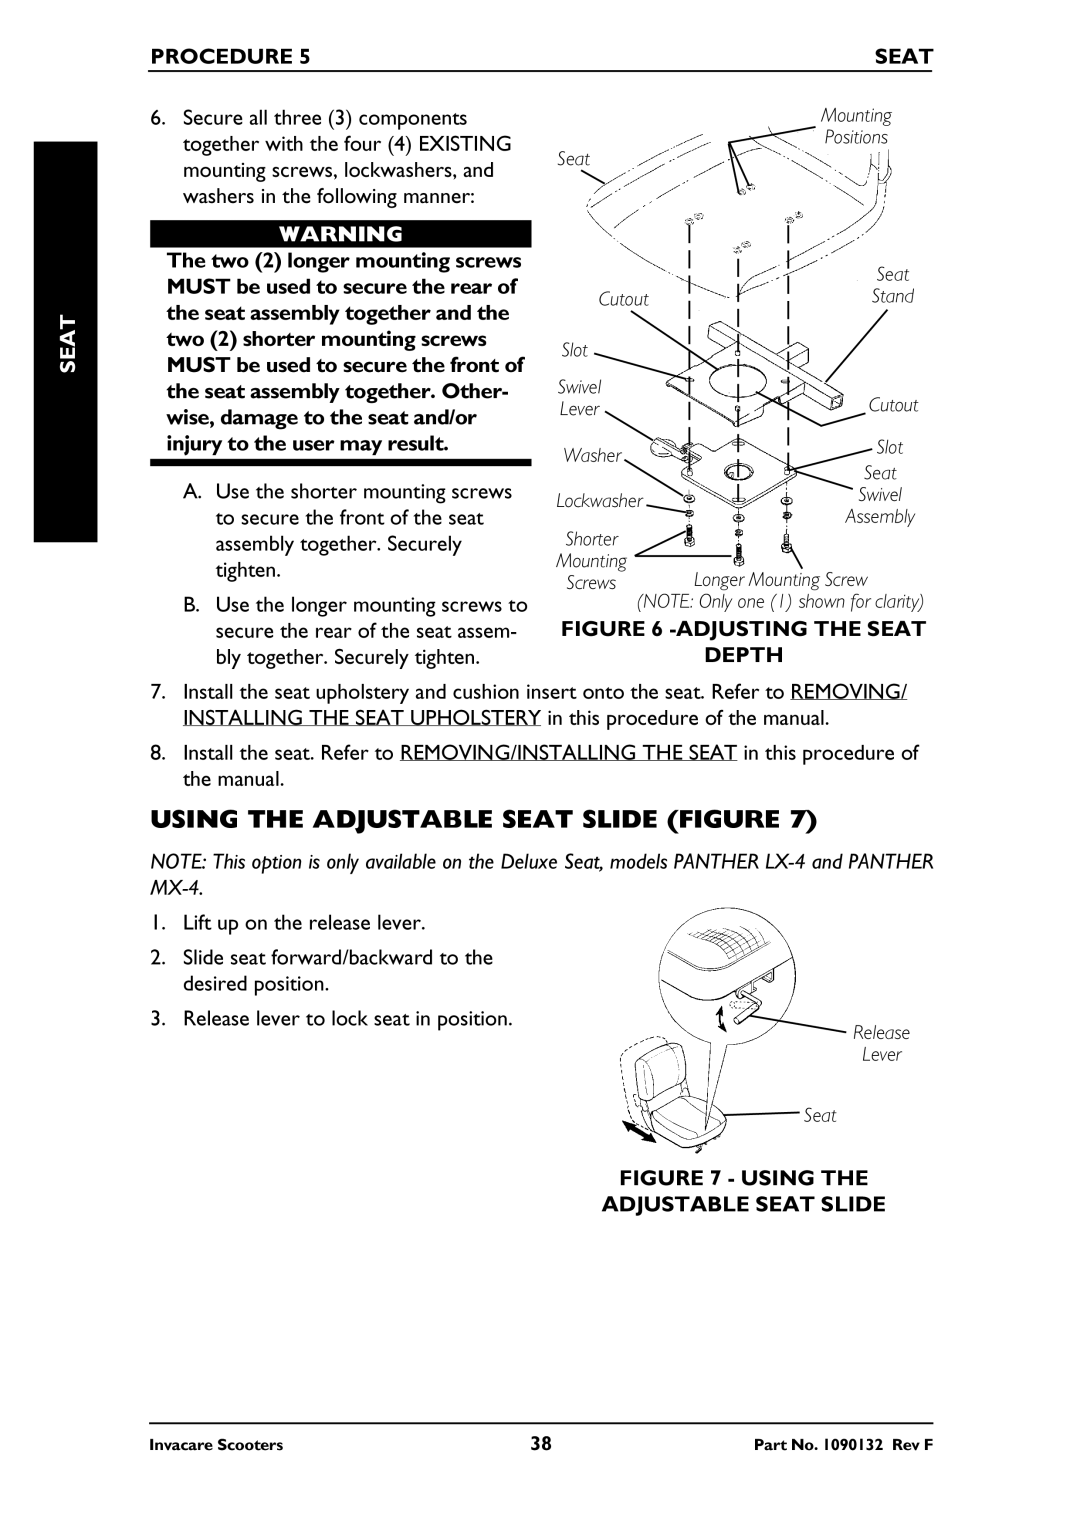
6.Secure all three (3) components together with the four (4) EXISTING mounting screws, lockwashers, and washers in the following manner:
WARNING
The two (2) longer mounting screws MUST be used to secure the rear of the seat assembly together and the two (2) shorter mounting screws MUST be used to secure the front of the seat assembly together. Other- wise, damage to the seat and/or injury to the user may result.
A.Use the shorter mounting screws to secure the front of the seat assembly together. Securely tighten.
B.Use the longer mounting screws to secure the rear of the seat assem- bly together. Securely tighten.
Mounting
Positions
Seat
|
|
| Seat |
|
|
| |
|
|
| |
|
|
| |
Cutout |
|
| Stand |
|
| ||
|
| ||
Slot |
|
|
|
|
|
| |
|
|
| |
|
|
| |
|
|
| |
|
|
| |
Swivel |
|
| Cutout |
|
| ||
|
| ||
|
| ||
Lever |
|
| |
|
| ||
Washer |
|
| Slot |
|
| ||
|
| ||
|
| ||
|
| ||
|
| Seat | |
|
|
| |
|
|
| |
Lockwasher |
|
| Swivel |
|
| Assembly | |
Shorter |
|
| |
|
|
| |
Mounting | Longer Mounting Screw | ||
Screws | |||
(NOTE: Only one (1) shown for clarity)
FIGURE 6 -ADJUSTING THE SEAT
DEPTH
7.Install the seat upholstery and cushion insert onto the seat. Refer to REMOVING/ INSTALLING THE SEAT UPHOLSTERY in this procedure of the manual.
8.Install the seat. Refer to REMOVING/INSTALLING THE SEAT in this procedure of the manual.
USING THE ADJUSTABLE SEAT SLIDE (FIGURE 7)
NOTE: This option is only available on the Deluxe Seat, models PANTHER
1.Lift up on the release lever.
2.Slide seat forward/backward to the desired position.
3.Release lever to lock seat in position.
![]() Release
Release
Lever
Seat
FIGURE 7 - USING THE
ADJUSTABLE SEAT SLIDE
Invacare Scooters | 38 | Part No. 1090132 Rev F |
