OPTIONS/REPLACEMENT PARTS | PROCEDURE 11 |
|
|
REMOVING/INSTALLING THE FLOOR BASKET (FIGURE 2)
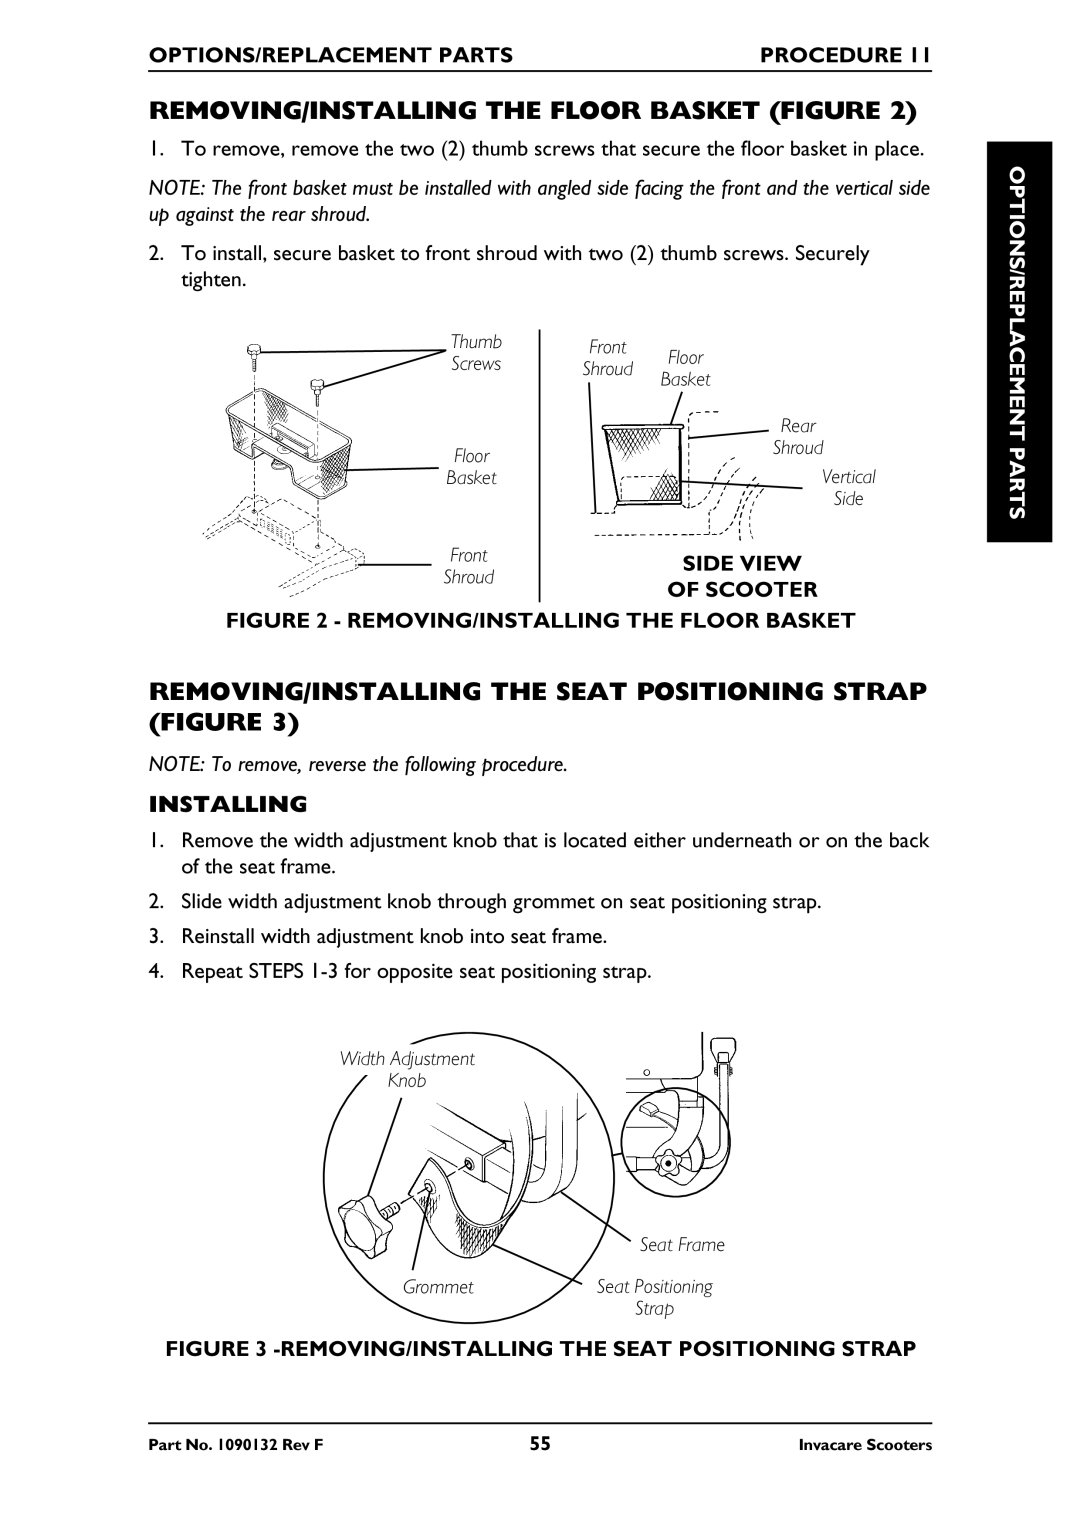
1. To remove, remove the two (2) thumb screws that secure the floor basket in place.
NOTE: The front basket must be installed with angled side facing the front and the vertical side up against the rear shroud.
2.To install, secure basket to front shroud with two (2) thumb screws. Securely tighten.
Thumb | Front | Floor | |
Screws | Shroud | ||
Basket | |||
|
| ||
|
| Rear | |
Floor |
| Shroud | |
| Vertical | ||
Basket |
| ||
|
| Side | |
Front |
| SIDE VIEW | |
Shroud |
| ||
| OF SCOOTER | ||
|
|
FIGURE 2 - REMOVING/INSTALLING THE FLOOR BASKET
REMOVING/INSTALLING THE SEAT POSITIONING STRAP (FIGURE 3)
NOTE: To remove, reverse the following procedure.
INSTALLING
1.Remove the width adjustment knob that is located either underneath or on the back of the seat frame.
2.Slide width adjustment knob through grommet on seat positioning strap.
3.Reinstall width adjustment knob into seat frame.
4.Repeat STEPS
Width Adjustment
Knob
| Seat Frame |
Grommet | Seat Positioning |
| Strap |
FIGURE 3 -REMOVING/INSTALLING THE SEAT POSITIONING STRAP
OPTIONS/REPLACEMENT PARTS
Part No. 1090132 Rev F | 55 | Invacare Scooters |