OPTIONS/REPLACEMENT PARTS
PROCEDURE 11 | OPTIONS/REPLACEMENT PARTS |
MODEL PANTHER MX-4 (FIGURE 10)
NOTE: Prongs on lightbulb plug are not equally spaced around diameter. Once removed, lightbulb plug can only be installed with prongs in the orientation in which they were removed.
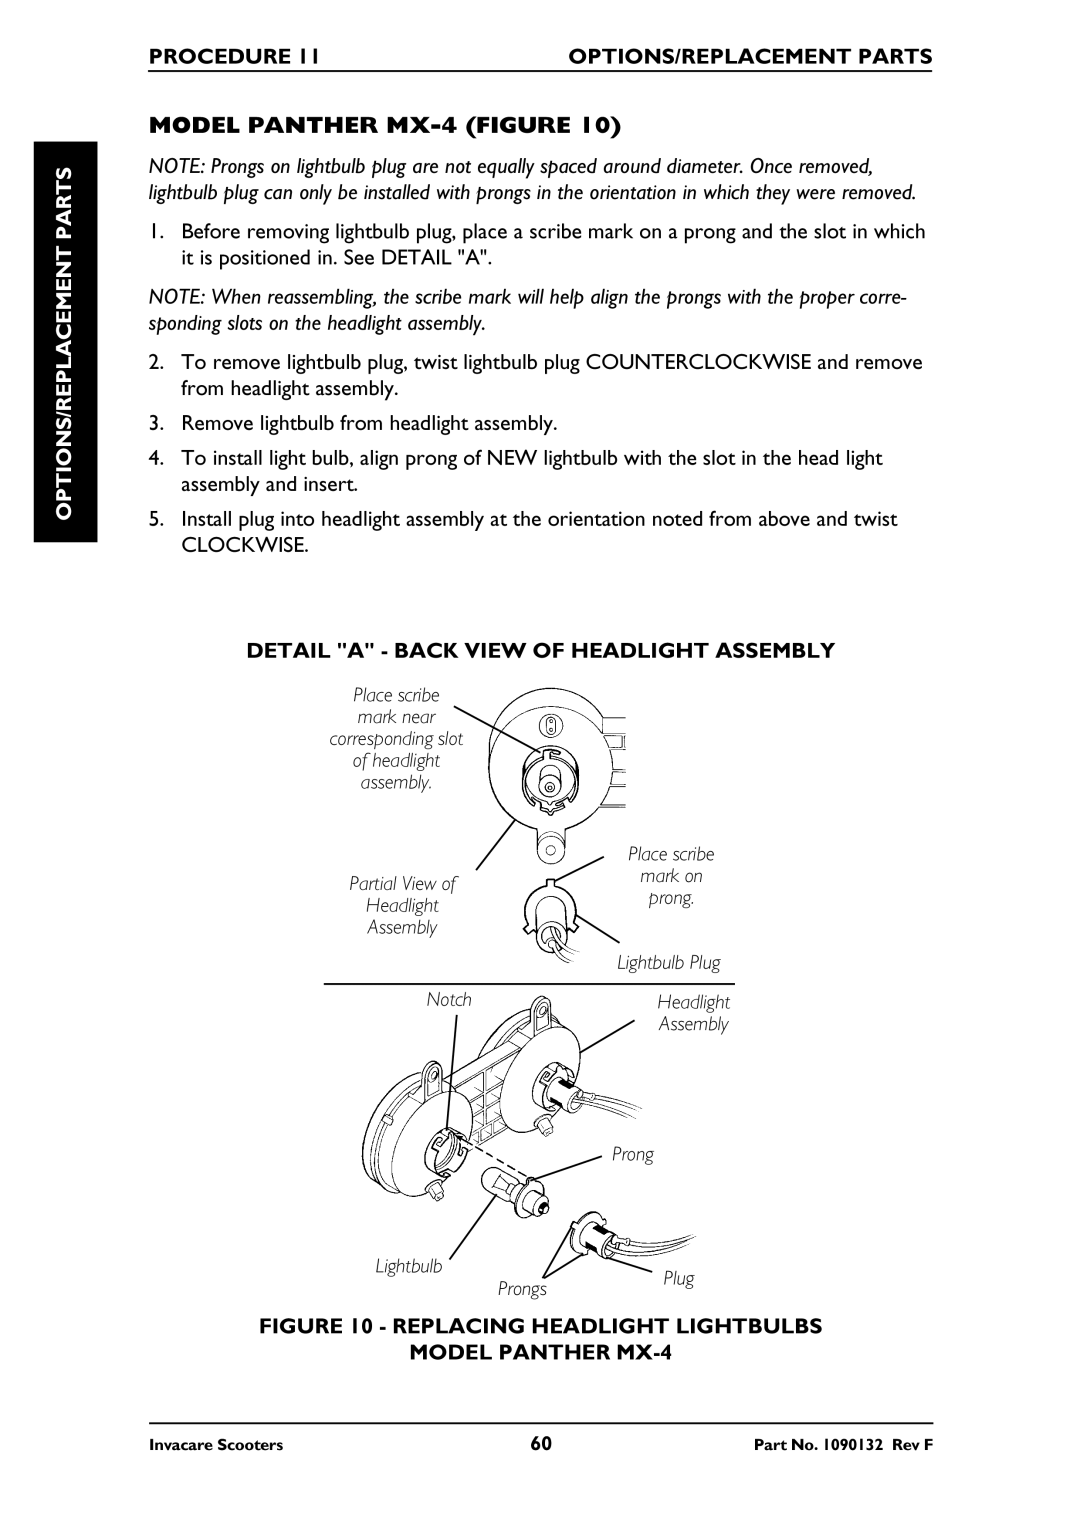
1.Before removing lightbulb plug, place a scribe mark on a prong and the slot in which it is positioned in. See DETAIL "A".
NOTE: When reassembling, the scribe mark will help align the prongs with the proper corre- sponding slots on the headlight assembly.
2.To remove lightbulb plug, twist lightbulb plug COUNTERCLOCKWISE and remove from headlight assembly.
3.Remove lightbulb from headlight assembly.
4.To install light bulb, align prong of NEW lightbulb with the slot in the head light assembly and insert.
5.Install plug into headlight assembly at the orientation noted from above and twist
CLOCKWISE.
DETAIL "A" - BACK VIEW OF HEADLIGHT ASSEMBLY
Place scribe
mark near
corresponding slot
of headlight
assembly.
| Place scribe | |
Partial View of | mark on | |
prong. | ||
Headlight | ||
| ||
Assembly |
| |
| Lightbulb Plug | |
Notch | Headlight | |
| Assembly |
Lightbulb
Prong
ProngsPlug
FIGURE 10 - REPLACING HEADLIGHT LIGHTBULBS
MODEL PANTHER MX-4
Invacare Scooters | 60 | Part No. 1090132 Rev F |