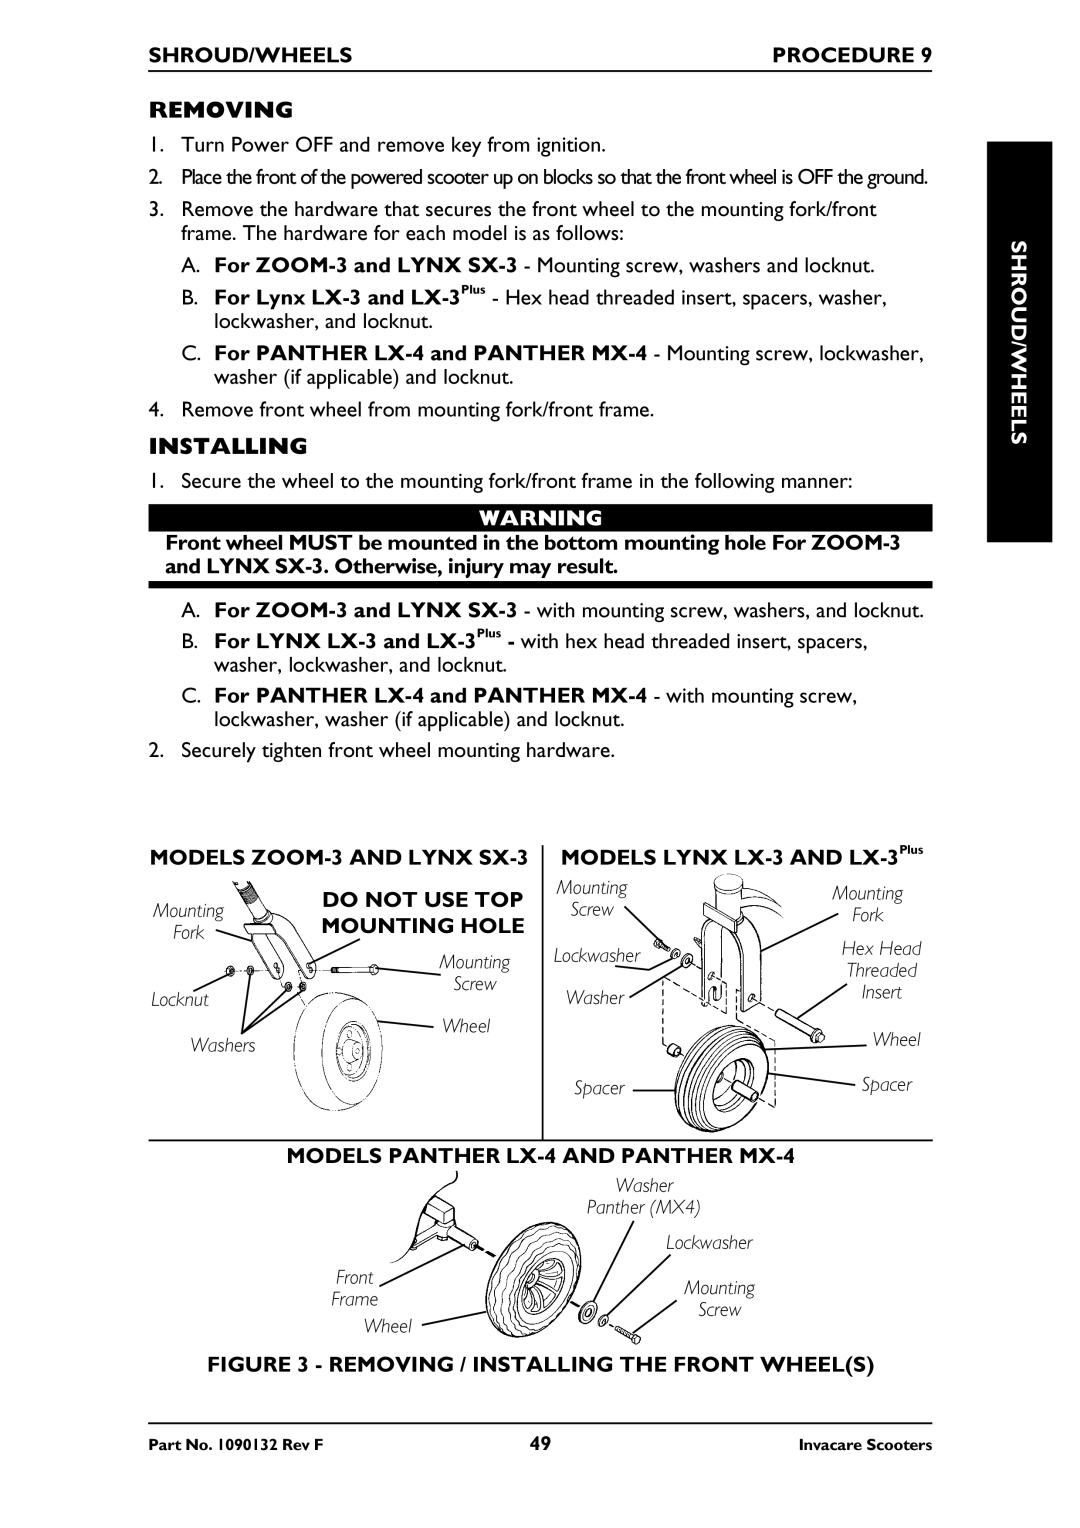
SHROUD/WHEELS | PROCEDURE 9 |
|
|
REMOVING
1.Turn Power OFF and remove key from ignition.
2.Place the front of the powered scooter up on blocks so that the front wheel is OFF the ground.
3.Remove the hardware that secures the front wheel to the mounting fork/front frame. The hardware for each model is as follows:
A.For
B.For Lynx
C.For PANTHER
4.Remove front wheel from mounting fork/front frame.
INSTALLING
1. Secure the wheel to the mounting fork/front frame in the following manner:
WARNING
Front wheel MUST be mounted in the bottom mounting hole For
A.For
B.For LYNX
C.For PANTHER
2.Securely tighten front wheel mounting hardware.
MODELS | MODELS LYNX | |||
| DO NOT USE TOP | Mounting | Mounting | |
Mounting | Screw | |||
MOUNTING HOLE | Fork | |||
Fork |
| Hex Head | ||
| Lockwasher | |||
| Mounting | |||
| Threaded | |||
|
| |||
| Screw |
| ||
Locknut | Washer | Insert | ||
| ||||
Washers | Wheel |
| Wheel | |
|
| |||
|
| Spacer | Spacer | |
MODELS PANTHER LX-4 AND PANTHER MX-4
| Washer | |
| Panther (MX4) | |
| Lockwasher | |
Front | Mounting | |
Frame | ||
Screw | ||
Wheel | ||
|
FIGURE 3 - REMOVING / INSTALLING THE FRONT WHEEL(S)
SHROUD/WHEELS
Part No. 1090132 Rev F | 49 | Invacare Scooters |