OPTIONS/REPLACEMENT PARTS | PROCEDURE 11 |
|
|
REPLACING
WARNING
DO NOT operate scooter without the
ANTI-TIPPER WHEELS
1.Perform one of the following:
A.For
B.For all other models - Remove the cotter pin and washer that secure the
2.Install NEW wheels and secure with EXISTING hardware.
ANTI-TIPPER WHEEL
ASSEMBLY
NOTE:
PANTHER LX-4 models.
NOTE: To replace
1.Remove the
2.Remove the
3.Install NEW
WARNING
When installing
4.Secure NEW
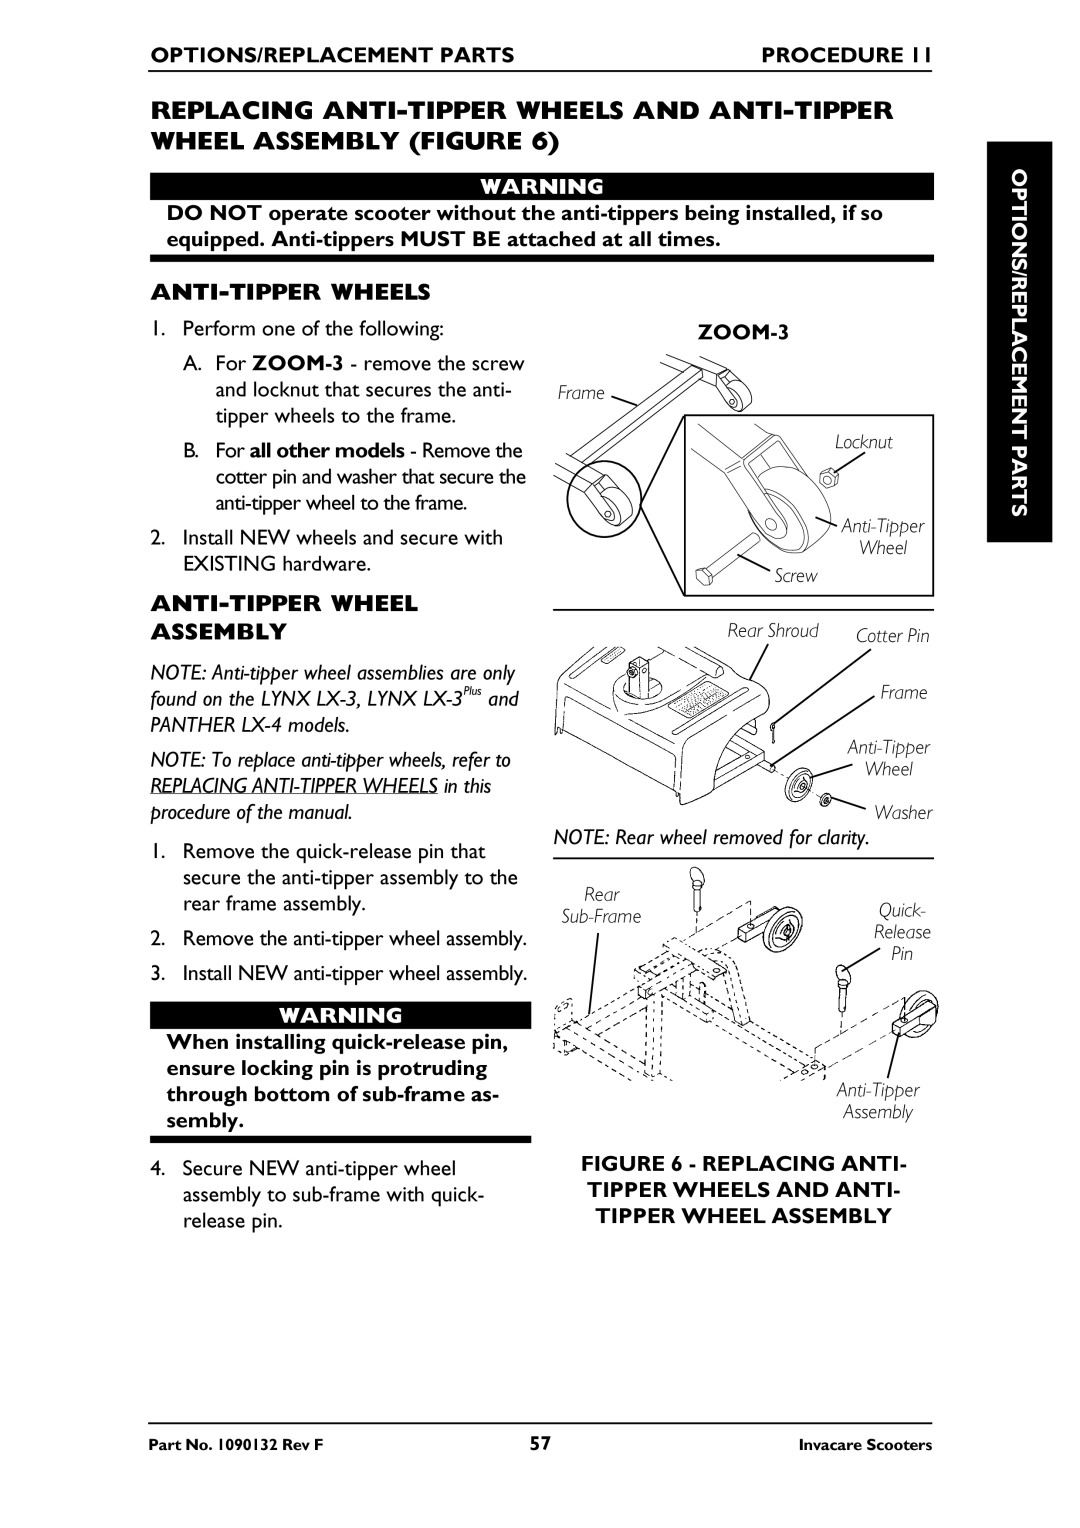
ZOOM-3
Frame
Locknut
Wheel
Screw
Rear Shroud | Cotter Pin |
Frame
Wheel
Washer
NOTE: Rear wheel removed for clarity.
Rear
Release
Pin
Assembly
FIGURE 6 - REPLACING ANTI- TIPPER WHEELS AND ANTI- TIPPER WHEEL ASSEMBLY
OPTIONS/REPLACEMENT PARTS
Part No. 1090132 Rev F | 57 | Invacare Scooters |