q
w
q
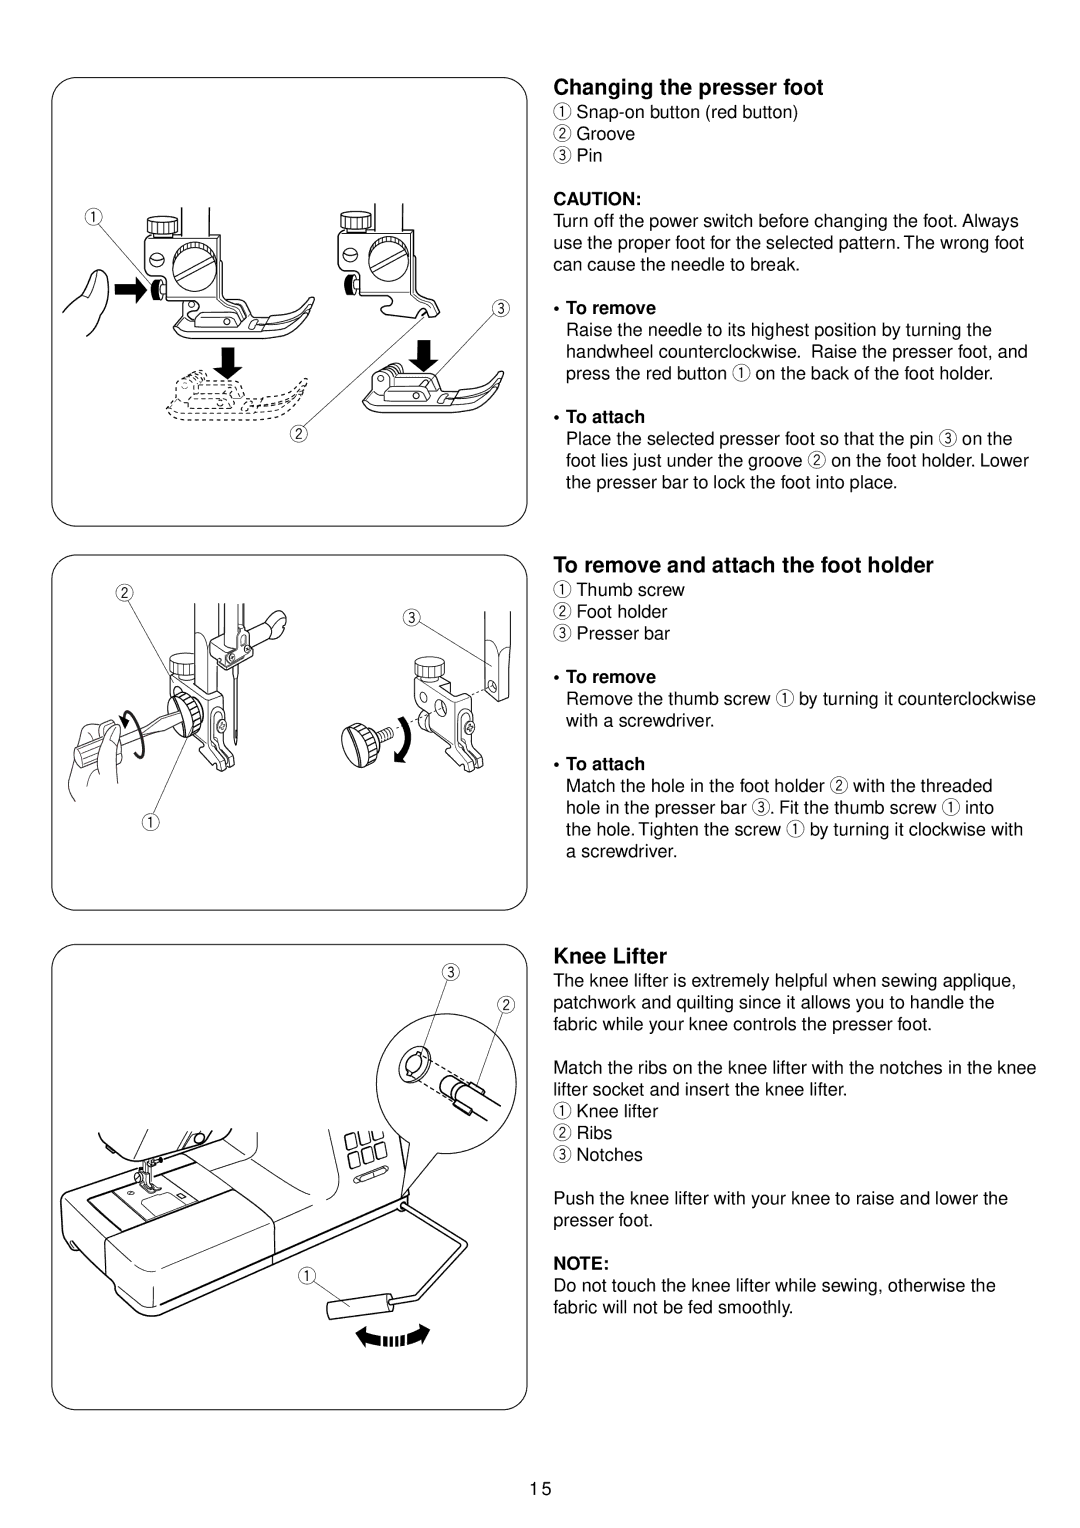
| Changing the presser foot |
| q |
| w Groove |
| e Pin |
| CAUTION: |
| Turn off the power switch before changing the foot. Always |
| use the proper foot for the selected pattern. The wrong foot |
| can cause the needle to break. |
e | • To remove |
| Raise the needle to its highest position by turning the |
| handwheel counterclockwise. Raise the presser foot, and |
| press the red button q on the back of the foot holder. |
w | • To attach |
Place the selected presser foot so that the pin e on the | |
| foot lies just under the groove w on the foot holder. Lower |
| the presser bar to lock the foot into place. |
| To remove and attach the foot holder | |
| q Thumb screw | |
e | w Foot holder | |
e Presser bar | ||
| ||
| • To remove | |
| Remove the thumb screw q by turning it counterclockwise | |
| with a screwdriver. | |
| • To attach | |
| Match the hole in the foot holder w with the threaded | |
| hole in the presser bar e. Fit the thumb screw q into | |
| the hole. Tighten the screw q by turning it clockwise with | |
| a screwdriver. |
Knee Lifter
eThe knee lifter is extremely helpful when sewing applique,
wpatchwork and quilting since it allows you to handle the fabric while your knee controls the presser foot.
Match the ribs on the knee lifter with the notches in the knee lifter socket and insert the knee lifter.
q Knee lifter w Ribs
e Notches
| Push the knee lifter with your knee to raise and lower the | |
| presser foot. | |
q | NOTE: | |
Do not touch the knee lifter while sewing, otherwise the | ||
| ||
| fabric will not be fed smoothly. |
1 5
