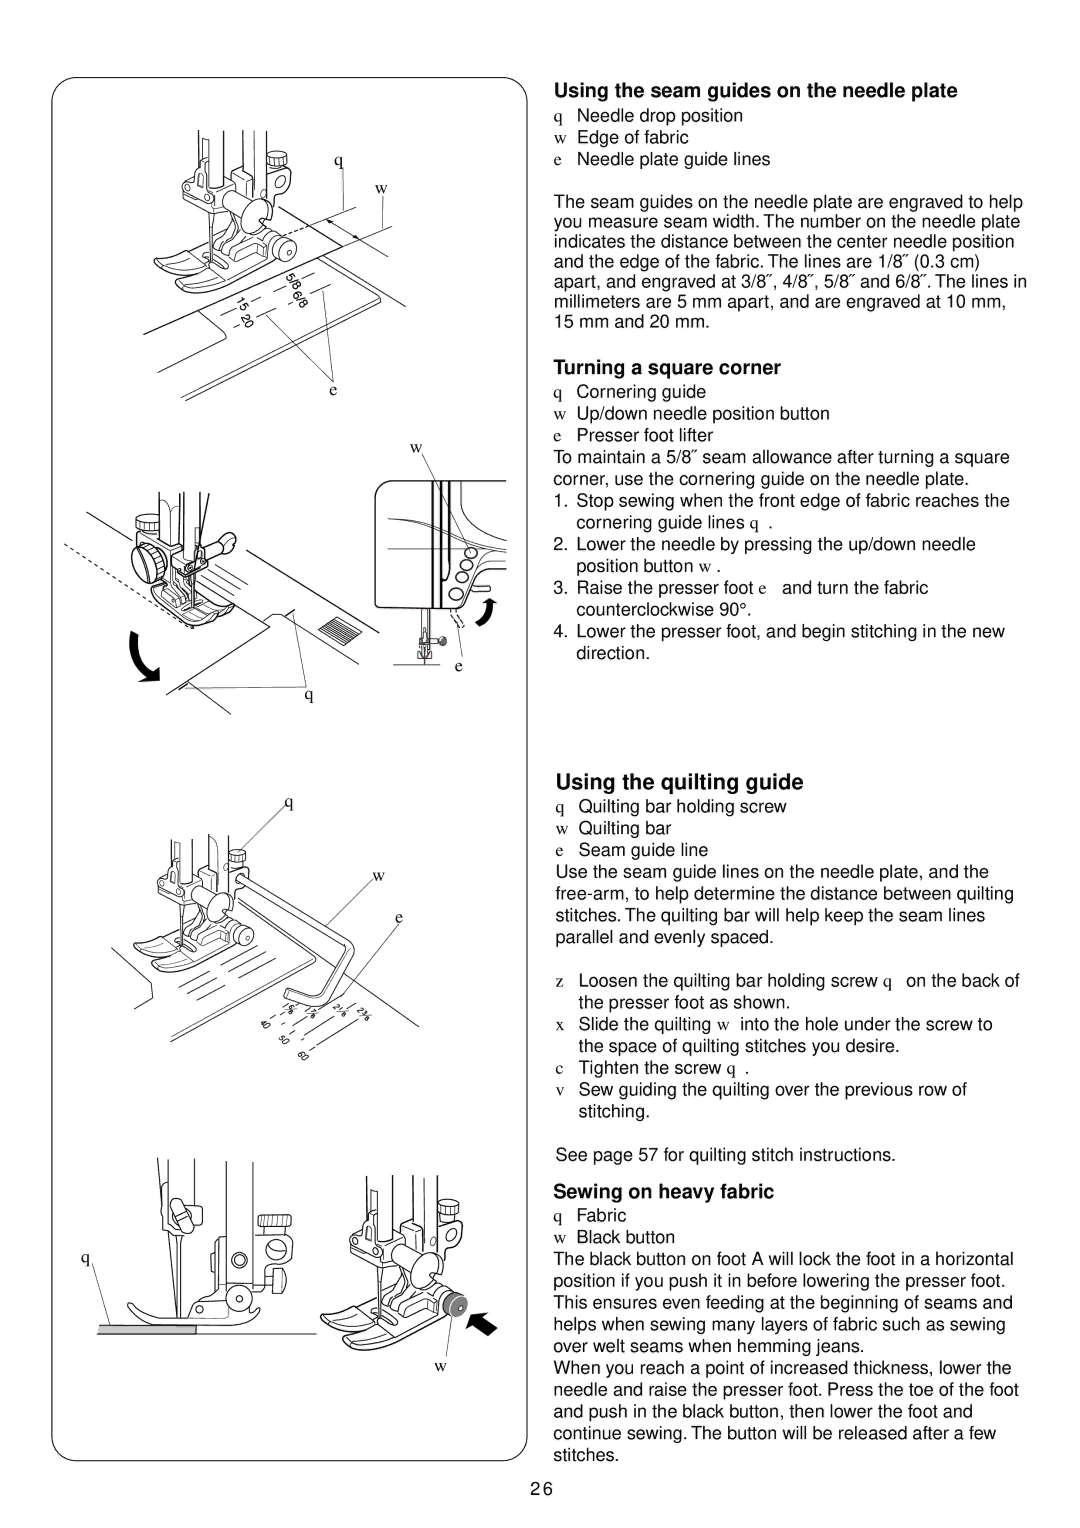
| Using the seam guides on the needle plate |
| q Needle drop position |
| w Edge of fabric |
q | e Needle plate guide lines |
| w |
| The seam guides on the needle plate are engraved to help |
| you measure seam width. The number on the needle plate |
| indicates the distance between the center needle position |
| and the edge of the fabric. The lines are 1/8˝ (0.3 cm) |
| apart, and engraved at 3/8˝, 4/8˝, 5/8˝ and 6/8˝. The lines in |
| millimeters are 5 mm apart, and are engraved at 10 mm, |
| 15 mm and 20 mm. |
|
| Turning a square corner | |
e |
| q Cornering guide | |
|
| w Up/down needle position button | |
| w | e Presser foot lifter | |
| To maintain a 5/8˝ seam allowance after turning a square | ||
|
| ||
|
| corner, use the cornering guide on the needle plate. | |
|
| 1. | Stop sewing when the front edge of fabric reaches the |
|
|
| cornering guide lines q. |
|
| 2. | Lower the needle by pressing the up/down needle |
|
|
| position button w. |
|
| 3. | Raise the presser foot e and turn the fabric |
|
|
| counterclockwise 90°. |
|
| 4. | Lower the presser foot, and begin stitching in the new |
|
| e | direction. |
|
|
| |
q
q | Using the quilting guide |
q Quilting bar holding screw | |
| w Quilting bar |
| e Seam guide line |
w | Use the seam guide lines on the needle plate, and the |
| |
e | stitches. The quilting bar will help keep the seam lines |
| parallel and evenly spaced. |
| z Loosen the quilting bar holding screw q on the back of |
| the presser foot as shown. |
| x Slide the quilting w into the hole under the screw to |
| the space of quilting stitches you desire. |
| c Tighten the screw q. |
| v Sew guiding the quilting over the previous row of |
| stitching. |
| See page 57 for quilting stitch instructions. |
q
Sewing on heavy fabric
qFabric
w Black button
The black button on foot A will lock the foot in a horizontal position if you push it in before lowering the presser foot. This ensures even feeding at the beginning of seams and helps when sewing many layers of fabric such as sewing over welt seams when hemming jeans.
wWhen you reach a point of increased thickness, lower the needle and raise the presser foot. Press the toe of the foot and push in the black button, then lower the foot and continue sewing. The button will be released after a few stitches.
2 6