q
1
BASIC STITCHES (MODE 1)
w | e | Straight stitch |
|
|
2
Machine settings |
|
q Pattern: | 1 or 2 (mode 1) |
w Presser foot: | Zigzag foot A |
e Thread tension: | AUTO |
To sew
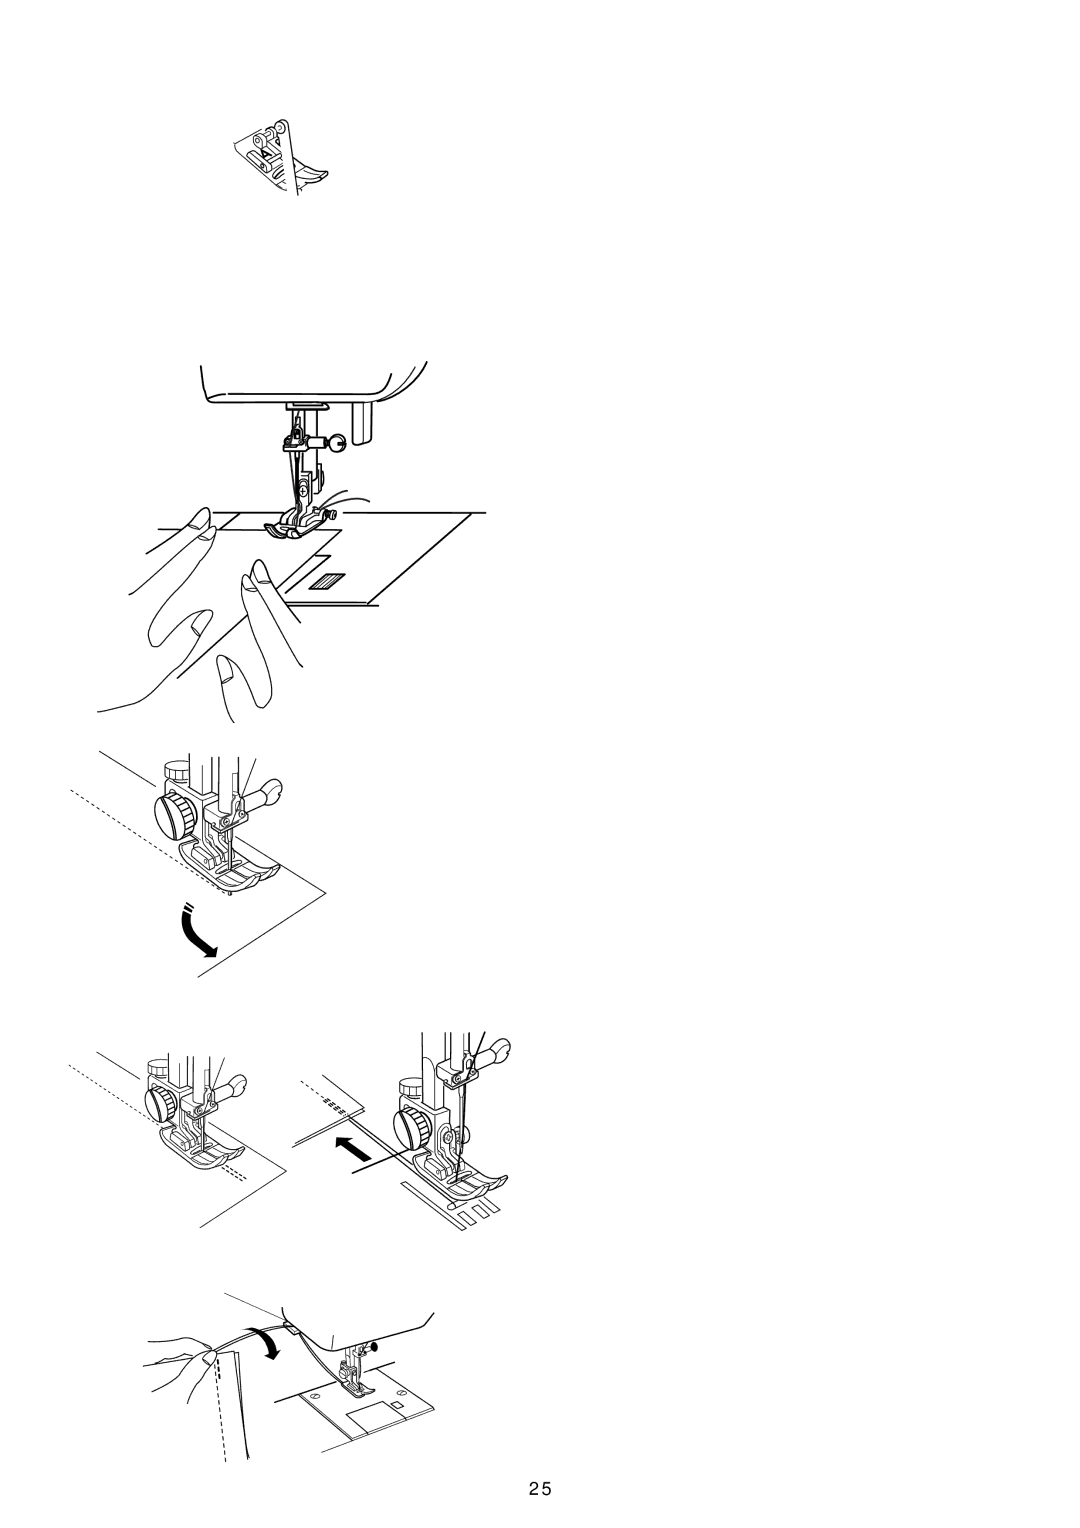
Raise the presser foot and position the fabric next to a seam guide line on the needle plate. Lower the needle to the point where you wish to start.
Pull the needle and bobbin threads toward the rear.
Lower the presser foot.
Depress the foot control to start sewing. Gently guide the fabric along the seam guide line letting the fabric feed naturally.
q | Changing sewing direction |
| Stop the machine and bring the needle down into the fabric |
| by pressing the up/down needle position button. |
| Raise the presser foot. |
| Pivot the fabric around the needle to change sewing |
| direction as desired. Lower the presser foot. |
| q Up/down needle position button |
| w Presser foot lifter |
w
Securing a seam
For fastening the end of seam, press the reverse button and sew several reverse stitches.
The machine sews in reverse as long as you press and hold the reverse button.
Press the reverse button once when sewing the ![]() (pattern 3) or locking stitch (pattern 4) so
(pattern 3) or locking stitch (pattern 4) so
| 3 | 4 |
| the machine will lock the stitch off and stop | |
|
| |
| automatically. |
|
| Cut the thread by using the thread cutter. |
|
e | The threads are cut the proper length for starting the next | |
seam. |
| |
|
| |
eThread cutter
2 5
