Names of Parts
|
|
|
Bottom | Interior |
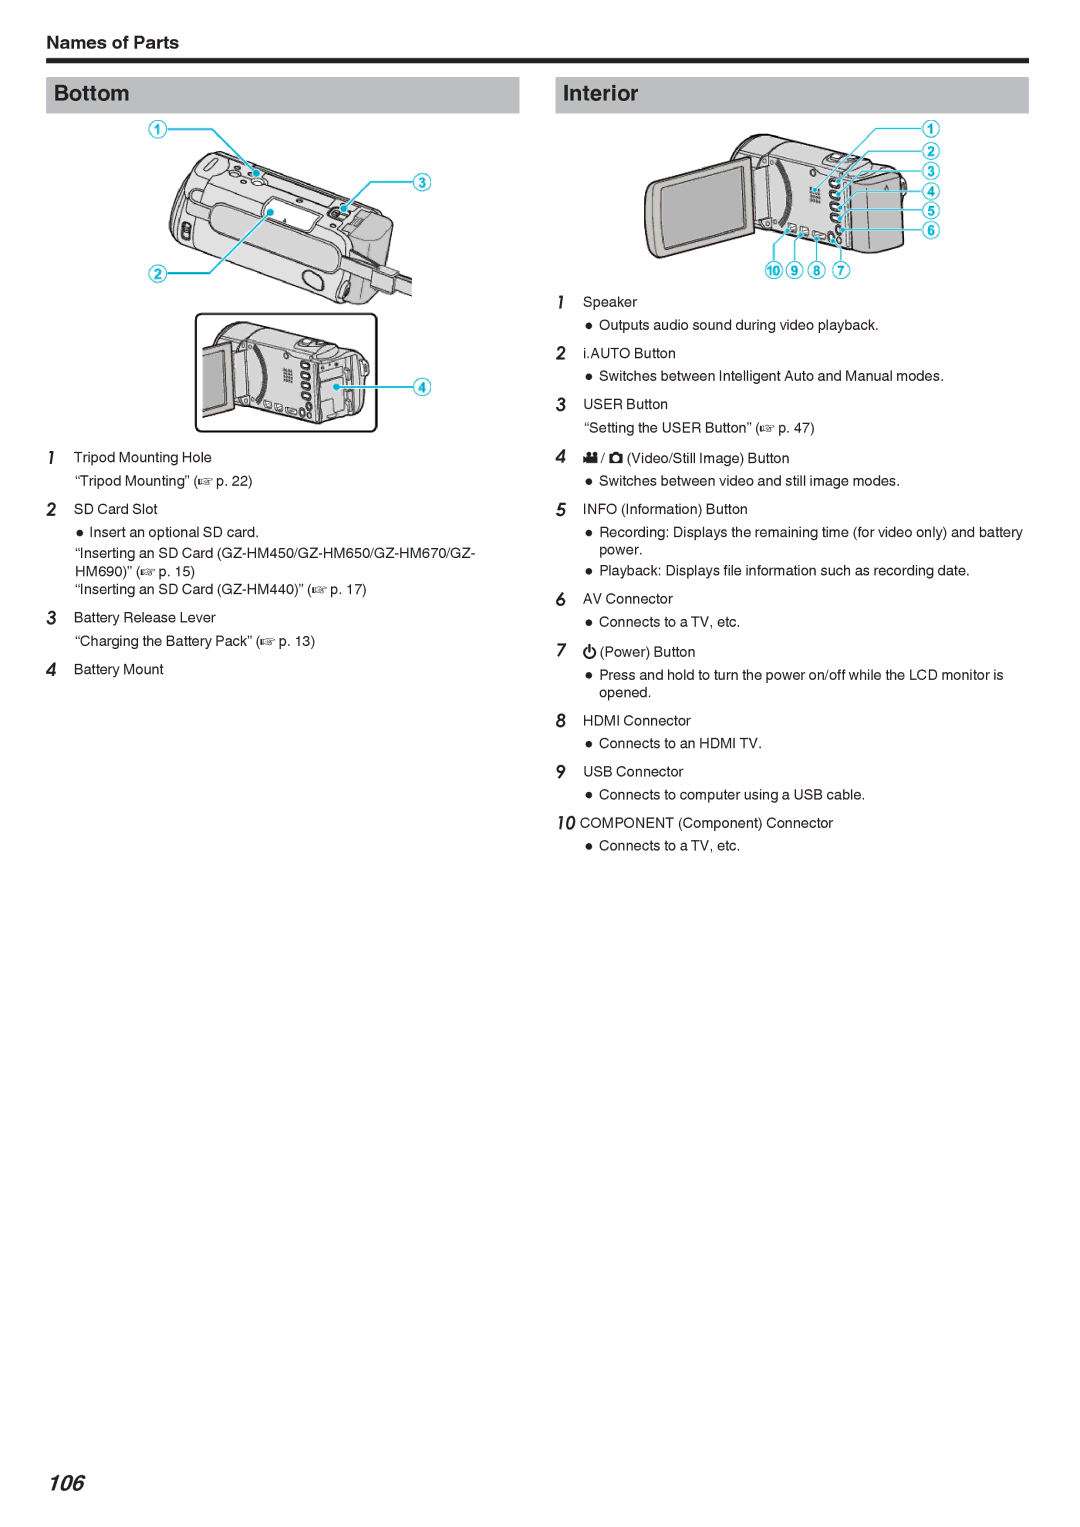
1Tripod Mounting Hole “Tripod Mounting” (A p. 22)
2SD Card Slot
0 Insert an optional SD card.
“Inserting an SD Card
“Inserting an SD Card
3Battery Release Lever
“Charging the Battery Pack” (A p. 13)
4Battery Mount
1Speaker
0 Outputs audio sound during video playback.
2i.AUTO Button
0 Switches between Intelligent Auto and Manual modes.
3USER Button
“Setting the USER Button” (A p. 47)
4A / B (Video/Still Image) Button
0 Switches between video and still image modes.
5INFO (Information) Button
0 Recording:power. Displays the remaining time (for video only) and battery
0Playback: Displays file information such as recording date.
6AV Connector
0 Connects to a TV, etc.
7M (Power) Button
0 Press and hold to turn the power on/off while the LCD monitor is opened.
8HDMI Connector
0 Connects to an HDMI TV.
9USB Connector
0 Connects to computer using a USB cable.
10 COMPONENT (Component) Connector
0Connects to a TV, etc.
106