Getting Started
Charging the Battery Pack
Charge the battery pack immediately after purchase and when the remaining battery power is low.
The battery pack is not charged at the time of purchase.
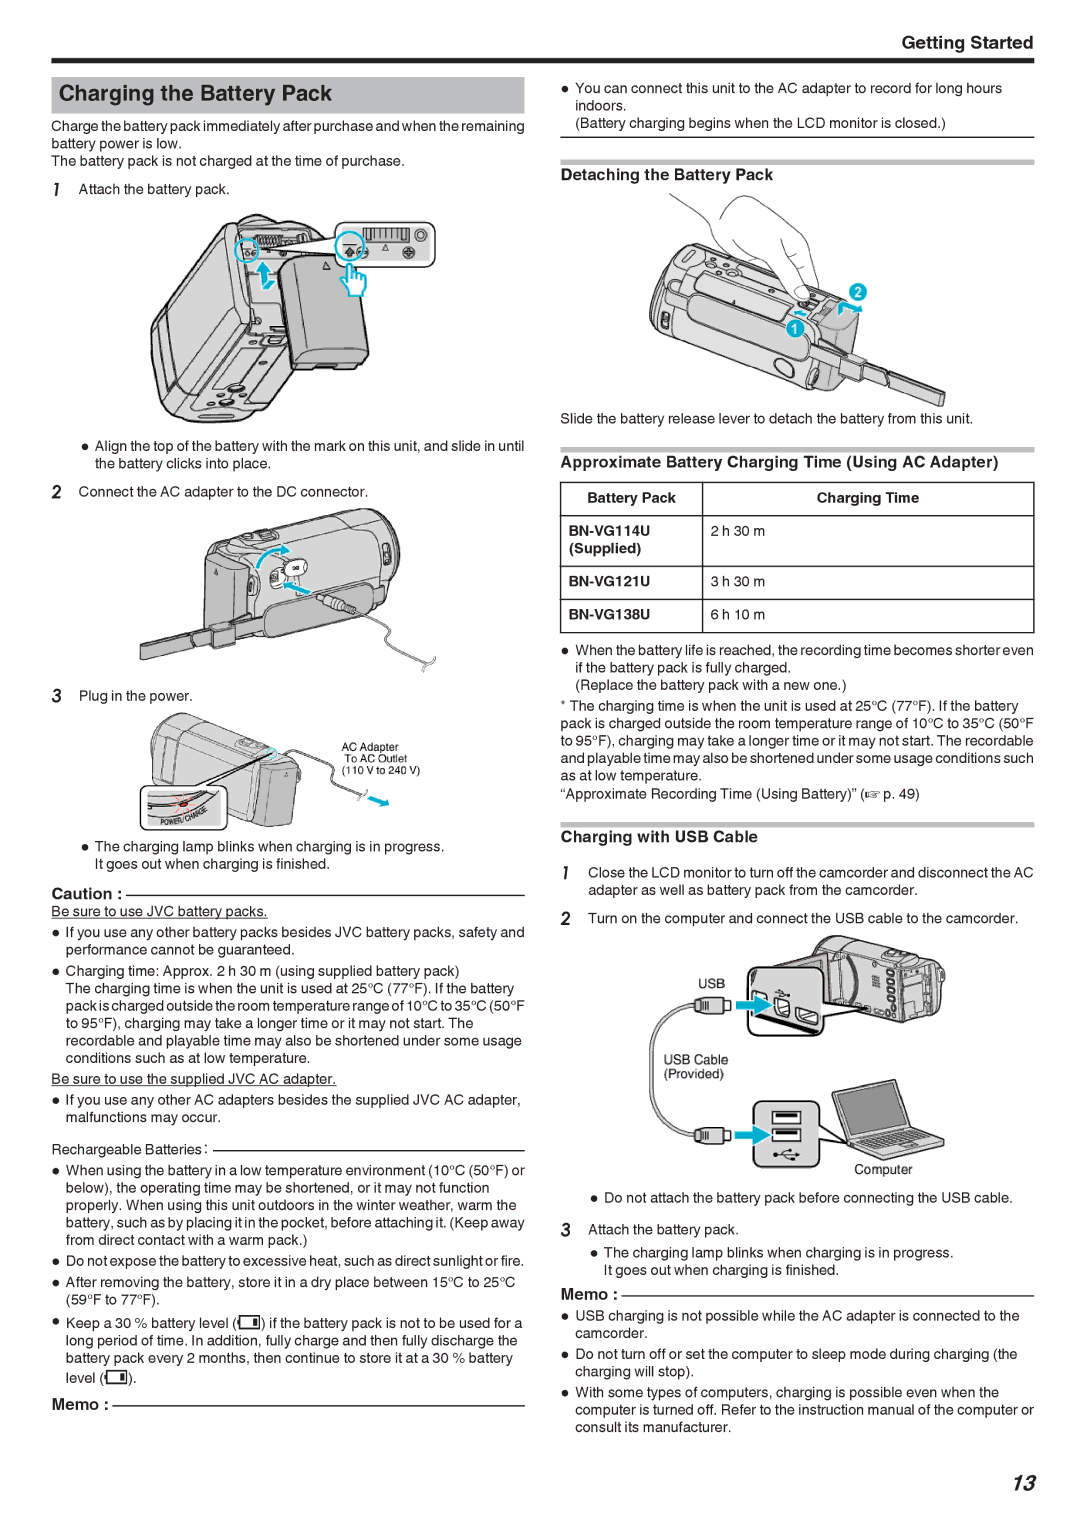
1Attach the battery pack.
0Align the top of the battery with the mark on this unit, and slide in until the battery clicks into place.
2Connect the AC adapter to the DC connector.
3Plug in the power.
0The charging lamp blinks when charging is in progress. It goes out when charging is finished.
Caution :
Be sure to use JVC battery packs.
0If you use any other battery packs besides JVC battery packs, safety and performance cannot be guaranteed.
0Charging time: Approx. 2 h 30 m (using supplied battery pack)
The charging time is when the unit is used at 25°C (77°F). If the battery pack is charged outside the room temperature range of 10°C to 35°C (50°F to 95°F), charging may take a longer time or it may not start. The recordable and playable time may also be shortened under some usage conditions such as at low temperature.
Be sure to use the supplied JVC AC adapter.
0If you use any other AC adapters besides the supplied JVC AC adapter, malfunctions may occur.
Rechargeable Batteries:
0When using the battery in a low temperature environment (10°C (50°F) or below), the operating time may be shortened, or it may not function properly. When using this unit outdoors in the winter weather, warm the battery, such as by placing it in the pocket, before attaching it. (Keep away from direct contact with a warm pack.)
0Do not expose the battery to excessive heat, such as direct sunlight or fire.
0After removing the battery, store it in a dry place between 15°C to 25°C (59°F to 77°F).
0Keep a 30 % battery level (X) if the battery pack is not to be used for a long period of time. In addition, fully charge and then fully discharge the battery pack every 2 months, then continue to store it at a 30 % battery level (X).
Memo :
0You can connect this unit to the AC adapter to record for long hours indoors.
(Battery charging begins when the LCD monitor is closed.)
Detaching the Battery Pack
Slide the battery release lever to detach the battery from this unit.
Approximate Battery Charging Time (Using AC Adapter)
Battery Pack | Charging Time |
|
|
2 h 30 m | |
(Supplied) |
|
3 h 30 m | |
|
|
| 6 h 10 m |
|
|
0When the battery life is reached, the recording time becomes shorter even if the battery pack is fully charged.
(Replace the battery pack with a new one.)
*The charging time is when the unit is used at 25°C (77°F). If the battery pack is charged outside the room temperature range of 10°C to 35°C (50°F to 95°F), charging may take a longer time or it may not start. The recordable and playable time may also be shortened under some usage conditions such as at low temperature.
“Approximate Recording Time (Using Battery)” (A p. 49)
Charging with USB Cable
1Close the LCD monitor to turn off the camcorder and disconnect the AC adapter as well as battery pack from the camcorder.
2Turn on the computer and connect the USB cable to the camcorder.
0Do not attach the battery pack before connecting the USB cable.
3Attach the battery pack.
0 The charging lamp blinks when charging is in progress. It goes out when charging is finished.
Memo :
0USB charging is not possible while the AC adapter is connected to the camcorder.
0Do not turn off or set the computer to sleep mode during charging (the charging will stop).
0With some types of computers, charging is possible even when the computer is turned off. Refer to the instruction manual of the computer or consult its manufacturer.
13
