Playback
Connecting to and Viewing on TV
You can connect this unit to a TV for playback. The image quality on TV varies with the type of TV and the connecting cable. Select the connector that best suits your TV.
0Refer also to the instruction manual of the TV in use.
“Connecting via the HDMI Mini Connector” (A p. 54) “Connecting via the Component Connector” (A p. 55) “Connecting via the AV Connector” (A p. 56)
Unnatural Displays on TV
Trouble |
| Action |
|
|
|
Images do not | 0 | Disconnect the cable and connect again. |
appear on the TV | 0 | Turn off and on this unit again. |
properly. | 0 | When connected via the component connector, |
|
| check if the setting of “COMPONENT OUTPUT” |
|
| in the connection settings menu suits the |
|
| connected TV. (Set to “1080i” by default) |
| “COMPONENT OUTPUT” (A p. 100) | |
|
|
|
Images are | 0 | Set “VIDEO OUTPUT” in the “COMMON” menu |
projected vertically |
| to “4:3”. |
on the TV. | “VIDEO OUTPUT” (A p. 100) | |
| ||
|
|
|
Images are | 0 | Adjust the TV's screen accordingly. |
projected |
|
|
horizontally on the |
|
|
TV. |
|
|
The color of images | 0 | If the video was recorded with “x.v.Color” set to |
looks strange. |
| “ON”, set the x.v.Color setting of the TV to on. |
| “x.v.Color” (A p. 82) | |
| 0 | Adjust the TV's screen accordingly. |
|
|
|
| 0 | TVs may operate differently depending on the |
functions do not |
| specifications, even if they are |
work properly, and |
| compliant. Therefore, the |
the TV does not |
| of this unit cannot be guaranteed to operate in |
work in conjunction |
| combination with all the TVs. In such cases, set |
with this unit. |
| “HDMI CONTROL” to “OFF”. |
| “HDMI CONTROL” (A p. 101) | |
|
|
|
The language on | 0 | It may occur when you connect this unit to a TV |
the display |
| with different language setting using an HDMI |
changed. |
| mini cable. |
|
|
|
Connecting via the HDMI Mini Connector
If you are using an HDTV, you can play back in HD quality by connecting to the HDMI connector.
0Use a High Speed HDMI mini cable as the HDMI mini cable when not using the provided one.
0Refer also to the instruction manual of the TV in use.
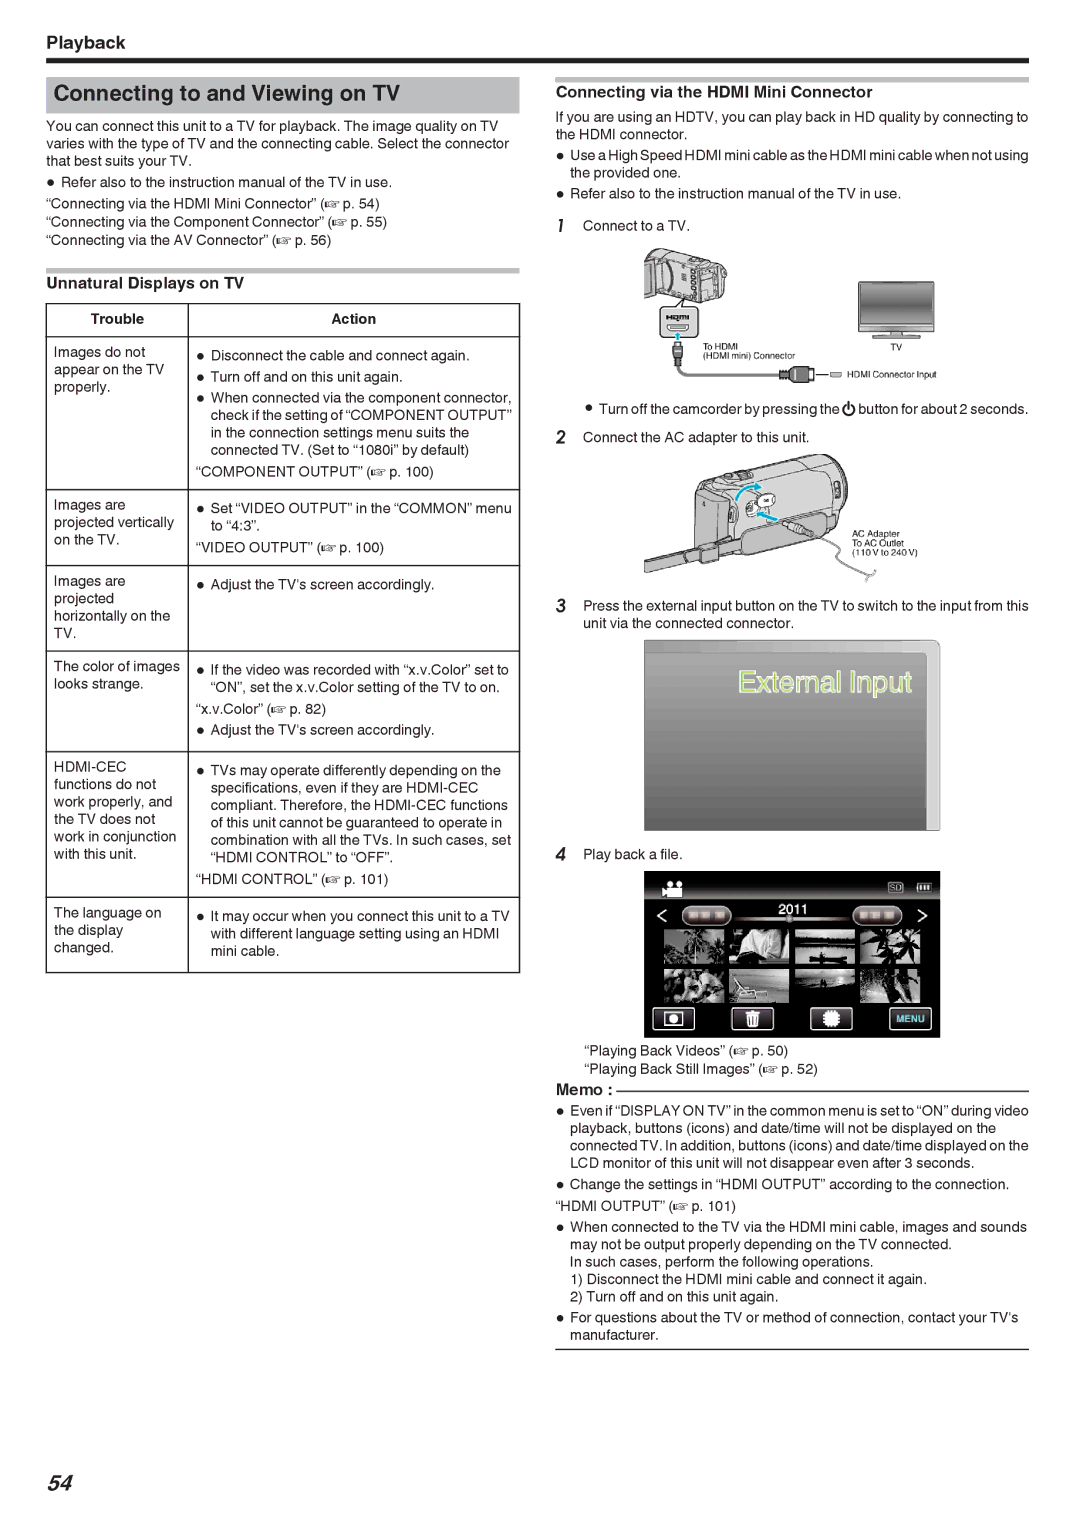
1Connect to a TV.
0Turn off the camcorder by pressing the Mbutton for about 2 seconds. 2 Connect the AC adapter to this unit.
3Press the external input button on the TV to switch to the input from this unit via the connected connector.
4Play back a file.
“Playing Back Videos” (A p. 50) “Playing Back Still Images” (A p. 52)
Memo :
0Even if “DISPLAY ON TV” in the common menu is set to “ON” during video playback, buttons (icons) and date/time will not be displayed on the connected TV. In addition, buttons (icons) and date/time displayed on the LCD monitor of this unit will not disappear even after 3 seconds.
0Change the settings in “HDMI OUTPUT” according to the connection. “HDMI OUTPUT” (A p. 101)
0When connected to the TV via the HDMI mini cable, images and sounds may not be output properly depending on the TV connected.
In such cases, perform the following operations.
1)Disconnect the HDMI mini cable and connect it again.
2)Turn off and on this unit again.
0Formanufacturer.questions about the TV or method of connection, contact your TV's
54