44![]()
![]()
![]() EN
EN![]()
![]()
![]()
![]()
![]()
![]()
![]()
![]()
![]()
![]()
![]()
![]()
![]()
![]()
![]()
![]()
![]()
![]()
![]()
![]()
![]()
![]()
P
 LAYBACK

 AND
AND
 RECORDING

 FEATURES
 (cont.)


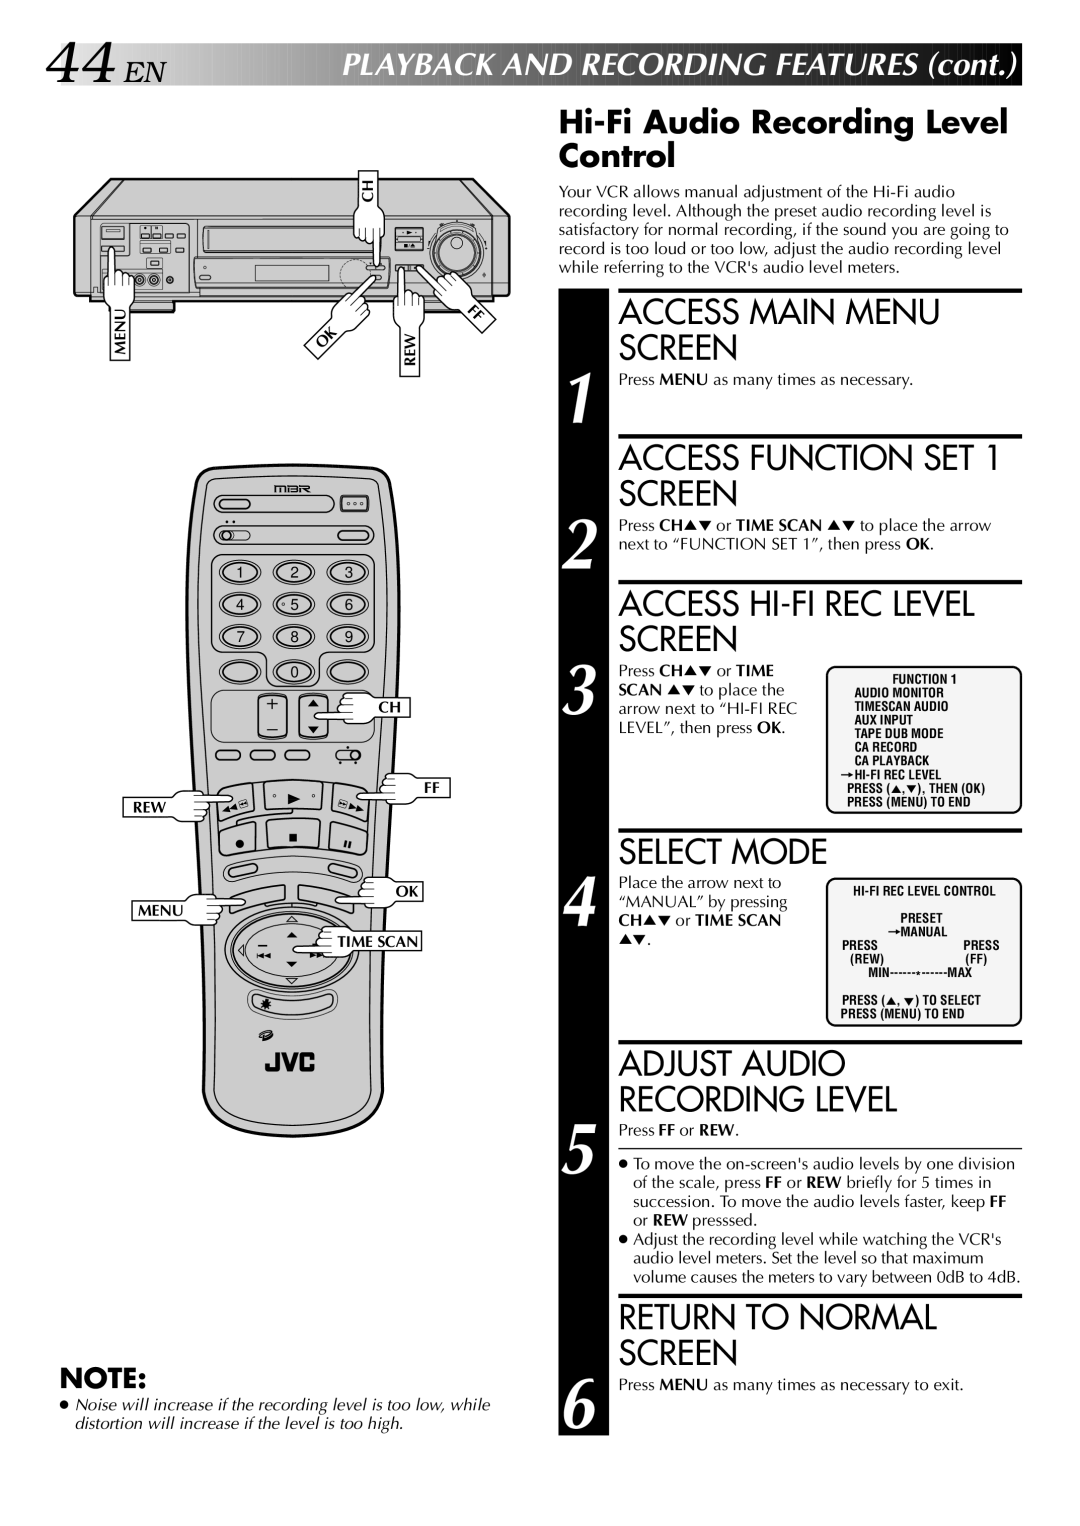
Hi-Fi Audio Recording Level Control
|
| CH |
|
| 8 |
MENU |
| FF |
OK | REW | |
|
1 2 3
4 | 5 | 6 |
7 8 9
0
CH
FF
REW
OK
MENU
![]() TIME SCAN
TIME SCAN
NOTE:
●Noise will increase if the recording level is too low, while distortion will increase if the level is too high.
Your VCR allows manual adjustment of the
|
| ACCESS MAIN MENU |
| ||
1 |
| SCREEN |
|
| |
| Press MENU as many times as necessary. |
| |||
|
| ACCESS FUNCTION SET 1 | |||
2 |
| SCREEN |
|
| |
| Press CH5° or TIME SCAN 5° to place the arrow | ||||
| next to “FUNCTION SET 1”, then press OK. |
| |||
|
| ACCESS | |||
3 |
| SCREEN |
|
| |
| Press CH5° or TIME | FUNCTION 1 |
| ||
| SCAN 5° to place the | AUDIO MONITOR |
| ||
| arrow next to | TIMESCAN AUDIO |
| ||
| AUX INPUT |
| |||
|
| LEVEL”, then press OK. | TAPE DUB MODE |
| |
|
|
|
| CA RECORD |
|
|
|
|
| CA PLAYBACK |
|
|
|
|
|
| |
|
|
|
| PRESS (5,°), THEN (OK) | |
|
|
|
| PRESS (MENU) TO END | |
|
|
|
|
| |
4 |
| SELECT MODE |
|
| |
|
| ° |
|
| |
|
| Place the arrow next to | |||
|
| “MANUAL” by pressing | |||
|
| CH5 or TIME SCAN | PRESET |
| |
| 5°. |
| =MANUAL |
| |
|
| PRESS | PRESS | ||
|
|
|
| (REW) | (FF) |
|
|
|
| ||
|
|
|
| * |
|
|
|
|
| PRESS (5, °) TO SELECT | |
|
|
|
| PRESS (MENU) TO END | |
|
|
|
| ||
|
| ADJUST AUDIO |
| ||
5 |
| RECORDING LEVEL |
| ||
| Press FF or REW. |
|
| ||
|
| ||||
| ● To move the | ||||
| of the scale, press FF or REW briefly for 5 times in | ||||
|
| succession. To move the audio levels faster, keep FF | |||
|
| or REW presssed. |
|
| |
| ● Adjust the recording level while watching the VCR's | ||||
|
| audio level meters. Set the level so that maximum | |||
|
| volume causes the meters to vary between 0dB to 4dB. | |||
|
|
|
| ||
|
| RETURN TO NORMAL |
| ||
6 |
| SCREEN |
|
| |
| Press MENU as many times as necessary to exit. | ||||