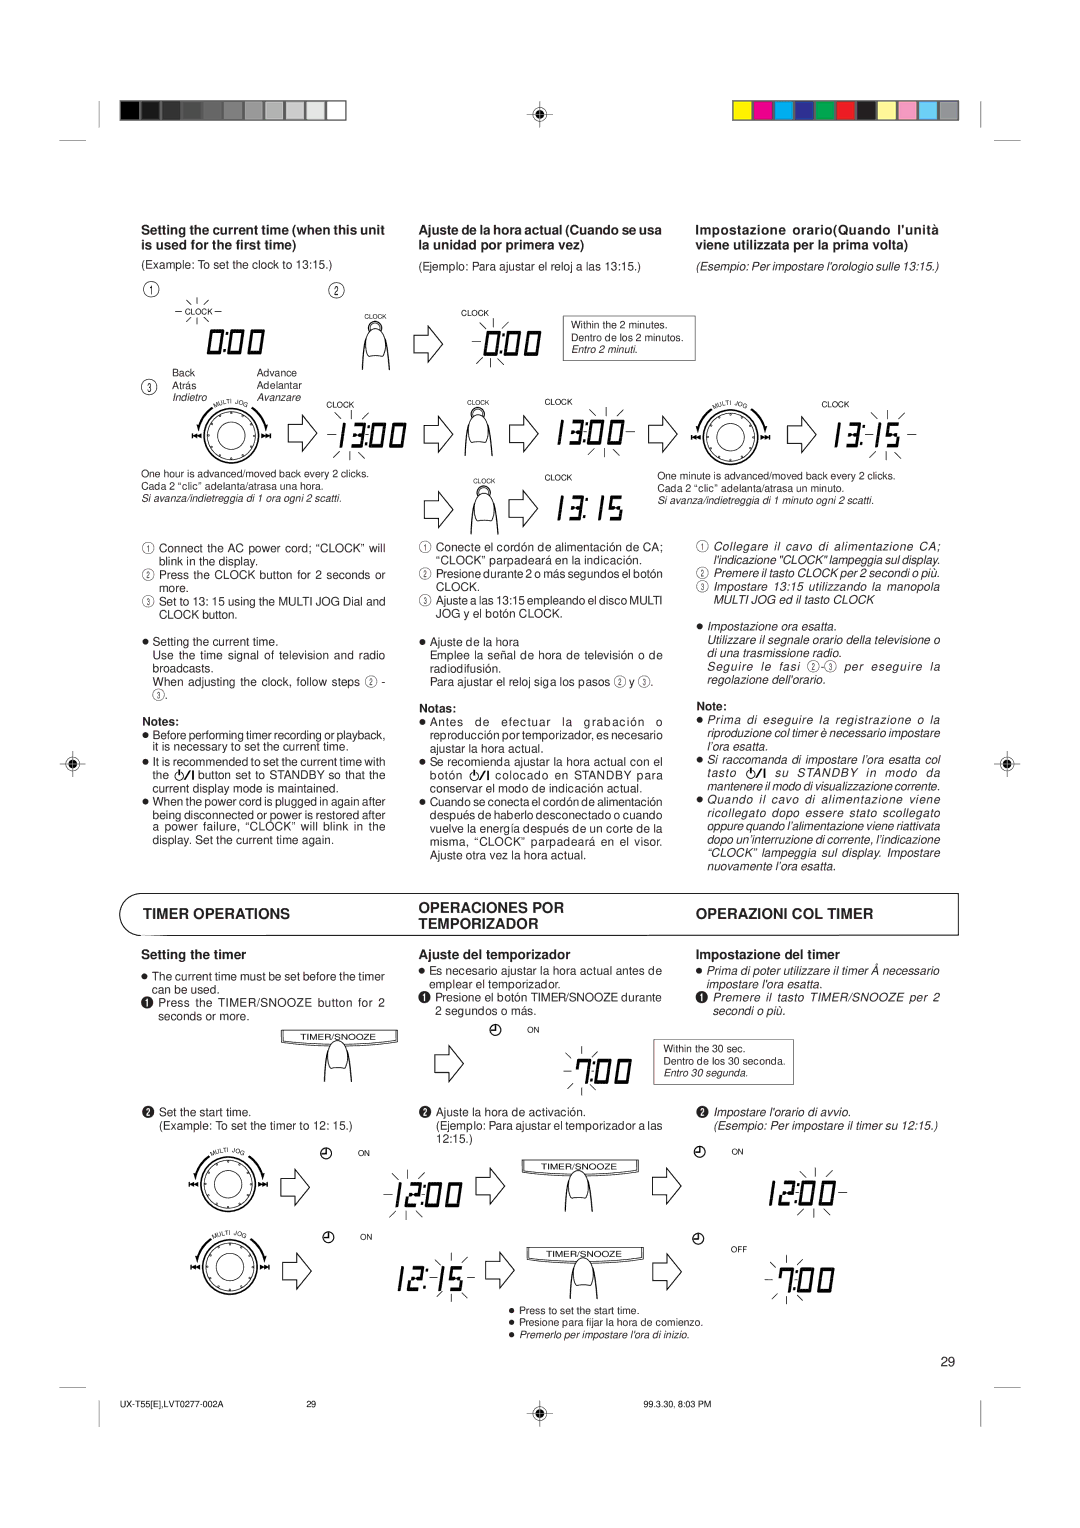
Setting the current time (when this unit is used for the first time)
(Example: To set the clock to 13:15.)
12
CLOCK
CLOCK
Back |
|
| Advance |
3 Atrás |
|
| Adelantar |
Indietro | ULTI JO | G | Avanzare |
| M | CLOCK | |
|
|
Ajuste de la hora actual (Cuando se usa | Impostazione orario(Quando l'unità |
la unidad por primera vez) | viene utilizzata per la prima volta) |
(Ejemplo: Para ajustar el reloj a las 13:15.) | (Esempio: Per impostare l'orologio sulle 13:15.) |
CLOCK
Within the 2 minutes.
Dentro de los 2 minutos.
Entro 2 minuti.
CLOCK | CLOCK | ULTI JO | G | CLOCK |
|
| M |
One hour is advanced/moved back every 2 clicks. Cada 2 “clic” adelanta/atrasa una hora.
Si avanza/indietreggia di 1 ora ogni 2 scatti.
CLOCK | CLOCK | One minute is advanced/moved back every 2 clicks. |
| Cada 2 “clic” adelanta/atrasa un minuto. | |
|
| |
|
| Si avanza/indietreggia di 1 minuto ogni 2 scatti. |
1Connect the AC power cord; “CLOCK” will blink in the display.
2Press the CLOCK button for 2 seconds or more.
3Set to 13: 15 using the MULTI JOG Dial and CLOCK button.
●Setting the current time.
Use the time signal of television and radio
broadcasts.
When adjusting the clock, follow steps 2 -
3.
Notes:
●Before performing timer recording or playback, it is necessary to set the current time.
●It is recommended to set the current time with
the ![]()
![]() button set to STANDBY so that the current display mode is maintained.
button set to STANDBY so that the current display mode is maintained.
●When the power cord is plugged in again after
being disconnected or power is restored after a power failure, “CLOCK” will blink in the display. Set the current time again.
1Conecte el cordón de alimentación de CA; “CLOCK” parpadeará en la indicación.
2Presione durante 2 o más segundos el botón
CLOCK.
3Ajuste a las 13:15 empleando el disco MULTI JOG y el botón CLOCK.
●Ajuste de la hora
Emplee la señal de hora de televisión o de
radiodifusión.
Para ajustar el reloj siga los pasos 2 y 3.
Notas:
●Antes de efectuar la grabación o reproducción por temporizador, es necesario ajustar la hora actual.
●Se recomienda ajustar la hora actual con el
botón ![]()
![]() colocado en STANDBY para conservar el modo de indicación actual.
colocado en STANDBY para conservar el modo de indicación actual.
●Cuando se conecta el cordón de alimentación después de haberlo desconectado o cuando vuelve la energía después de un corte de la misma, “CLOCK” parpadeará en el visor. Ajuste otra vez la hora actual.
1Collegare il cavo di alimentazione CA; l'indicazione "CLOCK" lampeggia sul display.
2Premere il tasto CLOCK per 2 secondi o più.
3 Impostare 13:15 utilizzando la manopola MULTI JOG ed il tasto CLOCK
●Impostazione ora esatta.
Utilizzare il segnale orario della televisione o
di una trasmissione radio.
Seguire le fasi
Note:
●Prima di eseguire la registrazione o la riproduzione col timer è necessario impostare l’ora esatta.
●Si raccomanda di impostare l’ora esatta col
tasto ![]()
![]() su STANDBY in modo da mantenere il modo di visualizzazione corrente.
su STANDBY in modo da mantenere il modo di visualizzazione corrente.
●Quando il cavo di alimentazione viene ricollegato dopo essere stato scollegato oppure quando l’alimentazione viene riattivata dopo un’interruzione di corrente, l’indicazione “CLOCK” lampeggia sul display. Impostare nuovamente l’ora esatta.
TIMER OPERATIONS
Setting the timer
●The current time must be set before the timer can be used.
1Press the TIMER/SNOOZE button for 2 seconds or more.
TIMER/SNOOZE
OPERACIONES POR
TEMPORIZADOR
Ajuste del temporizador
●Es necesario ajustar la hora actual antes de emplear el temporizador.
1Presione el botón TIMER/SNOOZE durante 2 segundos o más.
ON
OPERAZIONI COL TIMER
Impostazione del timer
●Prima di poter utilizzare il timer Å necessario impostare l'ora esatta.
1Premere il tasto TIMER/SNOOZE per 2 secondi o più.
2Set the start time.
(Example: To set the timer to 12: 15.)
ULTI JO | G | ON |
M |
| Within the 30 sec. |
| Dentro de los 30 seconda. |
| Entro 30 segunda. |
2 Ajuste la hora de activación. | 2 Impostare l'orario di avvio. |
(Ejemplo: Para ajustar el temporizador a las | (Esempio: Per impostare il timer su 12:15.) |
12:15.) |
|
| ON |
TIMER/SNOOZE |
|
ULTI M
JOG
ON
TIMER/SNOOZE
OFF
●Press to set the start time.
●Presione para fijar la hora de comienzo.
●Premerlo per impostare l'ora di inizio.
29
29 | 99.3.30, 8:03 PM |