OPERATING

INSTRUCTIONS


TABLE OF CONTENTS


SECTION


I. NAME


OF

PARTS


2

Thread

tension

adjustment

52

Tote Bags


2

Thread

tension

dial

52

..........................................................................


Incorrect

tension


52

Locate and Identify the parts

.............................................


2


Incorrect

tension


52

Attaching

the waste

catcher


4


Incorrect

tension


54

Storing

the accessory

holder

............................................


4


Incorrect

tension


54

Standard

accessories

.......................................................


4


Thread

tension

(3 threads)

56

Available

Accessories

and Attachments

...........................

6


Correct

tension


56

SECTION


I1. GETTING


READYTO

SEW

8

................................................................


Thread

tension

adjustment

56

Plug in the machine

and switch

on the power

8

Thread

tension

dial

56

Operating


Instructions

.......................................................


8

Incorrect

tension


56

Foot control

use


8

Incorrect

tension


56

How to turn handwheet

...................................................


10

Incorrect

tension


56

Opening and closing the side cover


10


Narrow

hem


58

• To open

.........................................................................


10

Rolled

hem


60

• To close


10

......................................................................


.........................................................................


Picot edge


62

Opening and closing the looper cover

.............................

10

.......................................................................


• To open


10

Turning

corners

...............................................................


64

.........................................................................


Outsider

corners


64

• To close


10


.........................................................................


Inside corners


66

For your safety


10


................................................................


Positioning

the telescoping

thread guide

bar

12

Edging

curves


66

Attaching

the spool

cap and

net


12

• Outside

curves


66

Raising

or lowering

the presser

foot


12

• Inside

curves


66

Adjustment

of stitch

length

..............................................

ratio


14

Overedging

......................................................................


68

Adjustment

of differential

feed


14

Overlocking


70

How to adjust


14

.....................................................................


..................................................................


Elastic (for wide elastic band)

72

Changing

the needle


16


Elastic

(for

narrow

elastic band)

74

• To attach

the needle on the right


16


Lace application


76

• To attach

the needle on the left


16

..............................................................


Decorative

edge


78

Adjustment

of foot pressure


16


Decorative

flatlock

(Topstitching)

80

Removing

the presser

foot

..............................................


18

Attaching

the presser

foot


18

Blind hem


82

...............................................


Pintuck


84

To disengage

the upper

knife

..........................................


18

............................................................................


To engage

the upper knife

...............................................


18

Attaching

stretch waistband

86

Adjustment

of cutting

width


20

Braiding


88

Adjustment

of needle

plate setting knob


Attach

sleeve


90

(Changing

to standard

serging

or rolled

hemming)

22

Flared

skirt


92

Standard

serging


22

......................................................................


Gathering


94

Rolled hemming


22

........................................................................


FOR MACHINE


SECTION


IV. CARE

96

Setting

the

lower looper pre-tension setting slider

24


Replacing

the upper

knife

96

Standard

serging (STD.)


24

.................................................


To remove


96

Rolled hemming(R.H.)


24


.....................................................


To attach


96

Initial Set-Up


26

..........................................................................


....................................................................


Cleaning

upper

knife area

96

Rethreading

a broken thread

..........................................


28


Replacing

the light bulb

98

Rethreading

the Serger


30-32

..............................................


For your safety


98

Threading

the

lower looper


30-32

................................................................


To remove


98

How to thread

wolly

nylon / polyester

thread

34


To insert


98

Threading

the upper

looper


36-38

..........................................................................


Cleaning

the feed

dogs

98

To rethread

the upper

looper


38

...........................................


Oiling the machine


100

Threading

the right needle


40

........................................................

..............................................


Carrying

the machine


100

Threading

the left needle


42

....................................................


SECTION


V. PERFORMANCE

102

3-thread


serging


44


Regular 3-thread serging:

1/8" (3.5 ram) width

44


Wide 3-thread

serging: 1/4" (5.7 mm) width

44


SECTION


III. LEARN

THE

STITCHES

46


Starting

to sew

................................................................


46


Finishing

sewing


46


Sewing

contiunously

.......................................................


46


How to use guide lines


46


Securing

ends

.................................................................


48


• At the beginning of the seam

........................................


48


• Backstitching

.................................................................


48


• At the end of the seam

..................................................


48


Thread

and needle chart


50-51


Thread

tension

(4 threads)

..............................................


52


Correct

tension

................................................................


52


VI

Page 7
Image 7
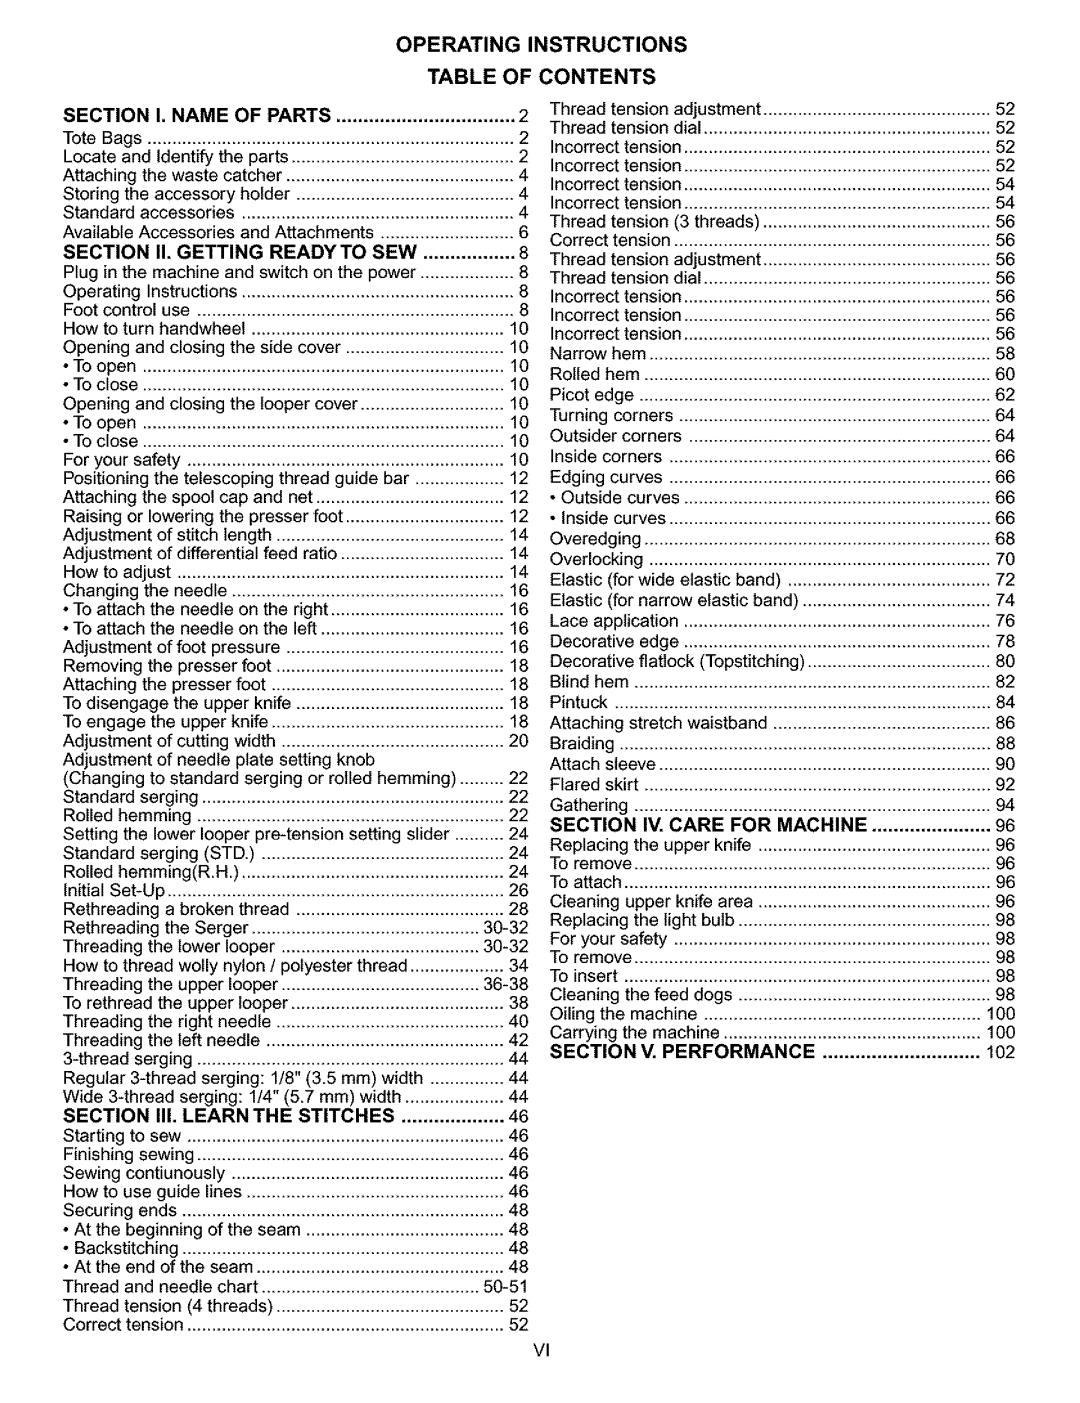
Kenmore 385.166551 owner manual Operating Instructions Table of Contents

385.166551 specifications

The Kenmore 385.166551 sewing machine is a versatile and reliable piece of equipment, ideal for both beginners and experienced seamstresses. This machine combines a classic design with modern technology, making it user-friendly while offering a variety of features to enhance sewing performance.

One of the standout characteristics of the Kenmore 385.166551 is its range of stitch options. It comes equipped with 24 built-in stitches, including utility stitches, decorative stitches, and stretch stitches. This variety allows users to tackle a wide range of sewing projects, from basic repairs to more complex garments. The machine also features a one-step buttonhole function, enabling seamless creation of professional-quality buttonholes with minimal effort.

Another significant feature of the Kenmore 385.166551 is its adjustable stitch length and width. Users can personalize their sewing projects by modifying these dimensions to achieve the desired results. This flexibility is particularly useful when working on different fabrics, ensuring the best possible outcome for each project. The machine's feed dog system allows for smooth fabric feeding, preventing puckering and ensuring even stitching.

The Kenmore 385.166551 also boasts a drop-in bobbin system, which simplifies the threading process. This feature makes it easier for users to change bobbins quickly, minimizing downtime during sewing sessions. The transparent bobbin cover allows for easy monitoring of the thread supply, ensuring users are never caught off-guard by an empty bobbin.

Portability is another important consideration for many sewists, and the Kenmore 385.166551 does not disappoint. Its lightweight design makes it easy to transport, whether for crafts classes or sewing groups. Additionally, the machine comes with a hard case to protect it during transit and storage.

The machine's automatic needle threader is an excellent time-saver, as it takes the hassle out of threading the needle. This feature is especially helpful for those who may struggle with manual threading due to vision issues or dexterity challenges.

Overall, the Kenmore 385.166551 sewing machine combines functionality with ease of use. With its extensive stitch options, adjustable settings, convenient features, and portability, it is well-suited for a wide range of sewing enthusiasts. Whether you’re looking to embark on a new sewing hobby or enhance your existing skills, this machine provides the tools necessary to achieve professional results right in your home.