f | PI | iiii!i m |
IMPORTANTSAFETY
INSTRUCTIONS
SAVE THESE INSTRUCTIONS
Read all Instructions before using this appliance. When using gea
or electrical appliances, basic safety precautions should be followed,
Including the following:
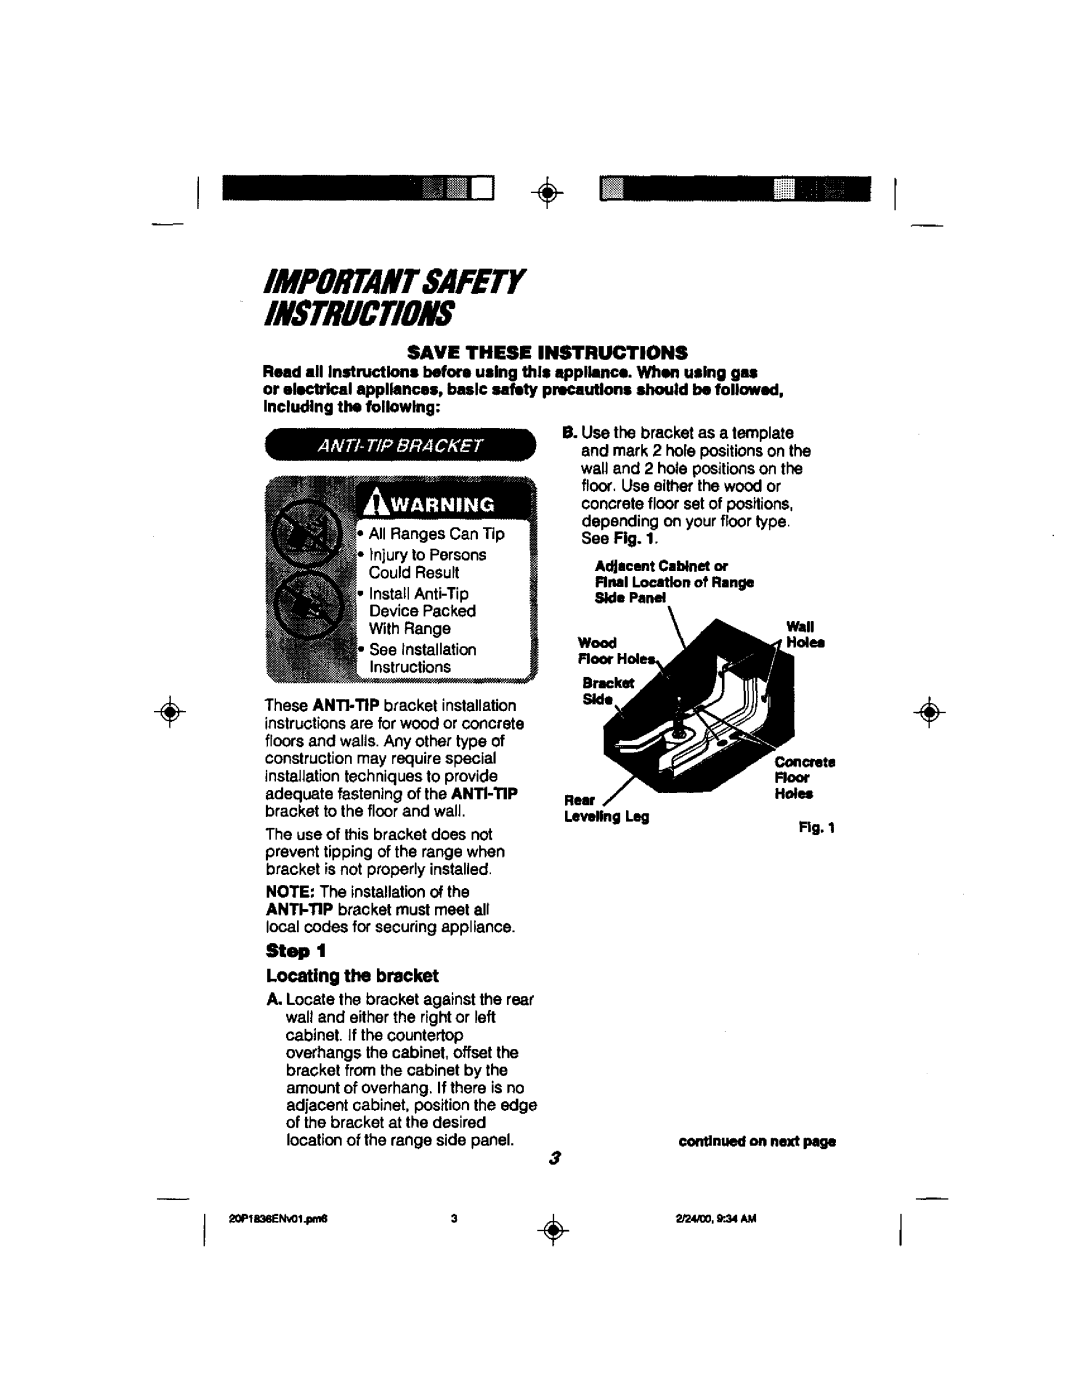
B. Use the bracketas a template and mark2 holepositionson the
wall and 2 hole positionson the floor,Use either the woodor
concretefloor set of positions, depending on yourfloortype. See Fig. 1.
Adjacent Cabinet or
Final Location of Range
Side Panel
[
÷ | These |
instructionsare for wood or concrete | |
| floors and walls.Any othertype of |
| constructionmay requirespecial |
| installation techniquesto provide |
| adequate fastening of the |
| bracket tothe floor and wall. |
| The use of this bracket does not |
| prevent tippingof the rangewhen |
| bracket is not properlyinstalled. |
| NOTE: The installation of the |
|
|
| localcodes for securingappliance. |
| Step 1 |
| Locating the bracket |
| A. Locate the bracketagainstthe rear |
| wall and eitherthe rightor left |
| cabinet, if the countertop |
| overhangsthe cabinet,offsetthe |
| bracket from the cabinet by the |
| amountof overhang. If there is no |
| adjacent cabinet, position the edge |
| of the bracket at the desired |
| locationof the range side panel. |
Wall
WoodHoles
Floor Holes
Bracket
Side
Rear
Leveling Leg
Fig. 1
€ondnued on next page
÷
3