Replacements and Installations
Replacing the MOTOR
Warning
Dangerous Voltage
[1]Disconnect the main power.
[2]Do the replacement procedure for the LOWER HOUSING ASSEMBLY.
[3]Disconnect all wires from the MOTOR.
[4]Cut the 2 WIRE TIES on the SMALL CIRCUIT BOARD between the MOTOR and MECHANISM ASSEMBLY.
[5]Disconnect the 2 wires from the CYCLE SOLENOID on the SMALL CIRCUIT BOARD.
[6]Pull the SMALL CIRCUIT BOARD up.
[7]Disconnect all wires on the MOTOR.
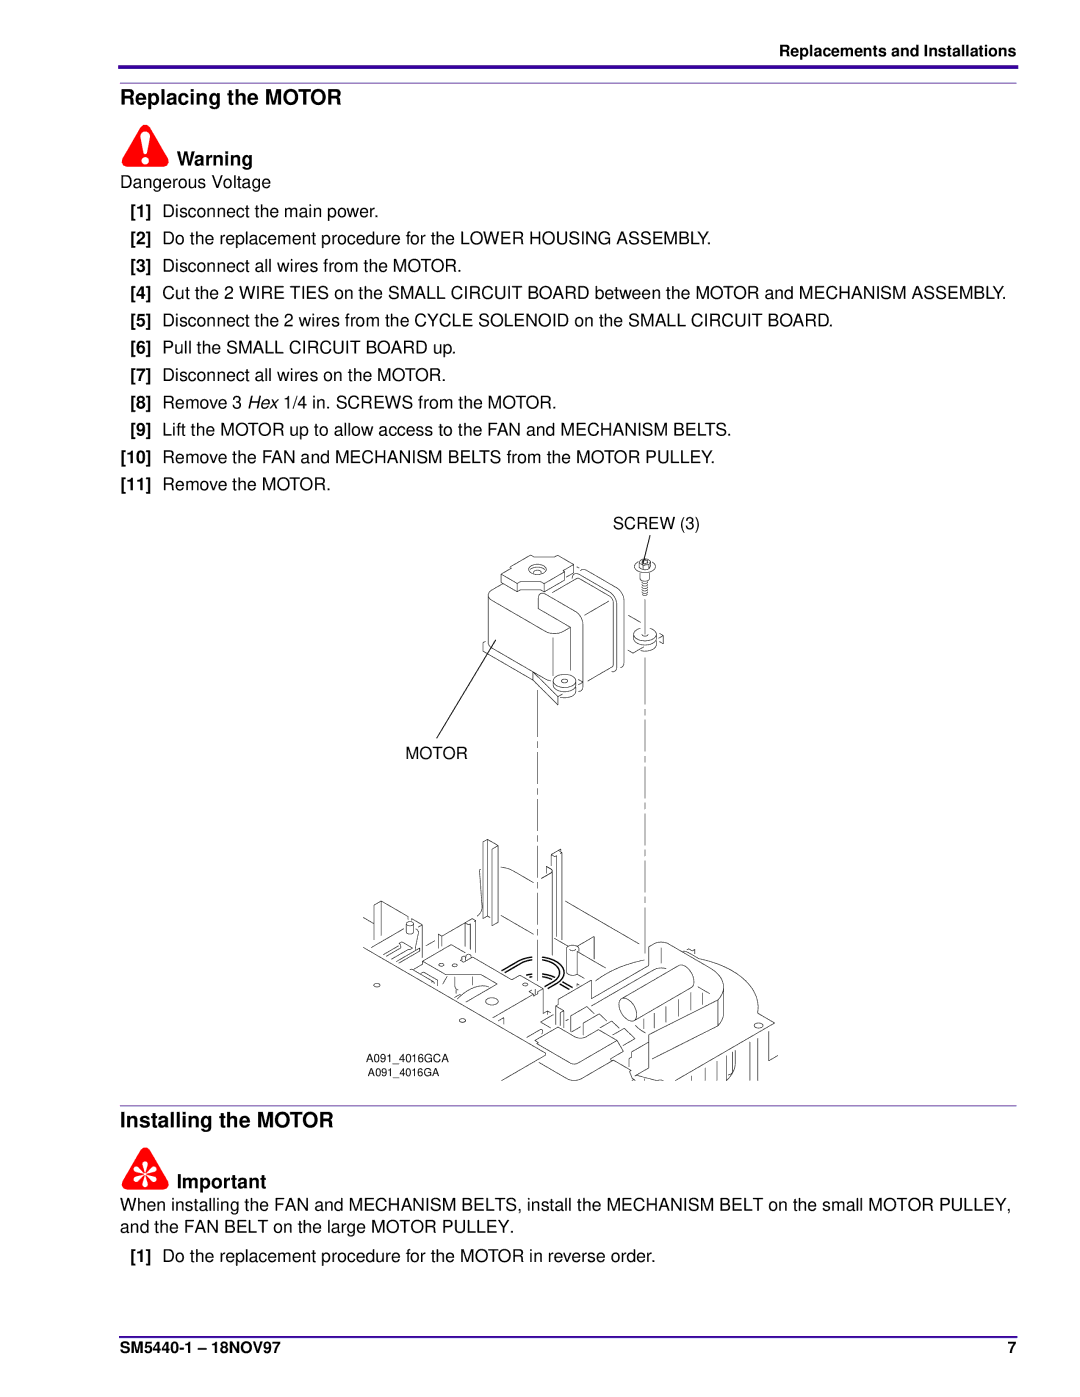
[8]Remove 3 Hex 1/4 in. SCREWS from the MOTOR.
[9]Lift the MOTOR up to allow access to the FAN and MECHANISM BELTS.
[10]Remove the FAN and MECHANISM BELTS from the MOTOR PULLEY.
[11]Remove the MOTOR.
SCREW (3)
MOTOR
A091_4016GCA
A091_4016GA
Installing the MOTOR
![]() Important
Important
When installing the FAN and MECHANISM BELTS, install the MECHANISM BELT on the small MOTOR PULLEY, and the FAN BELT on the large MOTOR PULLEY.
[1]Do the replacement procedure for the MOTOR in reverse order.
7 |
