SERVICE MANUAL
Replacing the CYCLE SOLENOID ASSEMBLY
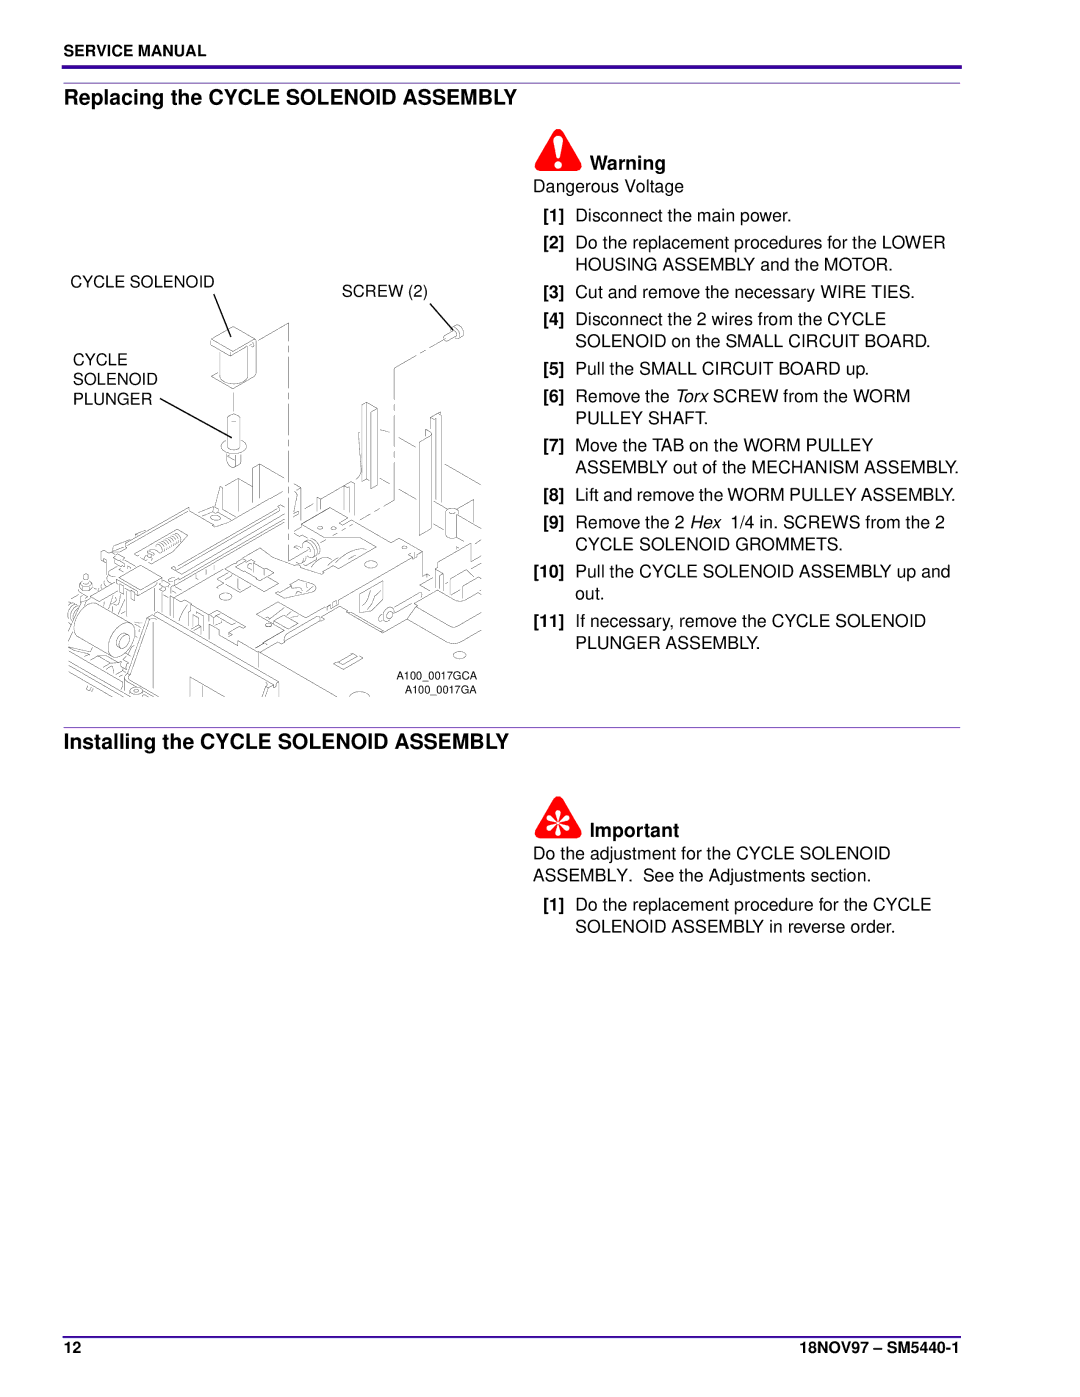
CYCLE SOLENOID
![]() Warning
Warning
Dangerous Voltage
[1] Disconnect the main power.
[2] Do the replacement procedures for the LOWER HOUSING ASSEMBLY and the MOTOR.
SCREW (2)[3] Cut and remove the necessary WIRE TIES.
[4] Disconnect the 2 wires from the CYCLE SOLENOID on the SMALL CIRCUIT BOARD.
CYCLE | [5] | Pull the SMALL CIRCUIT BOARD up. | |
SOLENOID | |||
[6] | Remove the Torx SCREW from the WORM | ||
PLUNGER | |||
|
| PULLEY SHAFT. | |
| [7] | Move the TAB on the WORM PULLEY | |
|
| ASSEMBLY out of the MECHANISM ASSEMBLY. | |
| [8] | Lift and remove the WORM PULLEY ASSEMBLY. | |
| [9] | Remove the 2 Hex 1/4 in. SCREWS from the 2 | |
|
| CYCLE SOLENOID GROMMETS. | |
| [10] | Pull the CYCLE SOLENOID ASSEMBLY up and | |
|
| out. | |
| [11] | If necessary, remove the CYCLE SOLENOID | |
|
| PLUNGER ASSEMBLY. |
A100_0017GCA
A100_0017GA
Installing the CYCLE SOLENOID ASSEMBLY
![]() Important
Important
Do the adjustment for the CYCLE SOLENOID
ASSEMBLY. See the Adjustments section.
[1] Do the replacement procedure for the CYCLE SOLENOID ASSEMBLY in reverse order.
12 | 18NOV97 – |