Replacements and Installations
[4]Disconnect the 2 wires from the CYCLE SOLENOID on the SMALL CIRCUIT BOARD.
[5]Pull the SMALL CIRCUIT BOARD up.
[6]Remove the Torx SCREW from the BLOWER COVER ASSEMBLY.
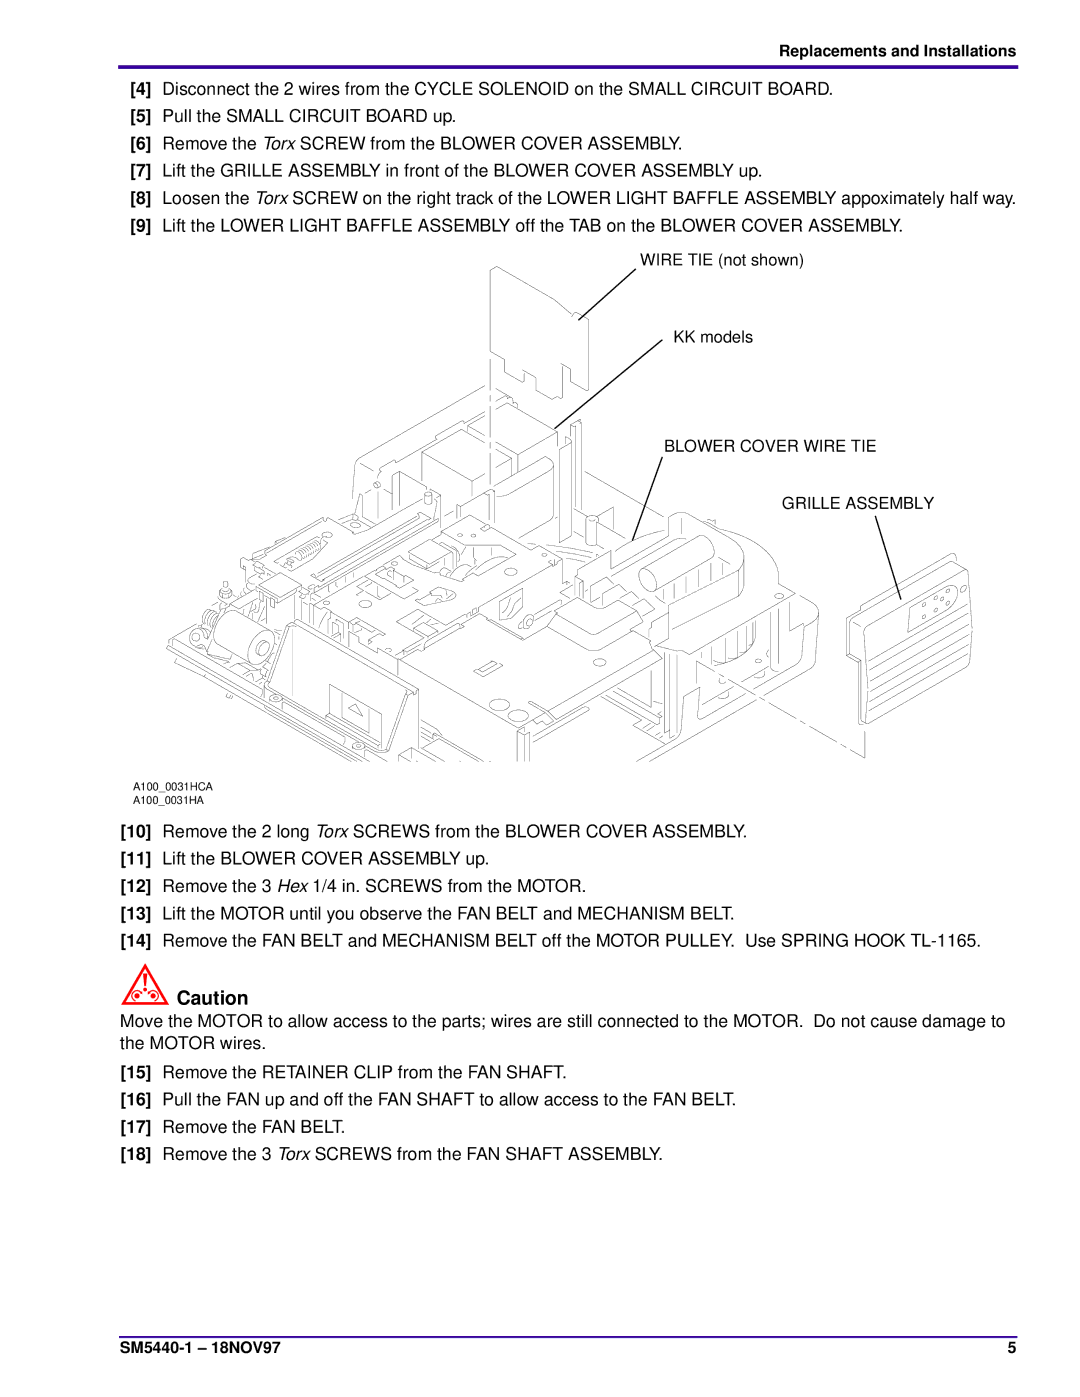
[7]Lift the GRILLE ASSEMBLY in front of the BLOWER COVER ASSEMBLY up.
[8]Loosen the Torx SCREW on the right track of the LOWER LIGHT BAFFLE ASSEMBLY appoximately half way.
[9]Lift the LOWER LIGHT BAFFLE ASSEMBLY off the TAB on the BLOWER COVER ASSEMBLY.
WIRE TIE (not shown)
KK models
BLOWER COVER WIRE TIE
GRILLE ASSEMBLY
A100_0031HCA
A100_0031HA
[10]Remove the 2 long Torx SCREWS from the BLOWER COVER ASSEMBLY.
[11]Lift the BLOWER COVER ASSEMBLY up.
[12]Remove the 3 Hex 1/4 in. SCREWS from the MOTOR.
[13]Lift the MOTOR until you observe the FAN BELT and MECHANISM BELT.
[14]Remove the FAN BELT and MECHANISM BELT off the MOTOR PULLEY. Use SPRING HOOK
![]() Caution
Caution
Move the MOTOR to allow access to the parts; wires are still connected to the MOTOR. Do not cause damage to the MOTOR wires.
[15]Remove the RETAINER CLIP from the FAN SHAFT.
[16]Pull the FAN up and off the FAN SHAFT to allow access to the FAN BELT.
[17]Remove the FAN BELT.
[18]Remove the 3 Torx SCREWS from the FAN SHAFT ASSEMBLY.
5 |
