Replacements and Installations
Replacing the AUTO-FOCUS SWITCH ASSEMBLY
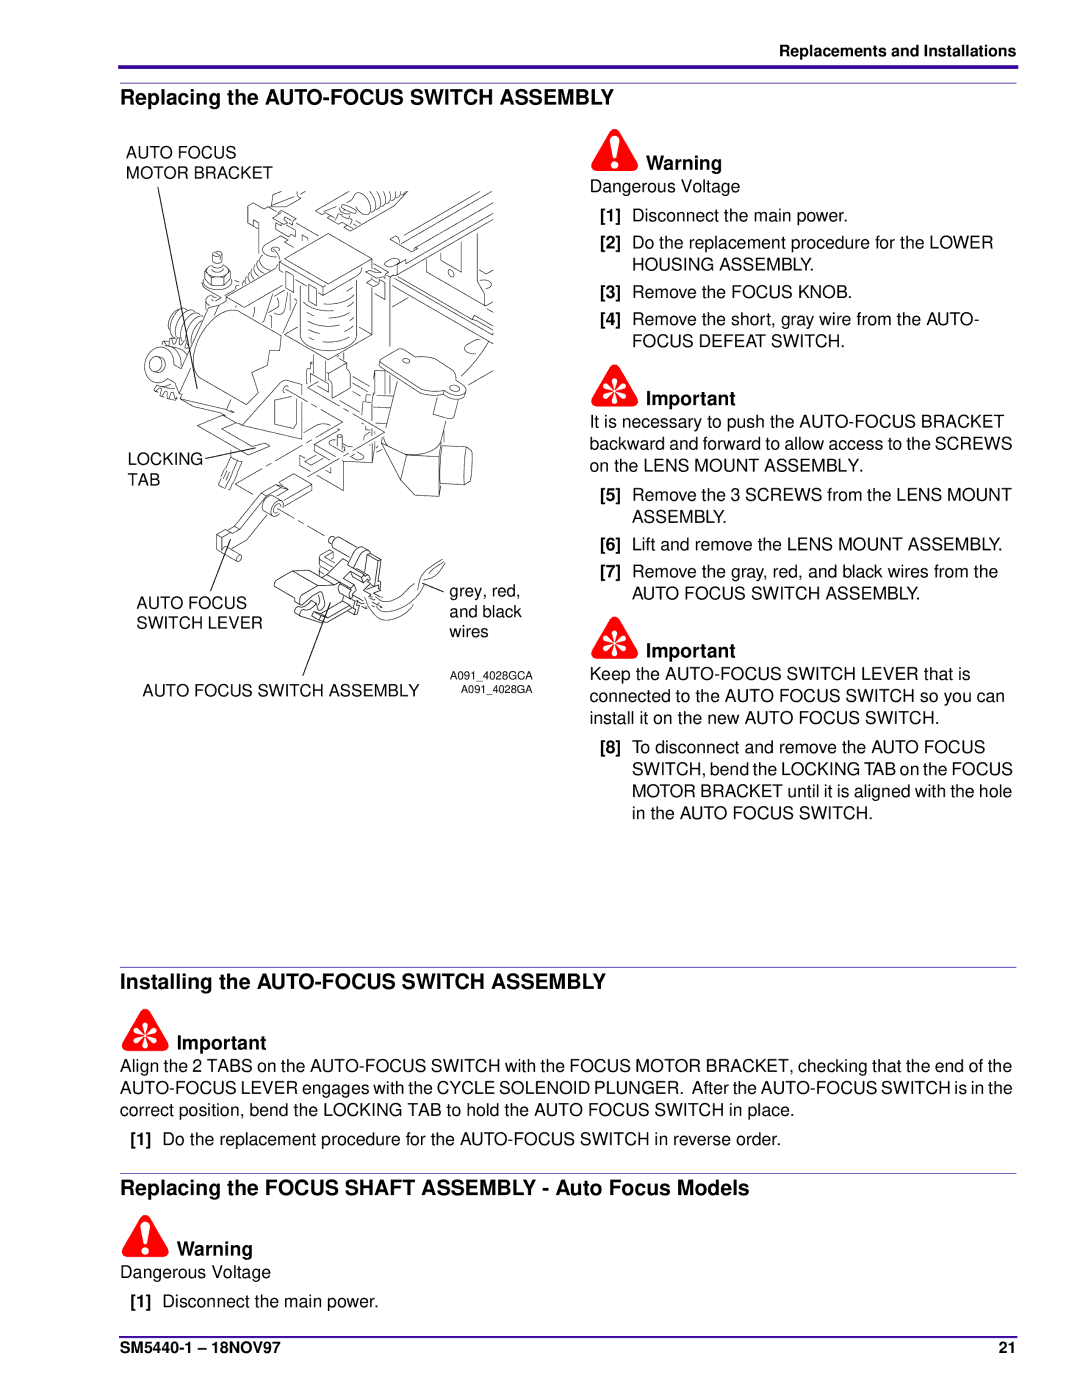
AUTO FOCUS
MOTOR BRACKET
LOCKING
TAB
AUTO FOCUS | grey, red, | |
and black | ||
SWITCH LEVER | ||
wires | ||
| ||
AUTO FOCUS SWITCH ASSEMBLY | A091_4028GCA | |
A091_4028GA |
Warning
Dangerous Voltage
[1]Disconnect the main power.
[2]Do the replacement procedure for the LOWER HOUSING ASSEMBLY.
[3]Remove the FOCUS KNOB.
[4]Remove the short, gray wire from the AUTO-
FOCUS DEFEAT SWITCH.
![]() Important
Important
It is necessary to push the
[5]Remove the 3 SCREWS from the LENS MOUNT ASSEMBLY.
[6]Lift and remove the LENS MOUNT ASSEMBLY.
[7]Remove the gray, red, and black wires from the
AUTO FOCUS SWITCH ASSEMBLY.
![]() Important
Important
Keep the
[8]To disconnect and remove the AUTO FOCUS SWITCH, bend the LOCKING TAB on the FOCUS MOTOR BRACKET until it is aligned with the hole in the AUTO FOCUS SWITCH.
Installing the AUTO-FOCUS SWITCH ASSEMBLY
![]() Important
Important
Align the 2 TABS on the
[1]Do the replacement procedure for the
Replacing the FOCUS SHAFT ASSEMBLY - Auto Focus Models
![]() Warning
Warning
Dangerous Voltage
[1]Disconnect the main power.
21 |