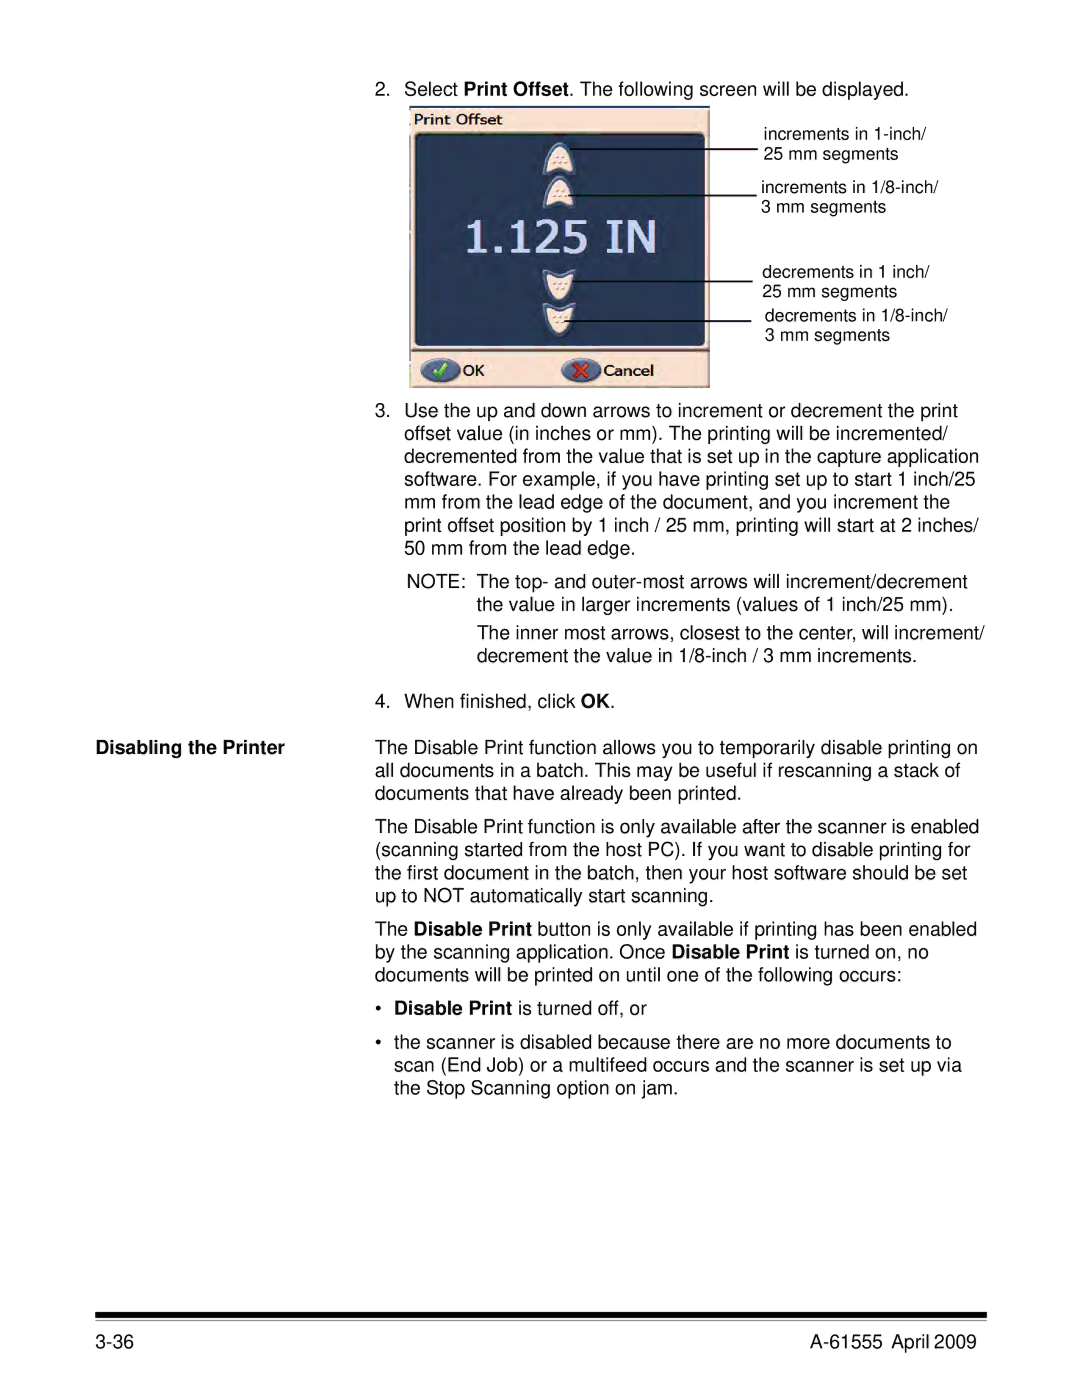
2. Select Print Offset. The following screen will be displayed.
increments in
increments in
decrements in 1 inch/ 25 mm segments
decrements in
3.Use the up and down arrows to increment or decrement the print offset value (in inches or mm). The printing will be incremented/ decremented from the value that is set up in the capture application software. For example, if you have printing set up to start 1 inch/25 mm from the lead edge of the document, and you increment the print offset position by 1 inch / 25 mm, printing will start at 2 inches/ 50 mm from the lead edge.
NOTE: The top- and
The inner most arrows, closest to the center, will increment/ decrement the value in
| 4. When finished, click OK. |
Disabling the Printer | The Disable Print function allows you to temporarily disable printing on |
| all documents in a batch. This may be useful if rescanning a stack of |
| documents that have already been printed. |
| The Disable Print function is only available after the scanner is enabled |
| (scanning started from the host PC). If you want to disable printing for |
| the first document in the batch, then your host software should be set |
| up to NOT automatically start scanning. |
| The Disable Print button is only available if printing has been enabled |
| by the scanning application. Once Disable Print is turned on, no |
| documents will be printed on until one of the following occurs: |
| • Disable Print is turned off, or |
| • the scanner is disabled because there are no more documents to |
| scan (End Job) or a multifeed occurs and the scanner is set up via |
| the Stop Scanning option on jam. |
|
