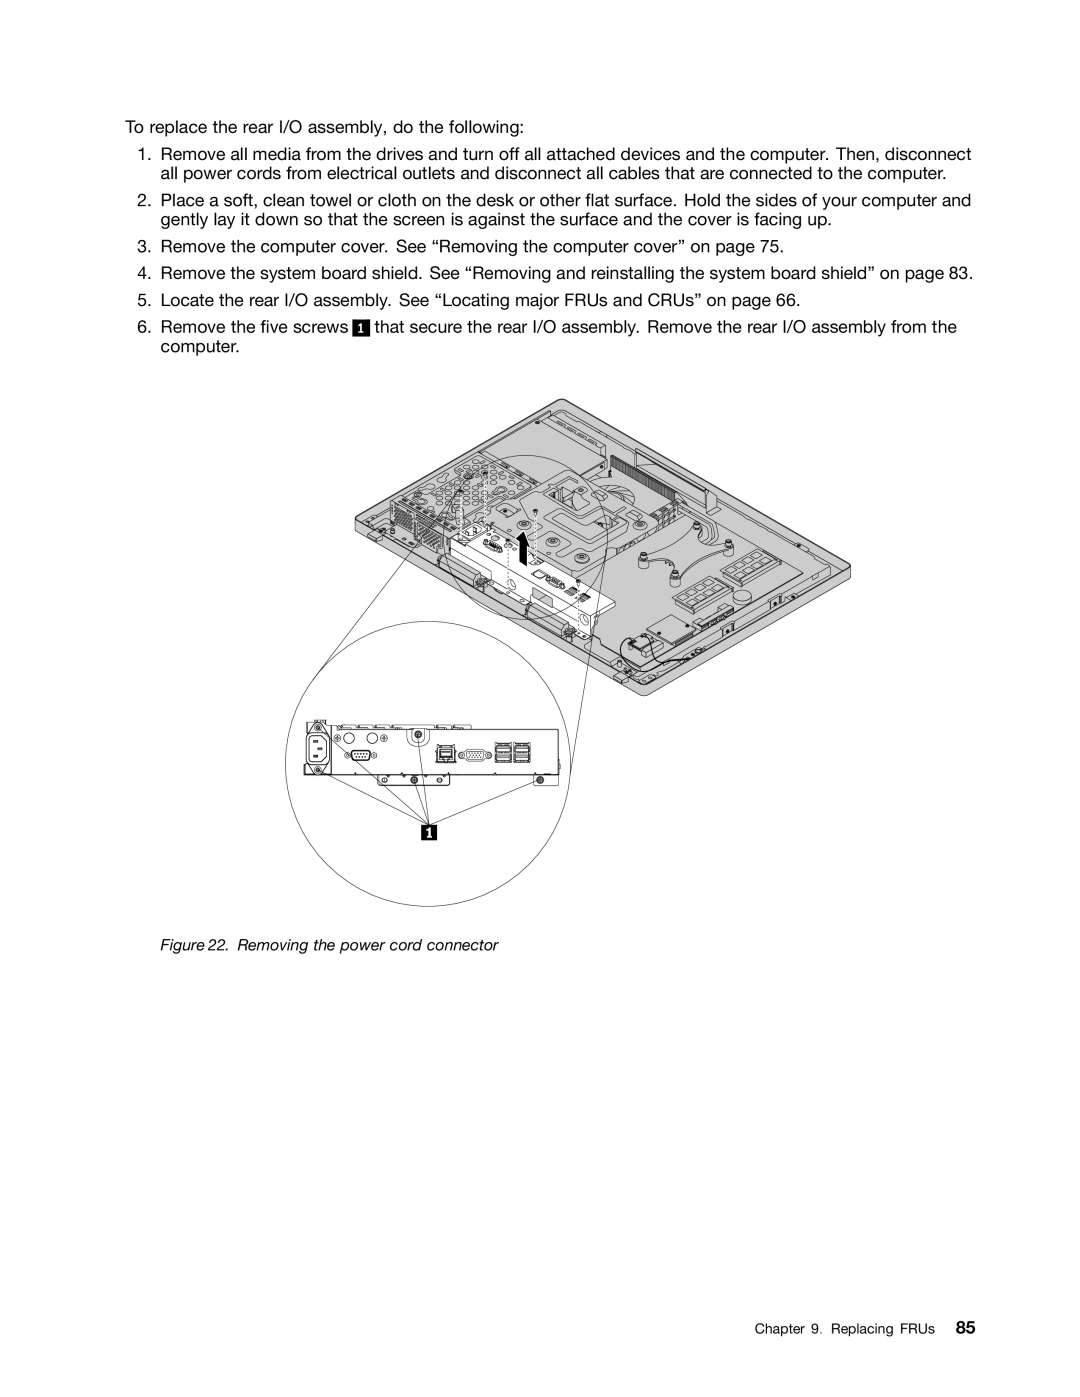
To replace the rear I/O assembly, do the following:
1.Remove all media from the drives and turn off all attached devices and the computer. Then, disconnect all power cords from electrical outlets and disconnect all cables that are connected to the computer.
2.Place a soft, clean towel or cloth on the desk or other flat surface. Hold the sides of your computer and gently lay it down so that the screen is against the surface and the cover is facing up.
3.Remove the computer cover. See “Removing the computer cover” on page 75.
4.Remove the system board shield. See “Removing and reinstalling the system board shield” on page 83.
5.Locate the rear I/O assembly. See “Locating major FRUs and CRUs” on page 66.
6.Remove the five screws computer.
1
that secure the rear I/O assembly. Remove the rear I/O assembly from the
Figure 22. Removing the power cord connector
Chapter 9. Replacing FRUs 85
