Maintaining the printer
Changing a photoconductor kit
Warning: When replacing a photoconductor kit, do not leave the new photoconductor kit exposed to direct light for an extended period of time. Extended light exposure can cause print quality problems.
1Turn the printer off.
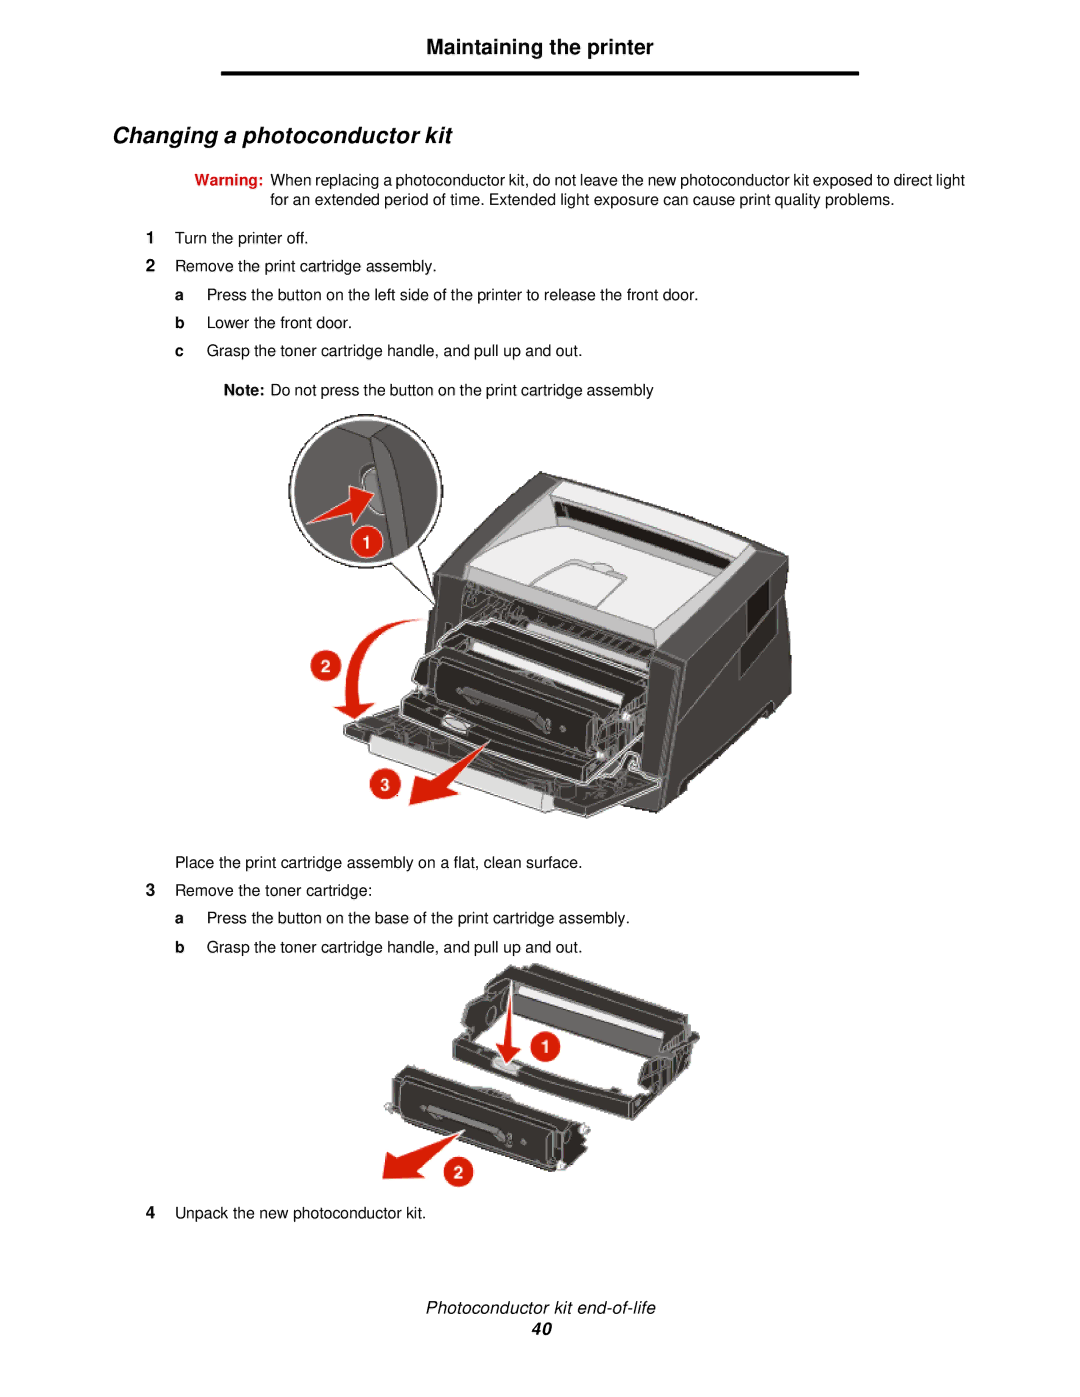
2Remove the print cartridge assembly.
a Press the button on the left side of the printer to release the front door. b Lower the front door.
c Grasp the toner cartridge handle, and pull up and out.
Note: Do not press the button on the print cartridge assembly
Place the print cartridge assembly on a flat, clean surface.
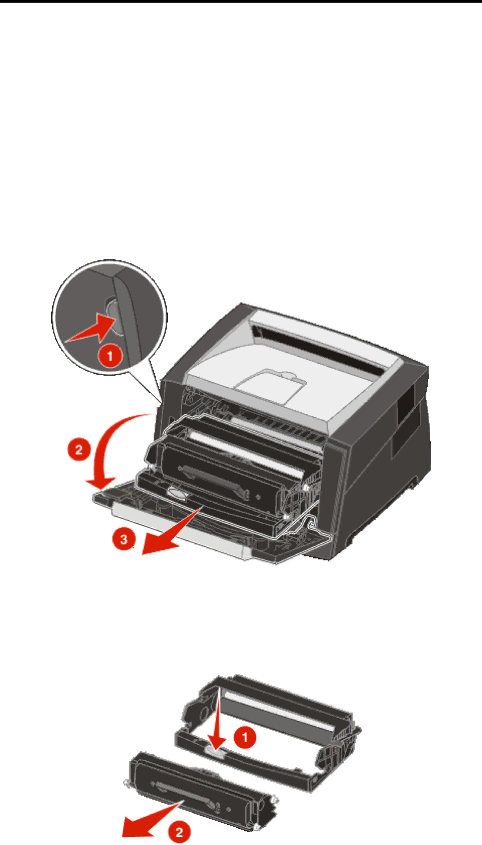
3Remove the toner cartridge:
a Press the button on the base of the print cartridge assembly. b Grasp the toner cartridge handle, and pull up and out.
4Unpack the new photoconductor kit.
Photoconductor kit
40