Maintaining the printer
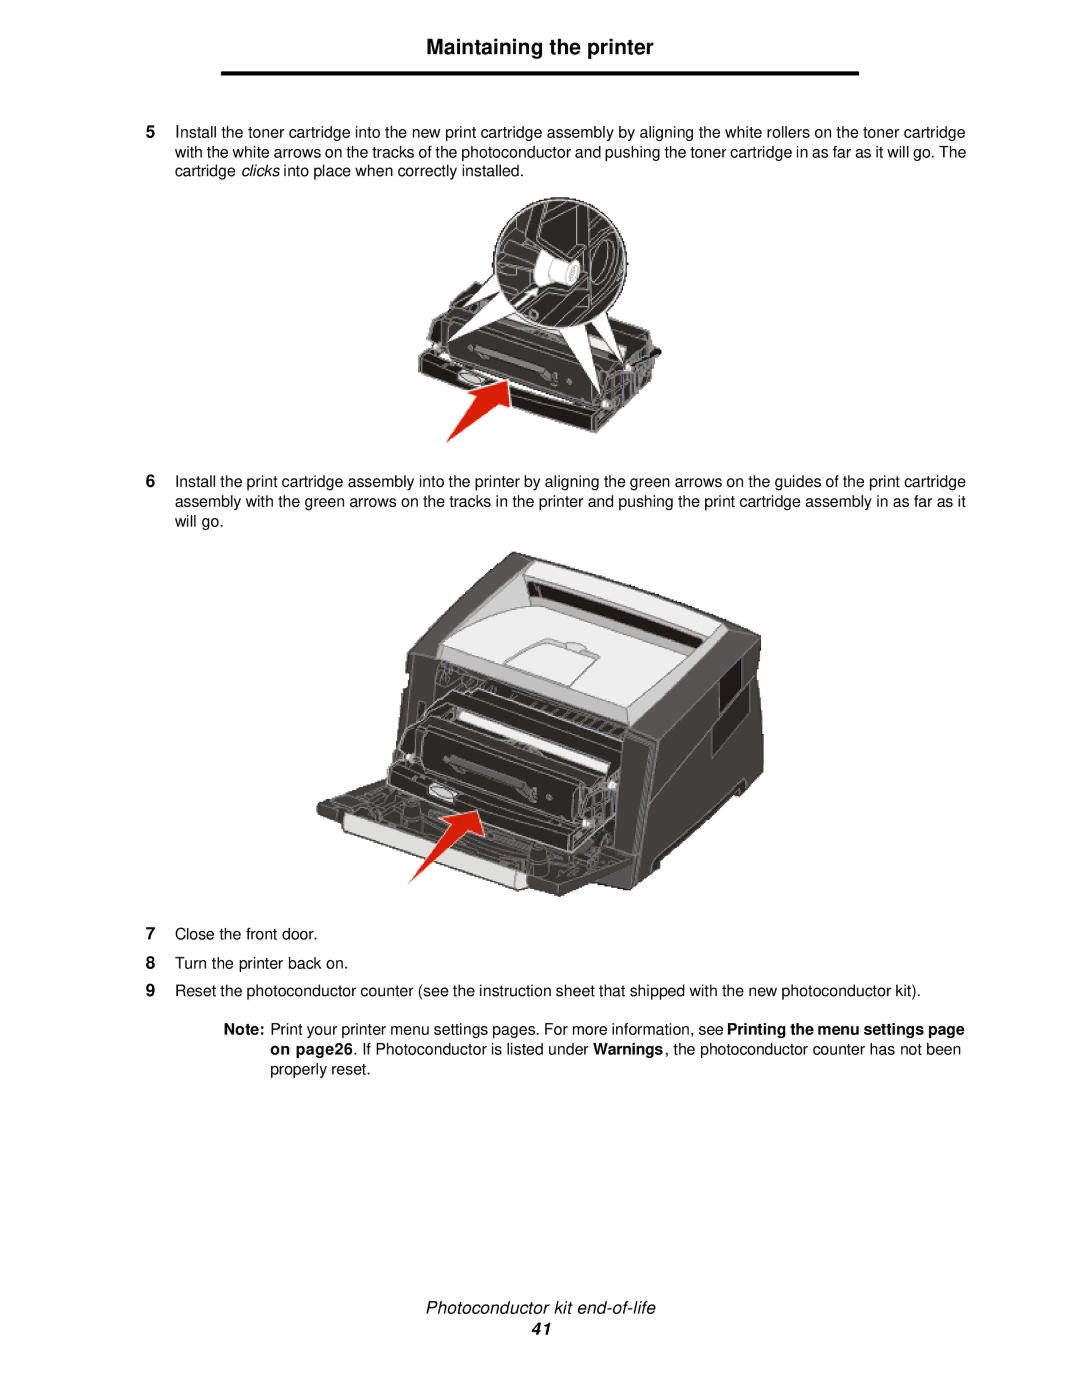
5Install the toner cartridge into the new print cartridge assembly by aligning the white rollers on the toner cartridge with the white arrows on the tracks of the photoconductor and pushing the toner cartridge in as far as it will go. The cartridge clicks into place when correctly installed.
6Install the print cartridge assembly into the printer by aligning the green arrows on the guides of the print cartridge assembly with the green arrows on the tracks in the printer and pushing the print cartridge assembly in as far as it will go.
7Close the front door.
8Turn the printer back on.
9Reset the photoconductor counter (see the instruction sheet that shipped with the new photoconductor kit).
Note: Print your printer menu settings pages. For more information, see Printing the menu settings page on page26. If Photoconductor is listed under Warnings, the photoconductor counter has not been properly reset.
Photoconductor kit
41
