Microprocessor Control
3.0MICROPROCESSOR CONTROL
The Microprocessor Control for the Liebert
3.1Feature Overview
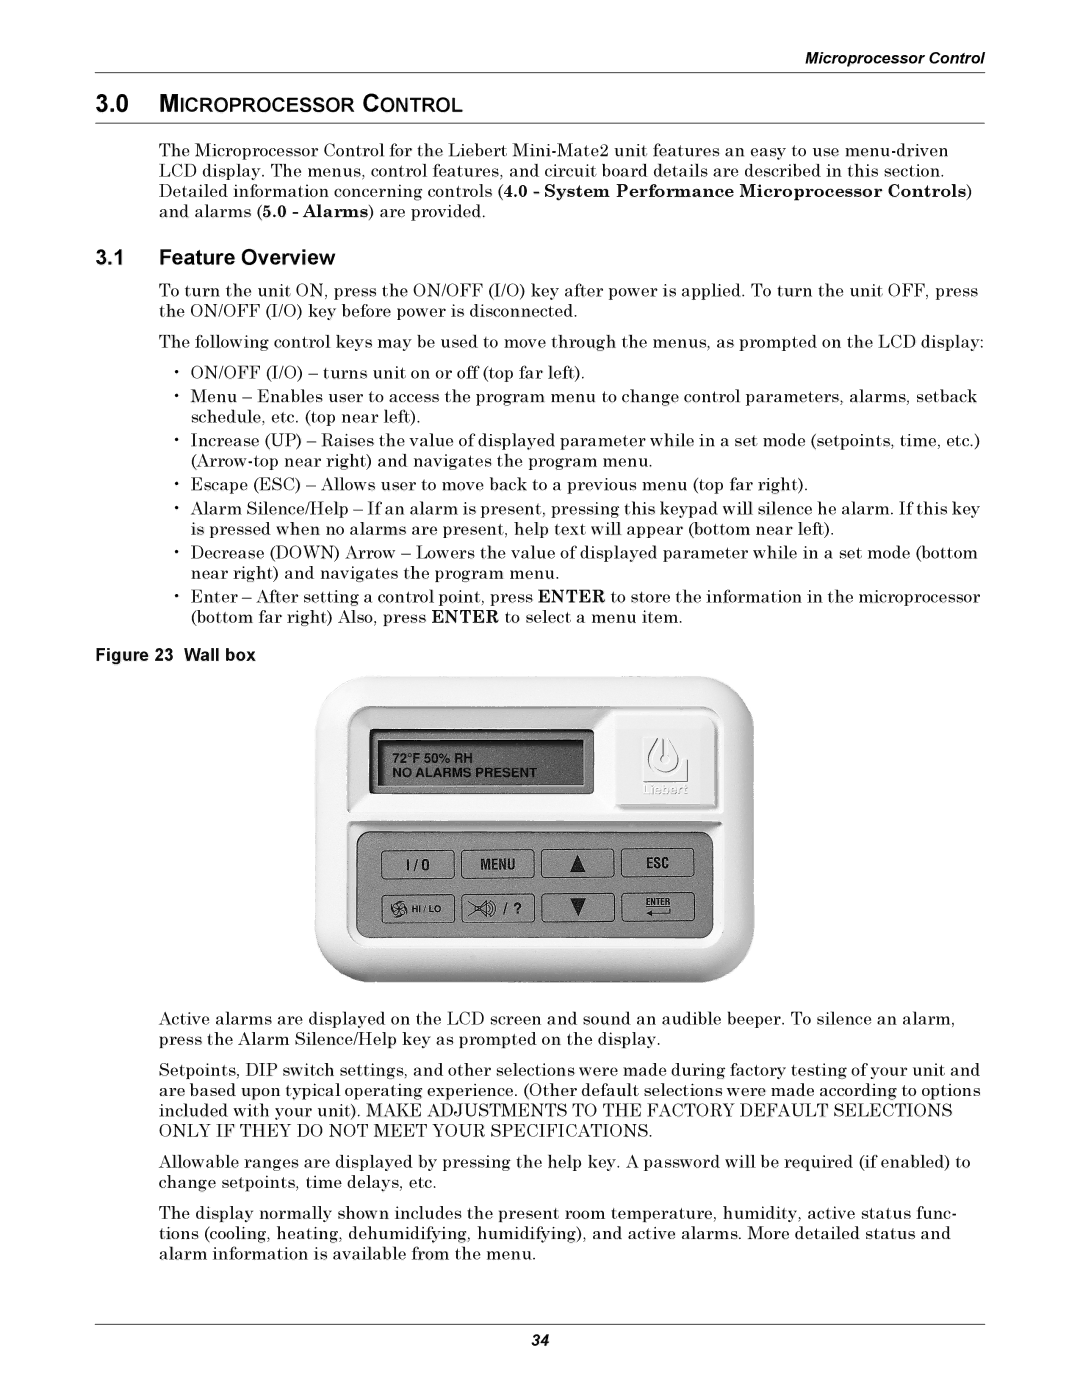
To turn the unit ON, press the ON/OFF (I/O) key after power is applied. To turn the unit OFF, press the ON/OFF (I/O) key before power is disconnected.
The following control keys may be used to move through the menus, as prompted on the LCD display:
•ON/OFF (I/O) – turns unit on or off (top far left).
•Menu – Enables user to access the program menu to change control parameters, alarms, setback schedule, etc. (top near left).
•Increase (UP) – Raises the value of displayed parameter while in a set mode (setpoints, time, etc.)
•Escape (ESC) – Allows user to move back to a previous menu (top far right).
•Alarm Silence/Help – If an alarm is present, pressing this keypad will silence he alarm. If this key is pressed when no alarms are present, help text will appear (bottom near left).
•Decrease (DOWN) Arrow – Lowers the value of displayed parameter while in a set mode (bottom near right) and navigates the program menu.
•Enter – After setting a control point, press ENTER to store the information in the microprocessor (bottom far right) Also, press ENTER to select a menu item.
Figure 23 Wall box
Active alarms are displayed on the LCD screen and sound an audible beeper. To silence an alarm, press the Alarm Silence/Help key as prompted on the display.
Setpoints, DIP switch settings, and other selections were made during factory testing of your unit and are based upon typical operating experience. (Other default selections were made according to options included with your unit). MAKE ADJUSTMENTS TO THE FACTORY DEFAULT SELECTIONS ONLY IF THEY DO NOT MEET YOUR SPECIFICATIONS.
Allowable ranges are displayed by pressing the help key. A password will be required (if enabled) to change setpoints, time delays, etc.
The display normally shown includes the present room temperature, humidity, active status func- tions (cooling, heating, dehumidifying, humidifying), and active alarms. More detailed status and alarm information is available from the menu.
34