Manuals
/
Liebherr
/
Kitchen Appliance
/
Refrigerator
Liebherr
RI 1410/ RBI 1410/ FI 1051
manual
90, hinges on left
Models:
RI 1410/ RBI 1410/ FI 1051
1
10
34
34
Download
34 pages
36.52 Kb
7
8
9
10
11
12
13
14
Install
Connecting the appliance
Dimension
Page 10
Image 10
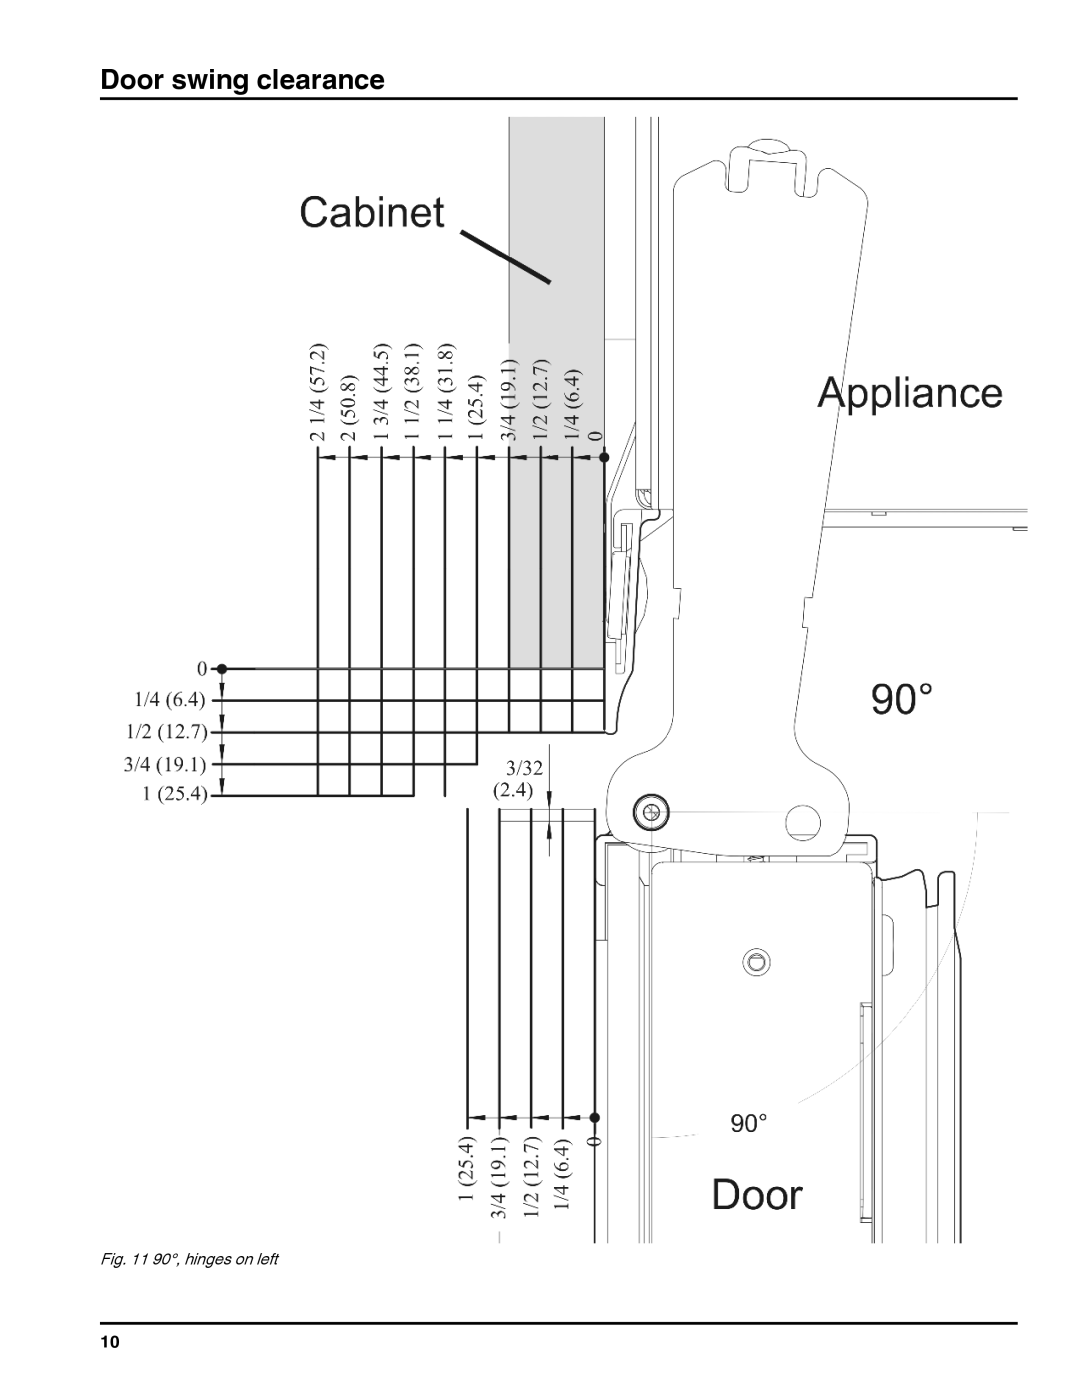
Door swing clearance
Fig. 11 90°, hinges on left
10
Page 9
Page 11
Page 10
Image 10
Page 9
Page 11
Contents
Installation Instructions
General safety information
General safety information Contents
Setting up the appliance
Setting up the appliance
Single-unit installation
Planning information
Side-by-side installation SBS24I3, SBS24I1, SBS24I6
Planning information
Cabinet Opening Dimensions
Air circulation in the kitchen cabinet
Door swing clearance
Air outlet
110, hinges on left
90, hinges on left
110, hinges on right
90, hinges on right
Fitting décor panels
Fitting décor panels
Décor panel dimensions Framed panels
Height H
Overlay Panel Backer Panel Spacer Panel
Overlay panel Spacer panel Backer panel Width W
Thickness of panel
Side-by-side installation
Front view
Overlay panel Spacer panel Backer panel
Spacer
1061
Changing the door hinges
Cut-out for glass window WFI
Overlay panel Backer panel Spacer panel Glassed area
Remove soft stop unit bottom
Remove door
Swapping bearing parts
Swapping the clip-on frame
Fitting the door
Loosen cover 9 from the panel 1
Removing the soft stop unit u Open the door
Adjusting the door opening angle
Aligning the door
Fit opening limiter
Water connection
Fit side installation strip
Single unit installation
Anti-tip device
Install the appliance in the recess
Install end strip
Secure side installation strips
Fit upper ventilation grille
Fit décor panels see Fit handles framed panel
Fit handles overlay panel
Side-by-side installation
Fit side installation strips
Join appliances
Fit upper ventilation grille 80 or
Secure side installation strip
Fit end strip
Fit handles to the overlay panel 63as shown in the diagram
Installing the water filter
Connecting the appliance
Connecting the appliance
Top
Page
Image
Contents