Wireless-G Internet Video Camera
Schedule
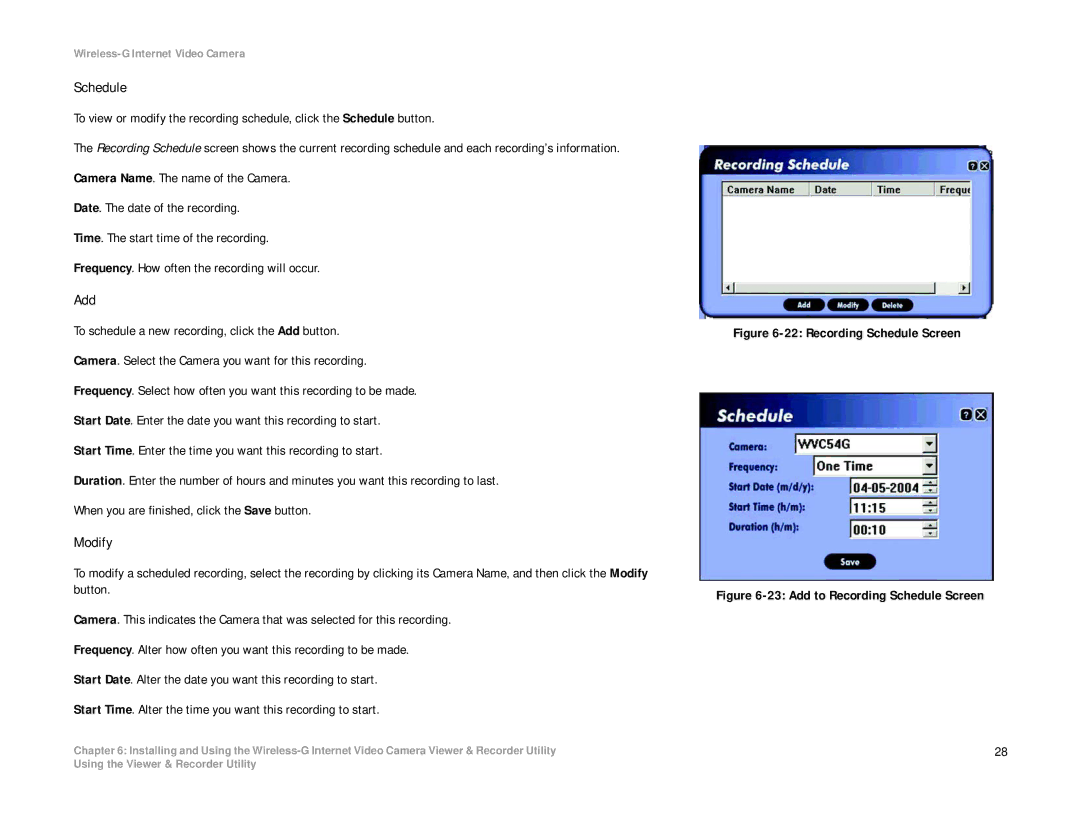
To view or modify the recording schedule, click the Schedule button.
The Recording Schedule screen shows the current recording schedule and each recording’s information. Camera Name. The name of the Camera.
Date. The date of the recording.
Time. The start time of the recording.
Frequency. How often the recording will occur.
Add
To schedule a new recording, click the Add button.
Camera. Select the Camera you want for this recording.
Frequency. Select how often you want this recording to be made.
Start Date. Enter the date you want this recording to start.
Start Time. Enter the time you want this recording to start.
Duration. Enter the number of hours and minutes you want this recording to last.
When you are finished, click the Save button.
Modify
To modify a scheduled recording, select the recording by clicking its Camera Name, and then click the Modify button.
Camera. This indicates the Camera that was selected for this recording.
Frequency. Alter how often you want this recording to be made.
Start Date. Alter the date you want this recording to start.
Start Time. Alter the time you want this recording to start.
Chapter 6: Installing and Using the
Figure 6-22: Recording Schedule Screen
Figure 6-23: Add to Recording Schedule Screen
28
Using the Viewer & Recorder Utility
