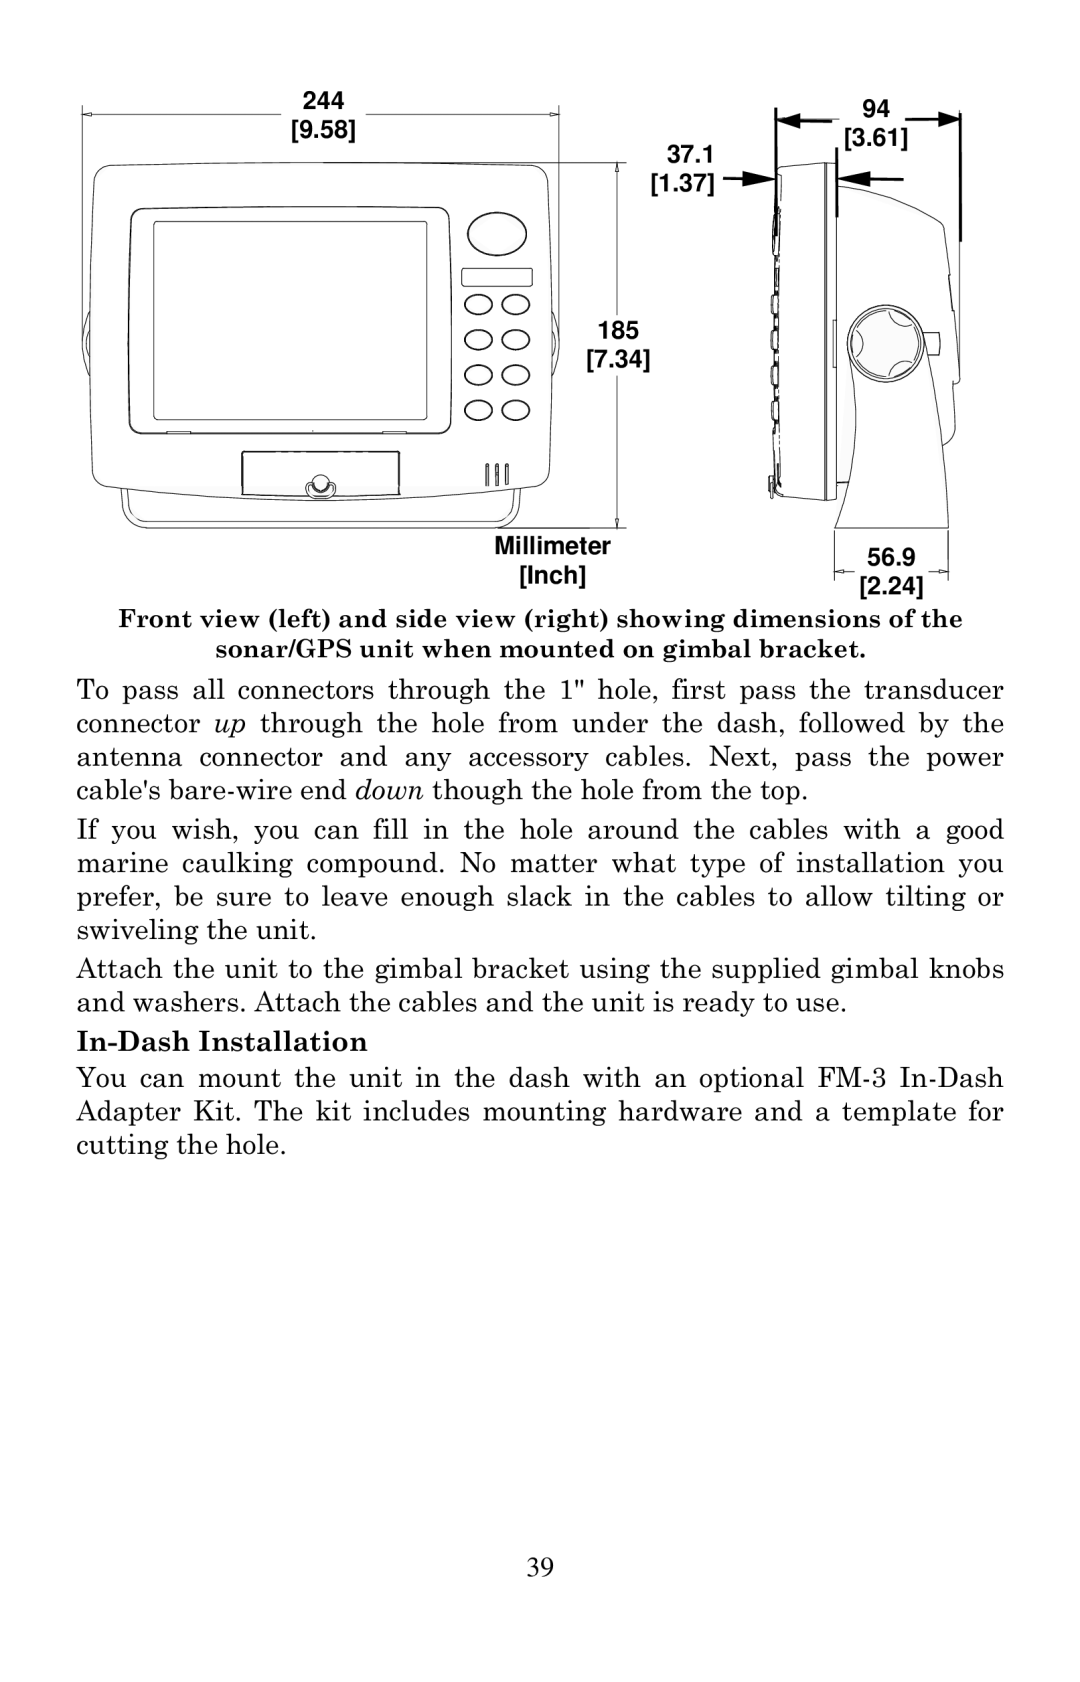
244
[9.58]
37.1
[1.37] ![]()
![]()
185
[7.34]
94
[3.61]
Millimeter
[Inch]
56.9
[2.24]
Front view (left) and side view (right) showing dimensions of the
sonar/GPS unit when mounted on gimbal bracket.
To pass all connectors through the 1" hole, first pass the transducer connector up through the hole from under the dash, followed by the antenna connector and any accessory cables. Next, pass the power cable's
If you wish, you can fill in the hole around the cables with a good marine caulking compound. No matter what type of installation you prefer, be sure to leave enough slack in the cables to allow tilting or swiveling the unit.
Attach the unit to the gimbal bracket using the supplied gimbal knobs and washers. Attach the cables and the unit is ready to use.
In-Dash Installation
You can mount the unit in the dash with an optional
39