ENGLISH
Positioning the Projected Image
You can position the projected image on the screen using the “Lens shift” feature in the menu (OSD). (For an explanation of this feature, see “Configuration” ☞ pg. 32.)
First, project an image on the screen. (If you haven’t an Input signal, display the focus pattern.)
ON
1 | |
| 2, 3, 4, 5 |
POWER |
|
STANDBY |
|
MENU | INPUT |
| |
| PATTERN |
| ENTER |
PATT.
1
MENU
2, 3,
4, 5
ENTER
INPUT ASPECT
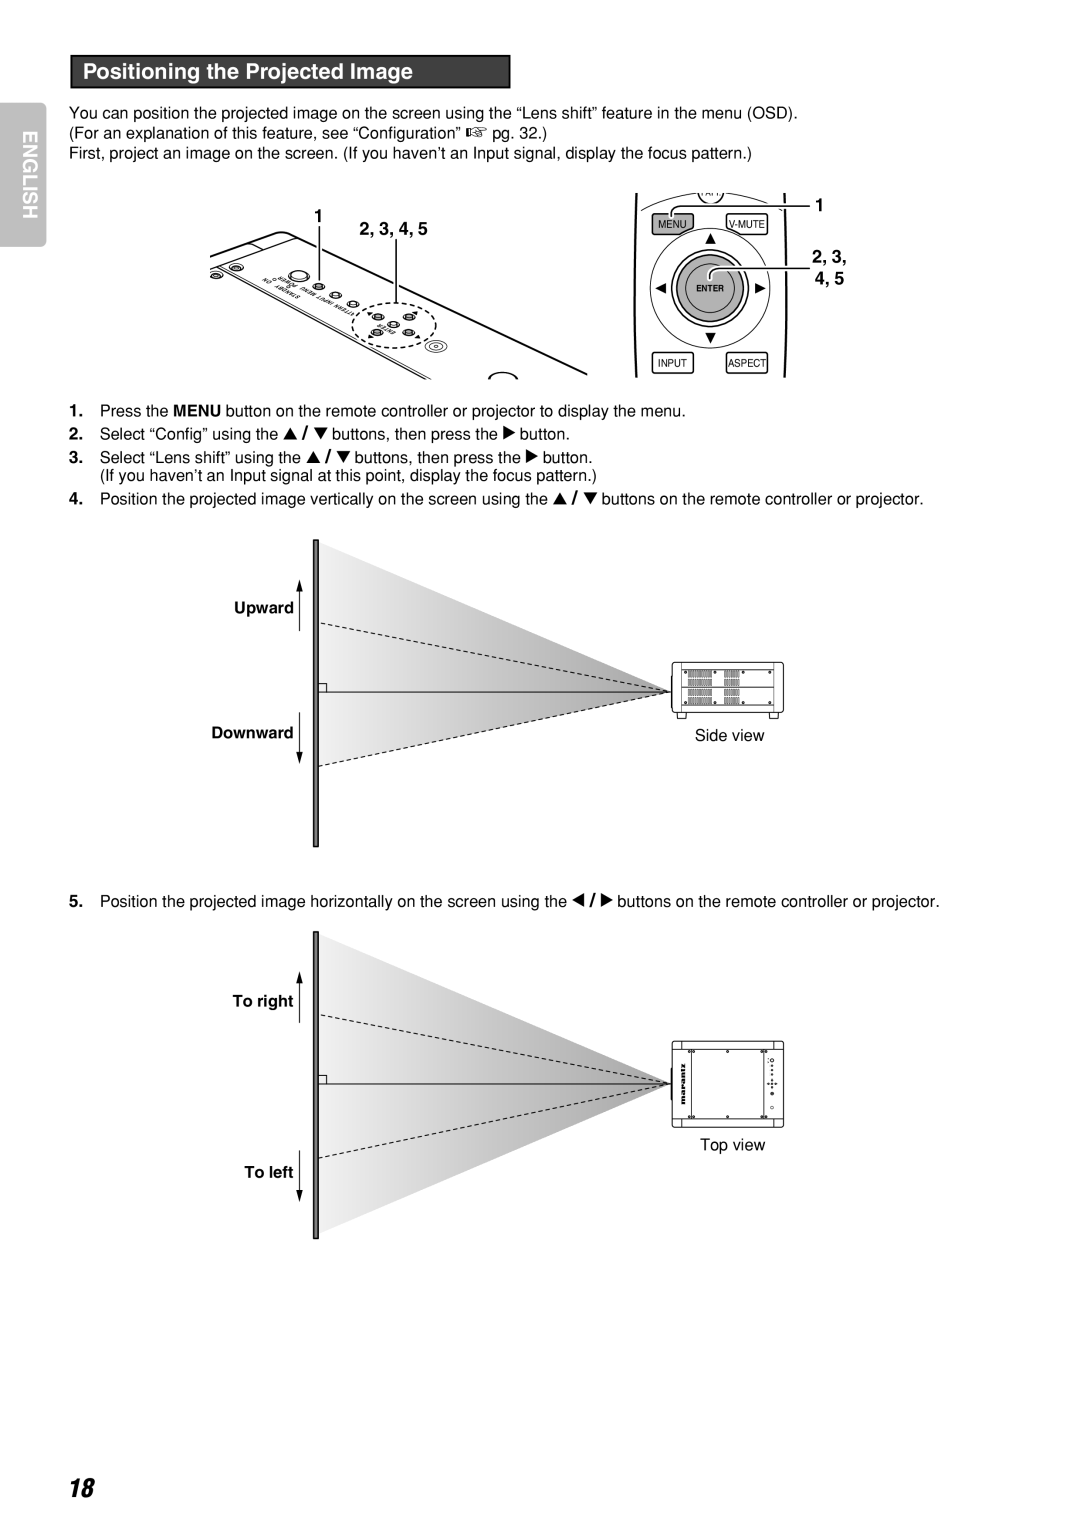
1.Press the MENU button on the remote controller or projector to display the menu.
2.Select “Config” using the 3 / 4 buttons, then press the 2 button.
3.Select “Lens shift” using the 3 / 4 buttons, then press the 2 button. (If you haven’t an Input signal at this point, display the focus pattern.)
4.Position the projected image vertically on the screen using the 3 / 4 buttons on the remote controller or projector.
Upward
Downward | Side view |
|
|
5.Position the projected image horizontally on the screen using the 1 / 2 buttons on the remote controller or projector.
To right
Top view
To left
18