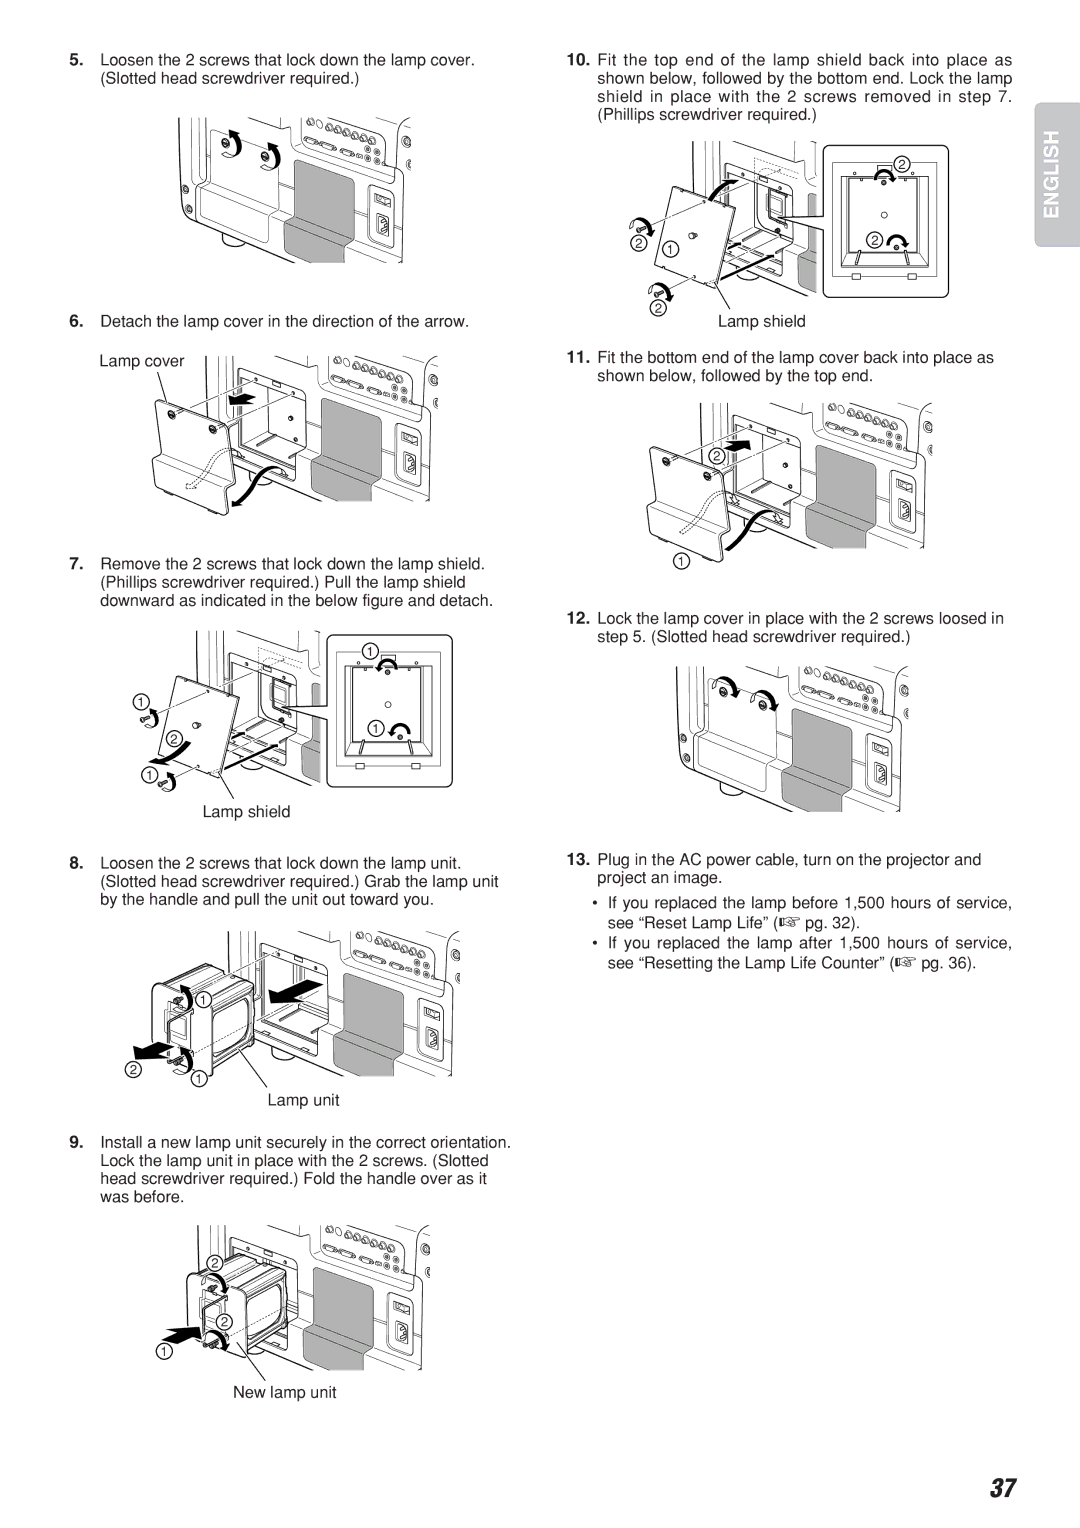
5.Loosen the 2 screws that lock down the lamp cover. (Slotted head screwdriver required.)
6.Detach the lamp cover in the direction of the arrow.
Lamp cover
7.Remove the 2 screws that lock down the lamp shield. (Phillips screwdriver required.) Pull the lamp shield downward as indicated in the below figure and detach.
10.Fit the top end of the lamp shield back into place as shown below, followed by the bottom end. Lock the lamp shield in place with the 2 screws removed in step 7. (Phillips screwdriver required.)
| 2 | ENGLISH |
|
| |
2 | 2 |
|
| 1 |
|
| 2 |
|
| Lamp shield |
|
11.Fit the bottom end of the lamp cover back into place as shown below, followed by the top end.
2![]()
1
12.Lock the lamp cover in place with the 2 screws loosed in step 5. (Slotted head screwdriver required.)
1
2
1
Lamp shield
1 |
1 |
8.Loosen the 2 screws that lock down the lamp unit. (Slotted head screwdriver required.) Grab the lamp unit by the handle and pull the unit out toward you.
1 |
2
1
Lamp unit
9.Install a new lamp unit securely in the correct orientation. Lock the lamp unit in place with the 2 screws. (Slotted head screwdriver required.) Fold the handle over as it was before.
2
2
1
New lamp unit
13.Plug in the AC power cable, turn on the projector and project an image.
•If you replaced the lamp before 1,500 hours of service, see “Reset Lamp Life” (☞ pg. 32).
•If you replaced the lamp after 1,500 hours of service, see “Resetting the Lamp Life Counter” (☞ pg. 36).
37