NAMES AND FUNCTIONS OF PARTS
ENGLISH
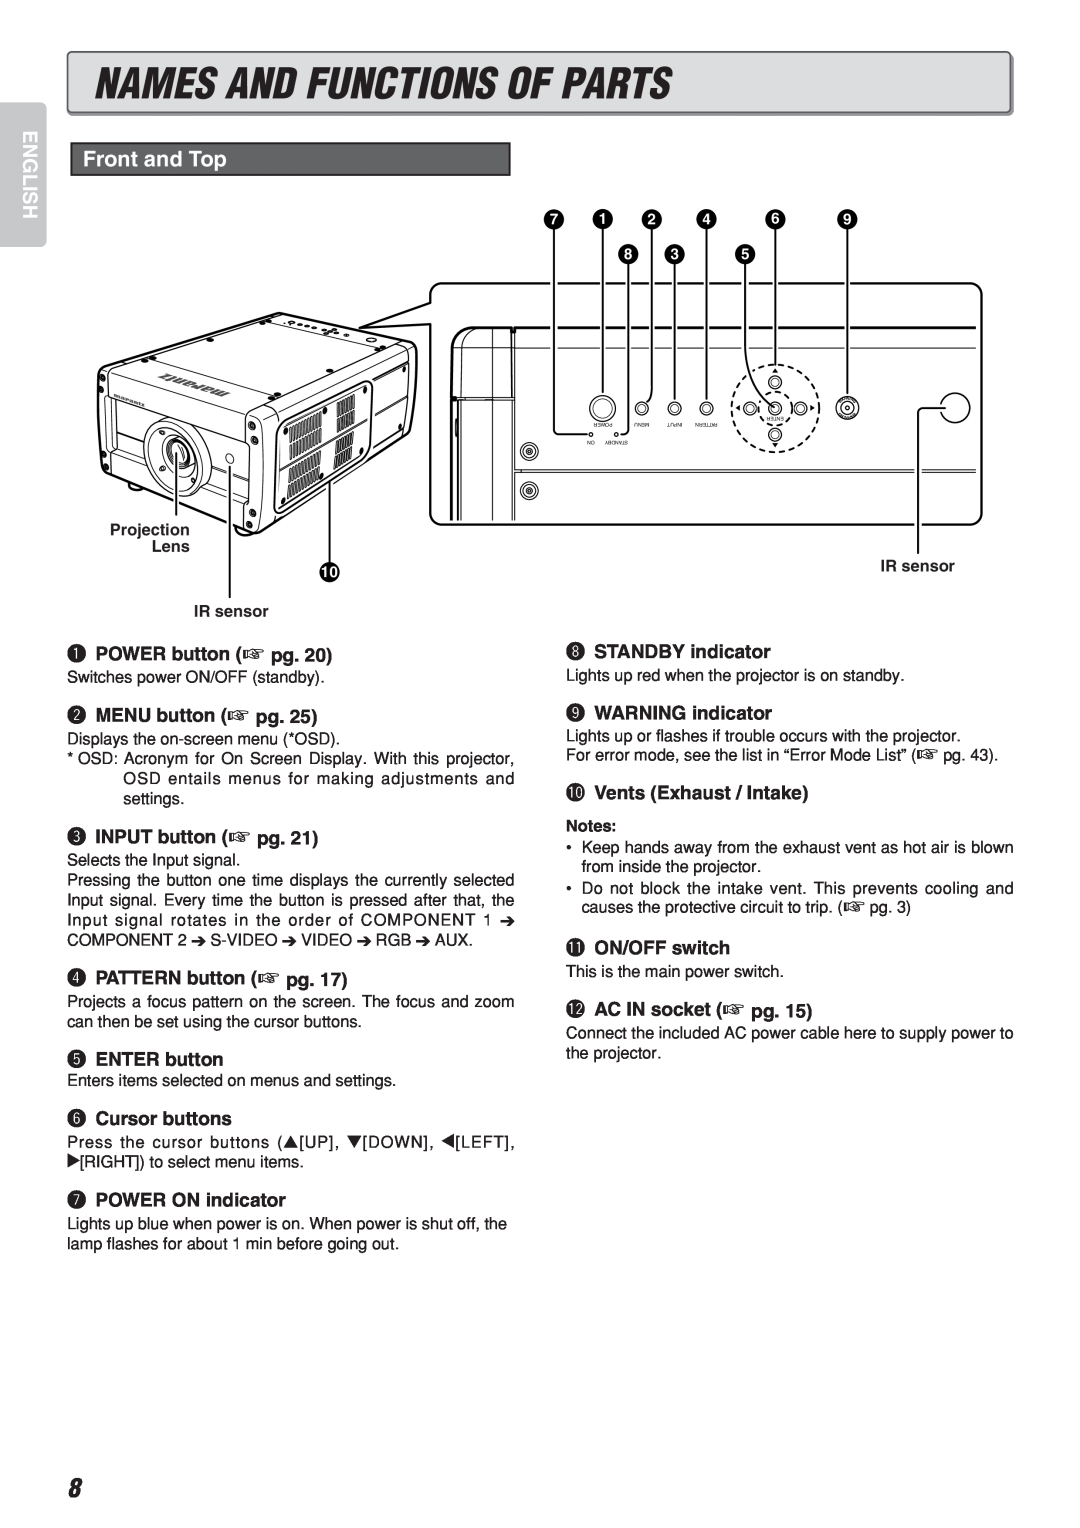
Front and Top
Projection
Lens
10
IR sensor
qPOWER button (☞ pg. 20)
Switches power ON/OFF (standby).
wMENU button (☞ pg. 25)
Displays the
*OSD: Acronym for On Screen Display. With this projector, OSD entails menus for making adjustments and settings.
eINPUT button (☞ pg. 21)
Selects the Input signal.
Pressing the button one time displays the currently selected Input signal. Every time the button is pressed after that, the Input signal rotates in the order of COMPONENT 1 ➔ COMPONENT 2 ➔
rPATTERN button (☞ pg. 17)
Projects a focus pattern on the screen. The focus and zoom can then be set using the cursor buttons.
tENTER button
Enters items selected on menus and settings.
yCursor buttons
Press the cursor buttons (3[UP], 4[DOWN], 1[LEFT], 2[RIGHT]) to select menu items.
7 | 1 | 2 |
| 4 | 6 |
| 9 | |
| 8 |
| 3 |
| 5 |
|
|
|
|
|
|
|
|
|
| RNI | NG |
|
|
|
|
|
| A | ||
|
|
|
|
|
| W |
|
|
|
|
|
|
|
| G | AW | |
|
|
|
|
| ENTER | NINR | ||
POWER | MENU | INPUT | PATTERN |
|
|
|
| |
ON | STANDBY |
|
|
|
|
|
|
|
IR sensor
iSTANDBY indicator
Lights up red when the projector is on standby.
oWARNING indicator
Lights up or flashes if trouble occurs with the projector.
For error mode, see the list in “Error Mode List” (☞ pg. 43).
!0Vents (Exhaust / Intake)
Notes:
•Keep hands away from the exhaust vent as hot air is blown from inside the projector.
•Do not block the intake vent. This prevents cooling and causes the protective circuit to trip. (☞ pg. 3)
!1ON/OFF switch
This is the main power switch.
!2AC IN socket (☞ pg. 15)
Connect the included AC power cable here to supply power to the projector.
uPOWER ON indicator
Lights up blue when power is on. When power is shut off, the lamp flashes for about 1 min before going out.
8