How to Operate Menus
This projector uses menus to make setting and adjustment easy.
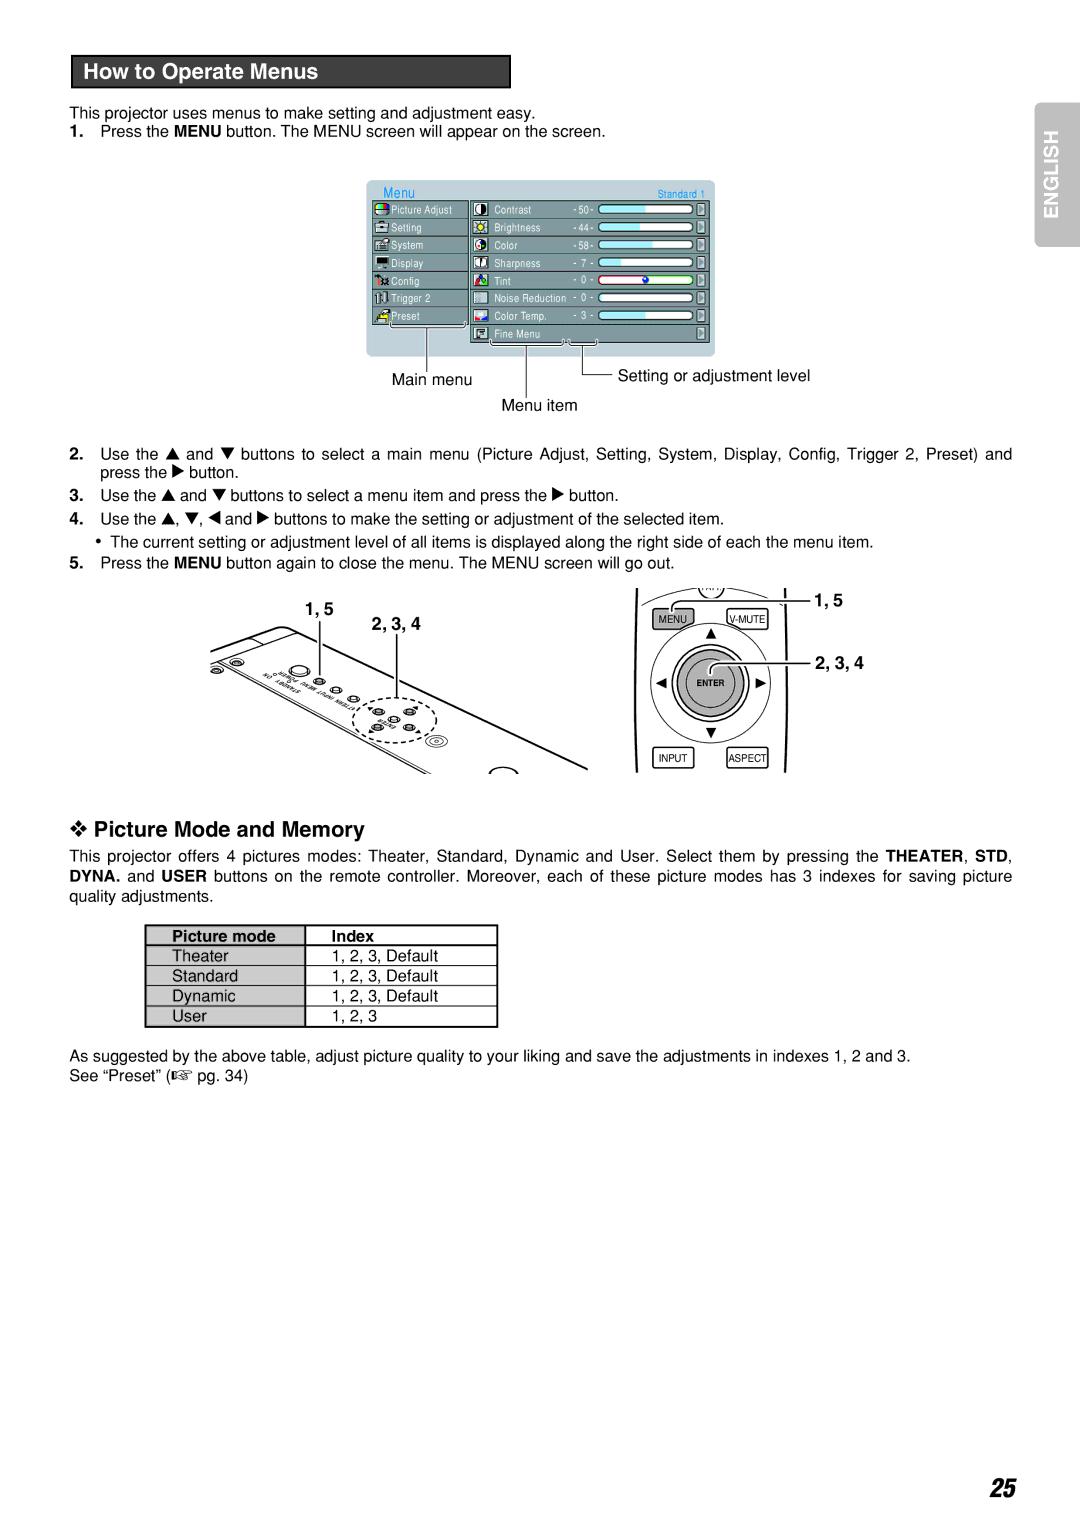
1.Press the MENU button. The MENU screen will appear on the screen.
Menu |
| Standard 1 |
Picture Adjust | Contrast | 50 |
Setting | Brightness | 44 |
System | Color | 58 |
Display | Sharpness | 7 |
Config | Tint | 0 |
Trigger 2 | Noise Reduction | 0 |
Preset | Color Temp. | 3 |
| Fine Menu |
|
Main menu |
| Setting or adjustment level |
Menu item
2.Use the 3 and 4 buttons to select a main menu (Picture Adjust, Setting, System, Display, Config, Trigger 2, Preset) and press the 2 button.
3.Use the 3 and 4 buttons to select a menu item and press the 2 button.
4.Use the 3, 4, 1 and 2 buttons to make the setting or adjustment of the selected item.
•The current setting or adjustment level of all items is displayed along the right side of each the menu item.
5.Press the MENU button again to close the menu. The MENU screen will go out.
ENGLISH
ON
1, 5
| 2, 3, 4 |
POWER |
|
STANDBY |
|
MENU | INPUT |
| |
| PATTERN |
| ENTER |
PATT.
1, 5
MENU
2, 3, 4
ENTER
INPUT ASPECT
❖Picture Mode and Memory
This projector offers 4 pictures modes: Theater, Standard, Dynamic and User. Select them by pressing the THEATER, STD, DYNA. and USER buttons on the remote controller. Moreover, each of these picture modes has 3 indexes for saving picture quality adjustments.
Picture mode | Index |
Theater | 1, 2, 3, Default |
Standard | 1, 2, 3, Default |
Dynamic | 1, 2, 3, Default |
User | 1, 2, 3 |
As suggested by the above table, adjust picture quality to your liking and save the adjustments in indexes 1, 2 and 3. See “Preset” (☞ pg. 34)
25