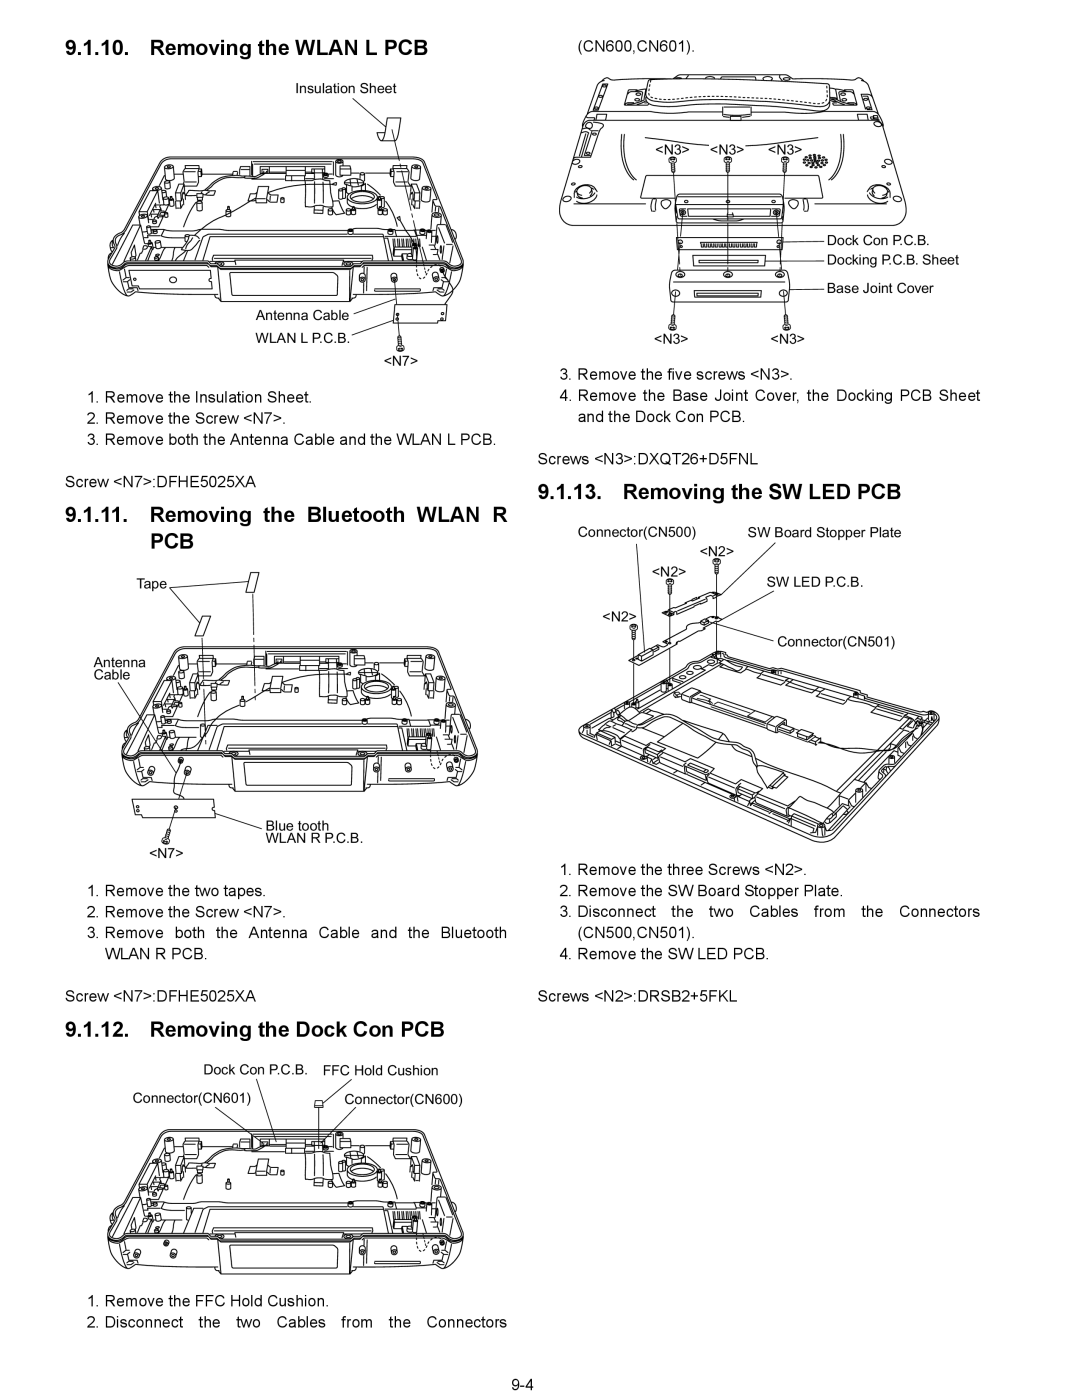
9.1.10. Removing the WLAN L PCB
Insulation Sheet
Antenna Cable
WLAN L P.C.B.
<N7>
1.Remove the Insulation Sheet.
2.Remove the Screw <N7>.
3.Remove both the Antenna Cable and the WLAN L PCB.
Screw <N7>:DFHE5025XA
9.1.11.Removing the Bluetooth WLAN R PCB
Tape
Antenna
Cable
Blue tooth WLAN R P.C.B.
<N7>
1.Remove the two tapes.
2.Remove the Screw <N7>.
3.Remove both the Antenna Cable and the Bluetooth
WLAN R PCB.
Screw <N7>:DFHE5025XA
9.1.12. Removing the Dock Con PCB
Dock Con P.C.B. FFC Hold Cushion
Connector(CN601)Connector(CN600)
1.Remove the FFC Hold Cushion.
2.Disconnect the two Cables from the Connectors
(CN600,CN601).
<N3> <N3> <N3>
Dock Con P.C.B.
Docking P.C.B. Sheet
Base Joint Cover
<N3><N3>
3.Remove the five screws <N3>.
4.Remove the Base Joint Cover, the Docking PCB Sheet and the Dock Con PCB.
Screws <N3>:DXQT26+D5FNL
9.1.13. Removing the SW LED PCB
Connector(CN500) | SW Board Stopper Plate |
<N2>
<N2>
SW LED P.C.B.
<N2>
Connector(CN501)
1.Remove the three Screws <N2>.
2.Remove the SW Board Stopper Plate.
3.Disconnect the two Cables from the Connectors (CN500,CN501).
4.Remove the SW LED PCB.
Screws <N2>:DRSB2+5FKL
