Match to the center.
Shield Tape
FFC(Audio Card)
Shield Tape
Remove half of the Release
Paper and wrap around one loop.
Attachment
Standard
Match to the center. |
|
| |
0~0.5mm |
|
|
|
| Ensure the Cable does not lean to the CN | ||
| side. (Avoid coming over the A line edge | ||
| to keep the inserting room for CN. ) | ||
0~0.5mm |
|
|
|
FFC |
|
| End of the CN |
|
| 0 to 0.5 mm | |
(Wireless Card) Busterade |
| Edge | Attachment |
Safety Working |
| ||
FFC(Audio Card) Check Insert/Lock. | A | Sheet | |
Safety Working
Check Insert/Lock.
1 ![]() 0.5mm
0.5mm
Edge Sheet
Connect.
FFC |
|
|
| Tape |
|
|
(Wireless Card) |
|
|
| |||
| Safety Working |
| ||||
|
|
|
|
|
|
|
|
| Check Insert/Lock. | ||||
|
| Connect. |
|
BT FFC |
|
| a |
b |
|
| |
|
| c | |
| Connect. | Safety Working | |
|
|
| |
|
| Check Insert/Lock. |
|
Ensure the correct order. ANT Cable→FFC→Spring
1~3mm ![]()
Connect.
Safety Working
Check Insert/Lock.
0~1mm
 Shield Tape
Tape
Power Cable
1~3mm
Match to the center.
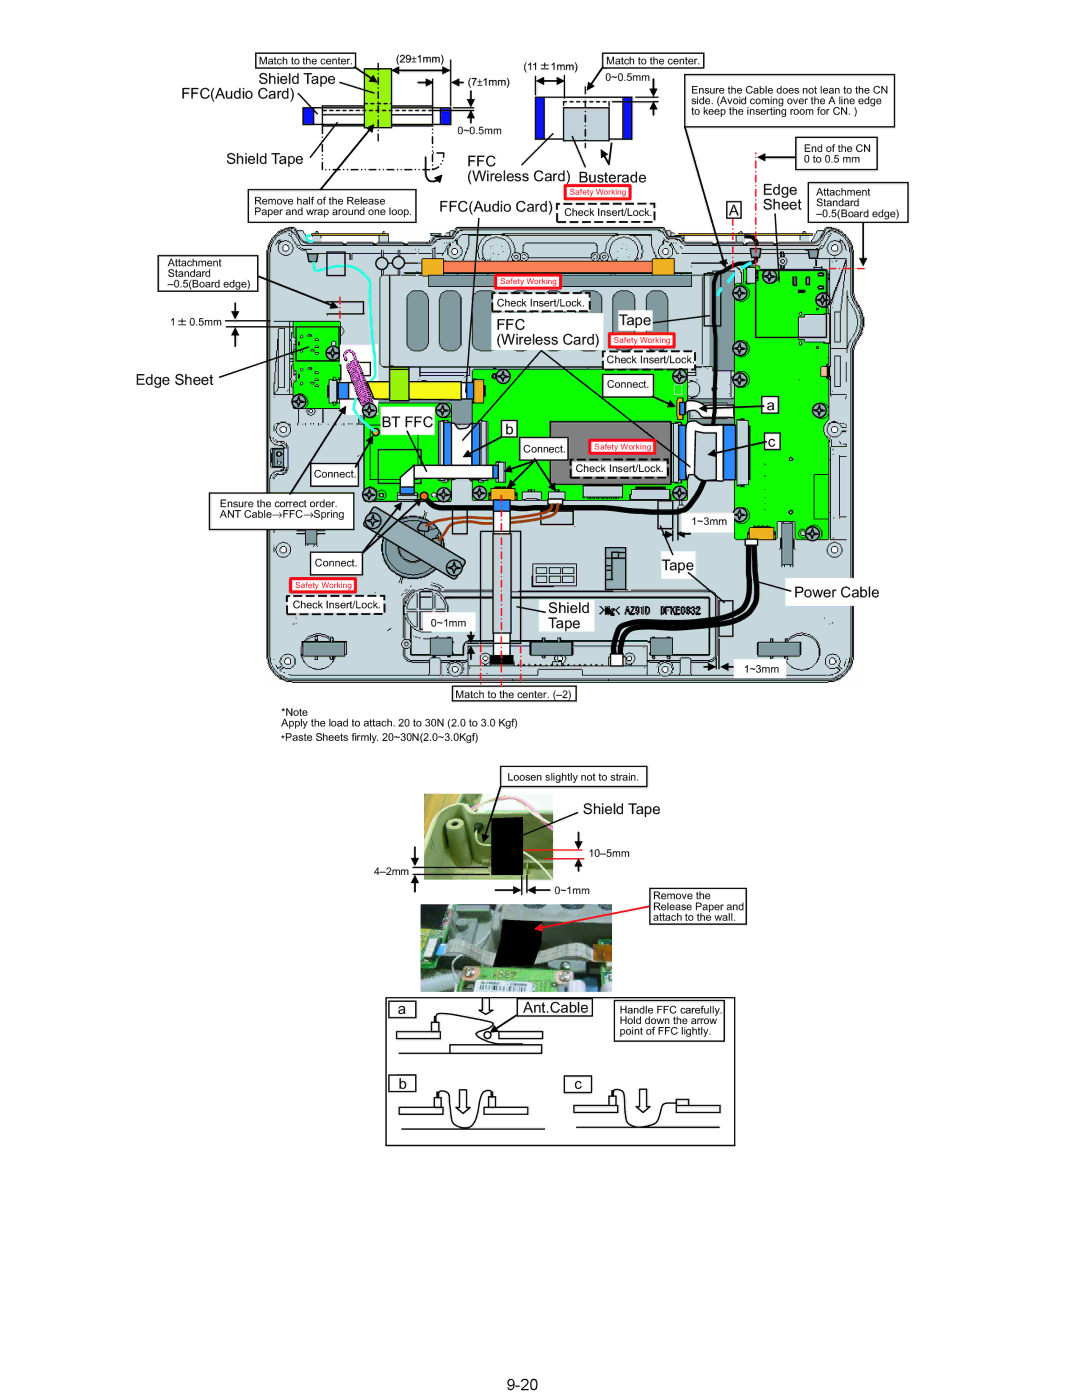
*Note
Apply the load to attach. 20 to 30N (2.0 to 3.0 Kgf) *Paste Sheets firmly. 20~30N(2.0~3.0Kgf)
Loosen slightly not to strain.
Shield Tape | |
| |
| |
0~1mm | Remove the |
| |
| Release Paper and |
| attach to the wall. |
a
Ant.Cable
Handle FFC carefully. Hold down the arrow point of FFC lightly.
b
c
