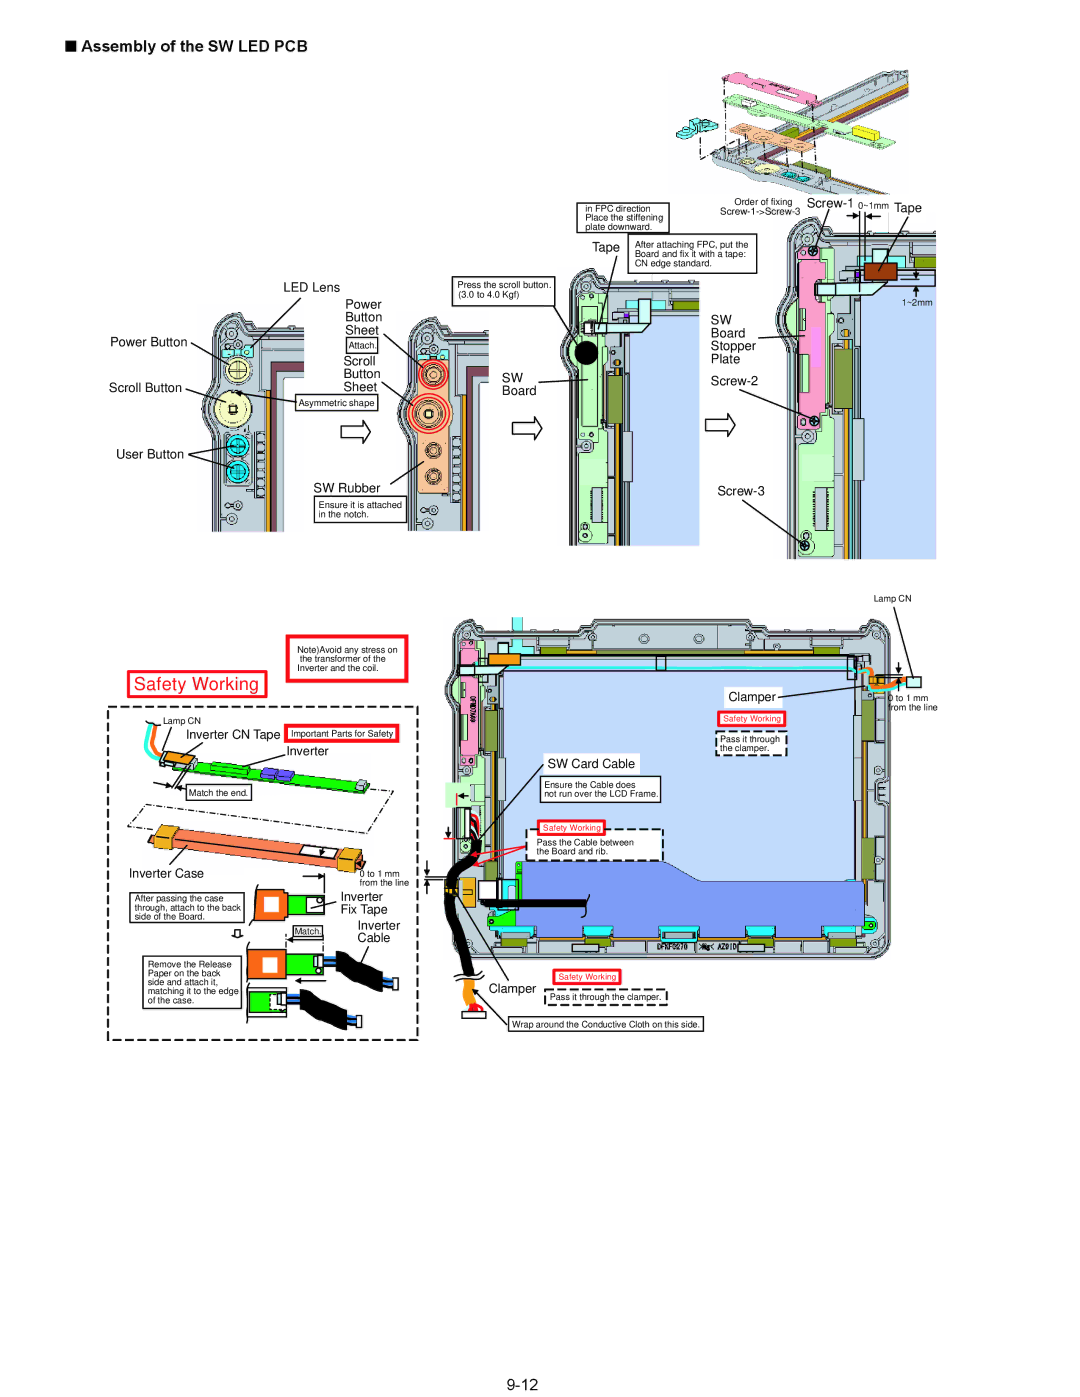
■Assembly of the SW LED PCB
| LED Lens | ||||
|
| Power | |||
|
| Button | |||
Power Button |
| Sheet | |||
|
| Attach. |
|
| |
|
|
| Scroll |
| |
|
| Button | |||
Scroll Button |
| Sheet | |||
|
| Asymmetric shape |
| ||
User Button
SW Rubber
Ensure it is attached in the notch.
Press the scroll button. (3.0 to 4.0 Kgf)
SW
Board
in FPC direction | 0~1mm | Tape | ||
|
| Order of fixing |
|
|
Place the stiffening |
|
|
| |
plate downward. |
|
|
| |
Tape | After attaching FPC, put the |
|
| |
| Board and fix it with a tape: |
|
| |
| CN edge standard. |
|
|
|
|
|
|
| 1~2mm |
SW
Board
Stopper
Plate
Lamp CN
Safety Working
Lamp CN
Inverter CN Tape
Match the end.
Inverter Case
After passing the case through, attach to the back side of the Board.
Note)Avoid any stress on the transformer of the Inverter and the coil.
Important Parts for Safety
Inverter
0 to 1 mm from the line
Inverter
Fix Tape
Clamper | 0 to 1 mm |
| from the line |
Safety Working |
|
Pass it through |
|
the clamper. |
|
SW Card Cable
Ensure the Cable does
not run over the LCD Frame.
Safety Working
Pass the Cable between the Board and rib.
Remove the Release Paper on the back side and attach it, matching it to the edge of the case.
Match.
Inverter Cable
Safety Working
Clamper
Pass it through the clamper.
Wrap around the Conductive Cloth on this side.