APPENDIX #1 – INSTALLING THE HDD
Follow these steps carefully to ensure correct installation.
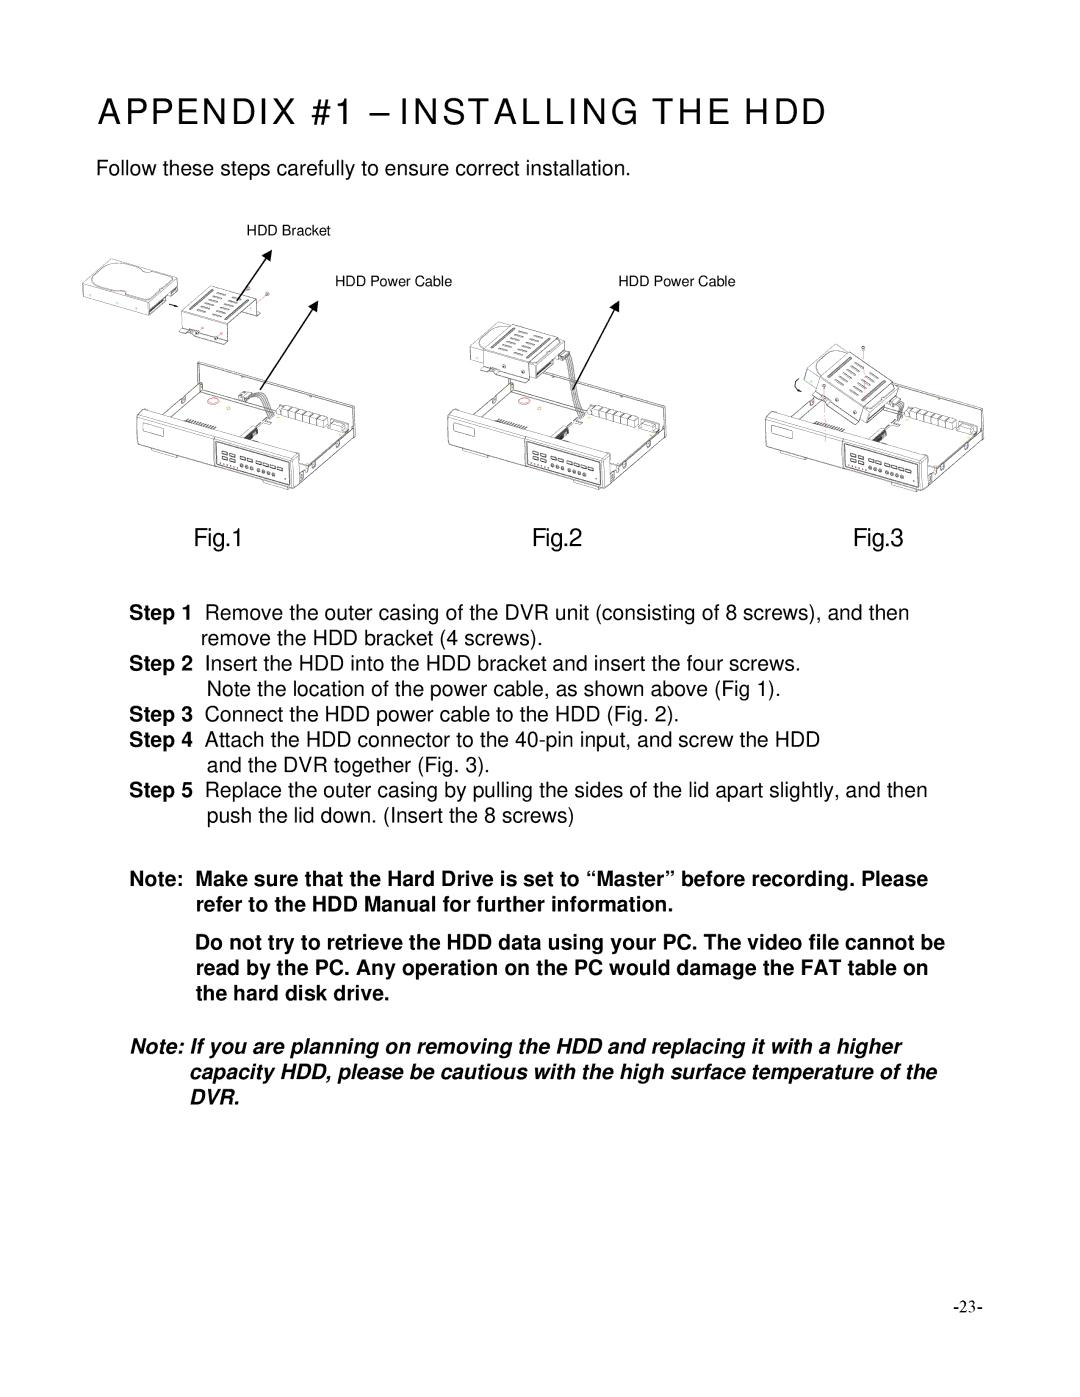
HDD Bracket
HDD Power Cable | HDD Power Cable |
Fig.1 | Fig.2 | Fig.3 |
Step 1 Remove the outer casing of the DVR unit (consisting of 8 screws), and then remove the HDD bracket (4 screws).
Step 2 Insert the HDD into the HDD bracket and insert the four screws. Note the location of the power cable, as shown above (Fig 1).
Step 3 Connect the HDD power cable to the HDD (Fig. 2).
Step 4 Attach the HDD connector to the
Step 5 Replace the outer casing by pulling the sides of the lid apart slightly, and then push the lid down. (Insert the 8 screws)
Note: Make sure that the Hard Drive is set to “Master” before recording. Please refer to the HDD Manual for further information.
Do not try to retrieve the HDD data using your PC. The video file cannot be read by the PC. Any operation on the PC would damage the FAT table on the hard disk drive.
Note: If you are planning on removing the HDD and replacing it with a higher capacity HDD, please be cautious with the high surface temperature of the DVR.