SMART 216 / 232 IP
9.1.2 Connecting a ROC USB
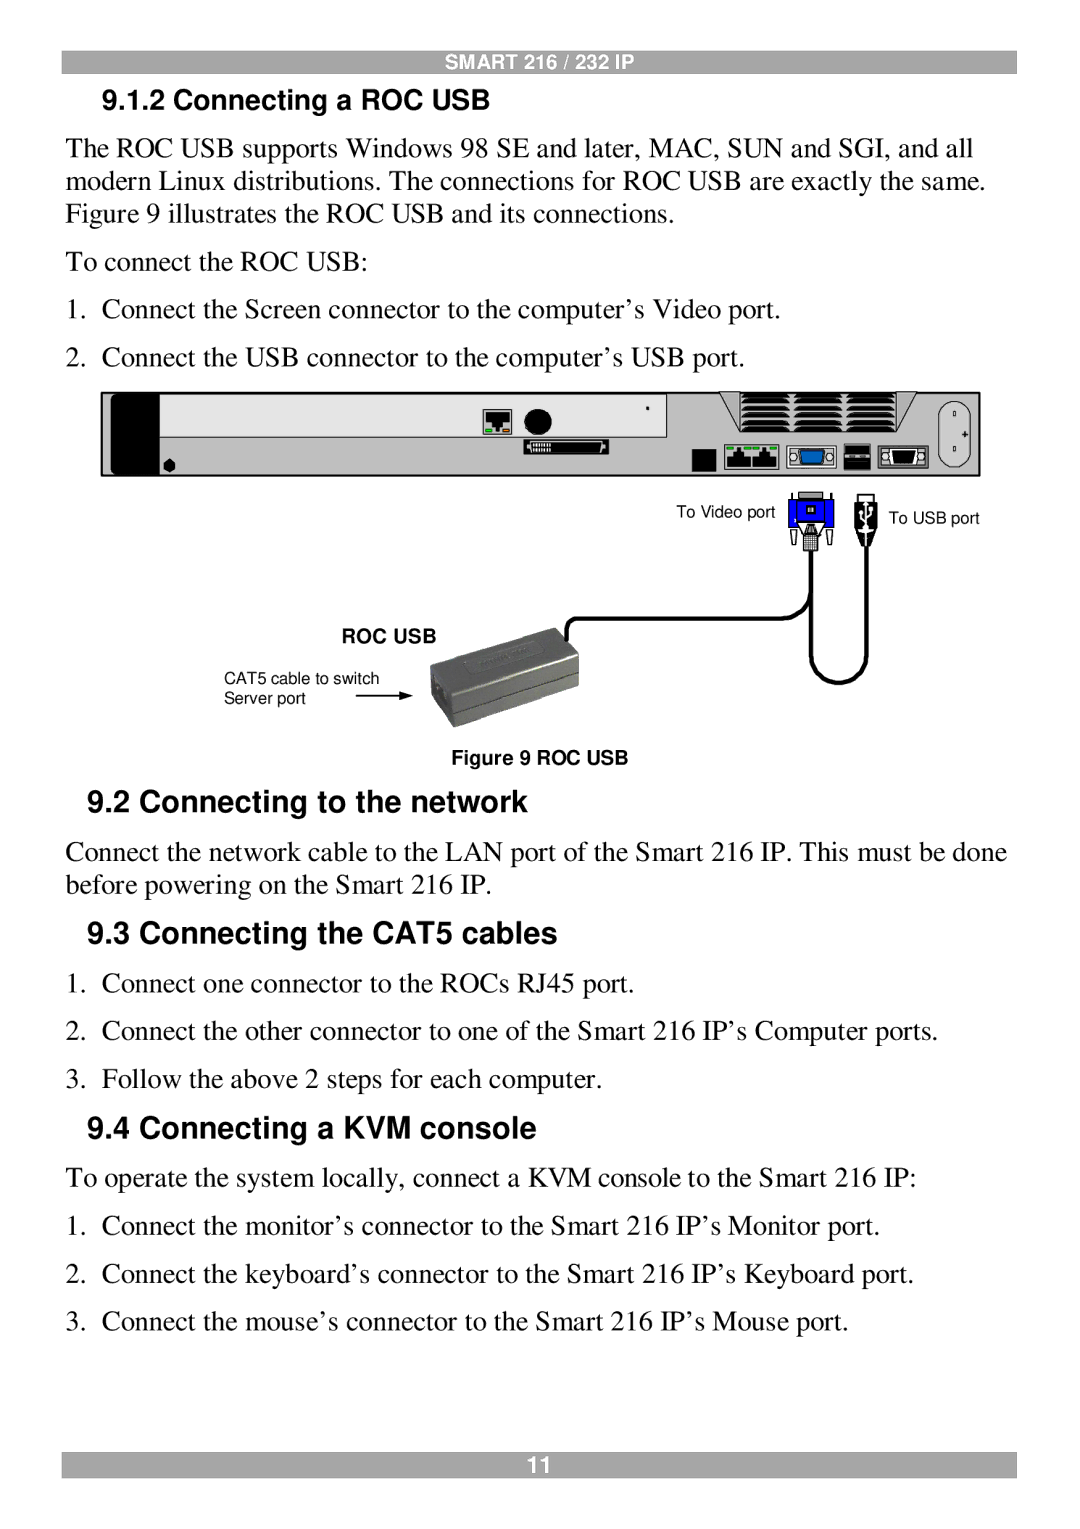
The ROC USB supports Windows 98 SE and later, MAC, SUN and SGI, and all modern Linux distributions. The connections for ROC USB are exactly the same. Figure 9 illustrates the ROC USB and its connections.
To connect the ROC USB:
1.Connect the Screen connector to the computer’s Video port.
2.Connect the USB connector to the computer’s USB port.
To Video port
To USB port
ROC USB
CAT5 cable to switch
Server port
Figure 9 ROC USB
9.2 Connecting to the network
Connect the network cable to the LAN port of the Smart 216 IP. This must be done before powering on the Smart 216 IP.
9.3Connecting the CAT5 cables
1.Connect one connector to the ROCs RJ45 port.
2.Connect the other connector to one of the Smart 216 IP’s Computer ports.
3.Follow the above 2 steps for each computer.
9.4Connecting a KVM console
To operate the system locally, connect a KVM console to the Smart 216 IP:
1.Connect the monitor’s connector to the Smart 216 IP’s Monitor port.
2.Connect the keyboard’s connector to the Smart 216 IP’s Keyboard port.
3.Connect the mouse’s connector to the Smart 216 IP’s Mouse port.
11