OPERATING PROCEDURE | PHOTOS |
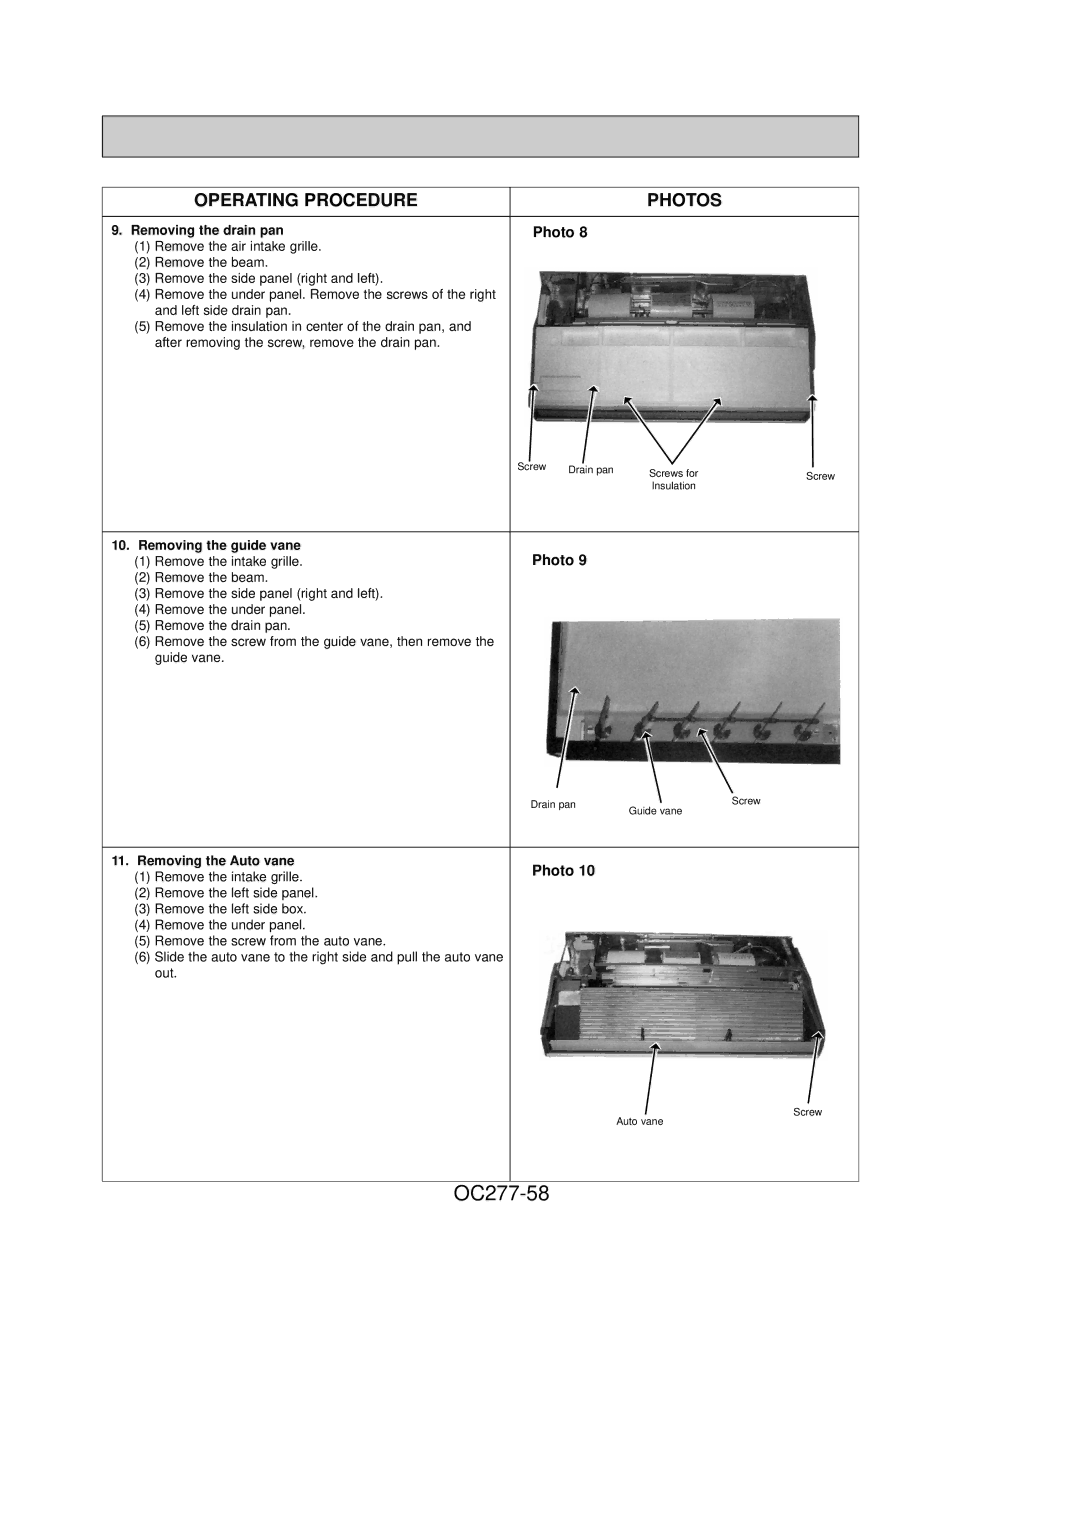
9. Removing the drain pan | Photo 8 |
(1)Remove the air intake grille.
(2)Remove the beam.
(3)Remove the side panel (right and left).
(4)Remove the under panel. Remove the screws of the right and left side drain pan.
(5)Remove the insulation in center of the drain pan, and after removing the screw, remove the drain pan.
Screw | Drain pan | Screws for | Screw |
| |||
|
| ||
|
| Insulation |
|
10. Removing the guide vane | Photo 9 |
(1) Remove the intake grille. |
(2)Remove the beam.
(3)Remove the side panel (right and left).
(4)Remove the under panel.
(5)Remove the drain pan.
(6)Remove the screw from the guide vane, then remove the guide vane.
Drain pan | Screw | |
Guide vane | ||
|
11. Removing the Auto vane | Photo 10 | |
(1) Remove the intake grille. | ||
|
(2)Remove the left side panel.
(3)Remove the left side box.
(4)Remove the under panel.
(5)Remove the screw from the auto vane.
(6)Slide the auto vane to the right side and pull the auto vane out.
Screw
Auto vane