Onkyo TX-DS898 instruction manual Audio Adjust

Models: TX-DS898

1 72
Download 72 pages 57.01 Kb
Page 41
Image 41
Audio Adjust

Audio Adjust

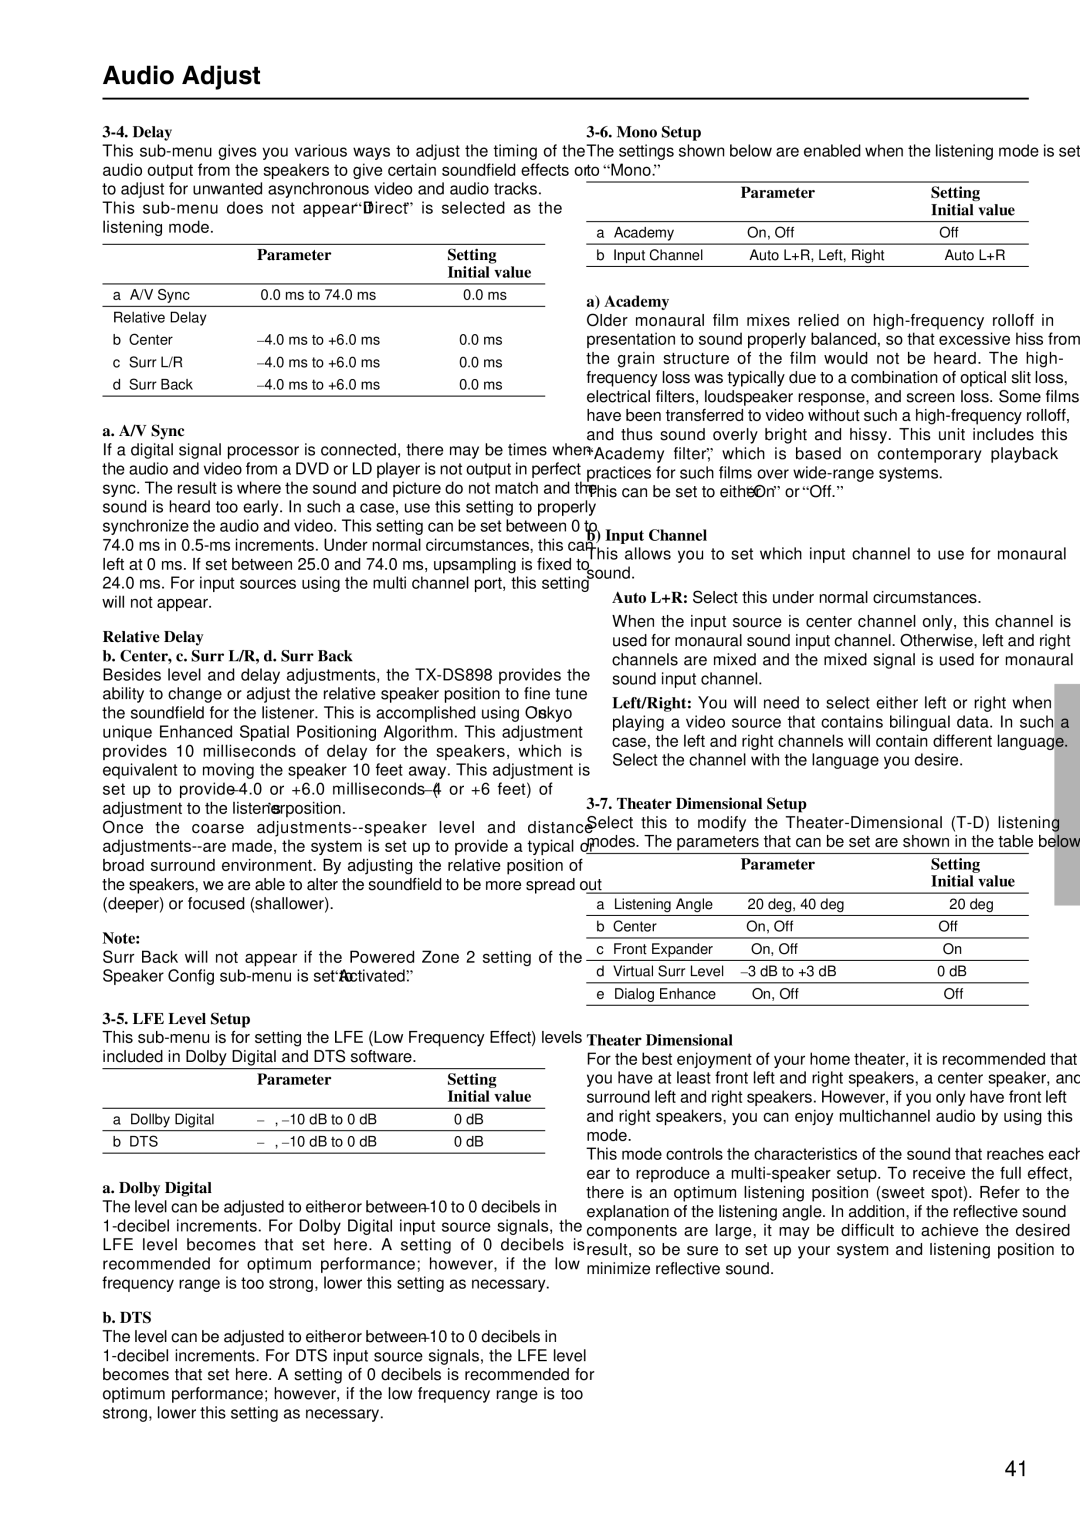
3-4. Delay

This sub-menu gives you various ways to adjust the timing of the audio output from the speakers to give certain soundfield effects or to adjust for unwanted asynchronous video and audio tracks.

This sub-menu does not appear if “Direct” is selected as the listening mode.


Parameter

Setting


Initial value


a

A/V Sync

0.0 ms to 74.0 ms

0.0 ms


Relative Delay


b

Center

–4.0 ms to +6.0 ms

0.0 ms

c

Surr L/R

–4.0 ms to +6.0 ms

0.0 ms

d

Surr Back

–4.0 ms to +6.0 ms

0.0 ms


a. A/V Sync

If a digital signal processor is connected, there may be times when the audio and video from a DVD or LD player is not output in perfect sync. The result is where the sound and picture do not match and the sound is heard too early. In such a case, use this setting to properly synchronize the audio and video. This setting can be set between 0 to

74.0ms in 0.5-ms increments. Under normal circumstances, this can left at 0 ms. If set between 25.0 and 74.0 ms, upsampling is fixed to

24.0ms. For input sources using the multi channel port, this setting will not appear.

Relative Delay

b. Center, c. Surr L/R, d. Surr Back

Besides level and delay adjustments, the TX-DS898 provides the ability to change or adjust the relative speaker position to fine tune the soundfield for the listener. This is accomplished using Onkyo’s unique Enhanced Spatial Positioning Algorithm. This adjustment provides 10 milliseconds of delay for the speakers, which is equivalent to moving the speaker 10 feet away. This adjustment is set up to provide –4.0 or +6.0 milliseconds (–4 or +6 feet) of adjustment to the listener’s position.

Once the coarse adjustments--speaker level and distance adjustments--are made, the system is set up to provide a typical or broad surround environment. By adjusting the relative position of the speakers, we are able to alter the soundfield to be more spread out (deeper) or focused (shallower).

Note:

Surr Back will not appear if the Powered Zone 2 setting of the Speaker Config sub-menu is set to “Activated.”

3-5. LFE Level Setup

This sub-menu is for setting the LFE (Low Frequency Effect) levels included in Dolby Digital and DTS software.


Parameter

Setting


Initial value

a Dollby Digital

, –10 dB to 0 dB

0 dB


b DTS

, –10 dB to 0 dB

0 dB


a. Dolby Digital

The level can be adjusted to either or between –10 to 0 decibels in 1-decibel increments. For Dolby Digital input source signals, the LFE level becomes that set here. A setting of 0 decibels is recommended for optimum performance; however, if the low frequency range is too strong, lower this setting as necessary.

b. DTS

The level can be adjusted to either or between –10 to 0 decibels in 1-decibel increments. For DTS input source signals, the LFE level becomes that set here. A setting of 0 decibels is recommended for optimum performance; however, if the low frequency range is too strong, lower this setting as necessary.

3-6. Mono Setup

The settings shown below are enabled when the listening mode is set to “Mono.”


Parameter

Setting


Initial value

a

Academy

On, Off

Off


b

Input Channel

Auto L+R, Left, Right

Auto L+R


a) Academy

Older monaural film mixes relied on high-frequency rolloff in presentation to sound properly balanced, so that excessive hiss from the grain structure of the film would not be heard. The high- frequency loss was typically due to a combination of optical slit loss, electrical filters, loudspeaker response, and screen loss. Some films have been transferred to video without such a high-frequency rolloff, and thus sound overly bright and hissy. This unit includes this “Academy filter,” which is based on contemporary playback practices for such films over wide-range systems.

This can be set to either “On” or “Off.”

b) Input Channel

This allows you to set which input channel to use for monaural sound.

Auto L+R: Select this under normal circumstances.

When the input source is center channel only, this channel is used for monaural sound input channel. Otherwise, left and right channels are mixed and the mixed signal is used for monaural sound input channel.

Left/Right: You will need to select either left or right when playing a video source that contains bilingual data. In such a case, the left and right channels will contain different language. Select the channel with the language you desire.

3-7. Theater Dimensional Setup

Select this to modify the Theater-Dimensional (T-D) listening modes. The parameters that can be set are shown in the table below.


Parameter

Setting


Initial value

a

Listening Angle

20 deg, 40 deg

20 deg


b

Center

On, Off

Off


c

Front Expander

On, Off

On


d

Virtual Surr Level

–3 dB to +3 dB

0 dB


e

Dialog Enhance

On, Off

Off


Theater Dimensional

For the best enjoyment of your home theater, it is recommended that you have at least front left and right speakers, a center speaker, and surround left and right speakers. However, if you only have front left and right speakers, you can enjoy multichannel audio by using this mode.

This mode controls the characteristics of the sound that reaches each ear to reproduce a multi-speaker setup. To receive the full effect, there is an optimum listening position (sweet spot). Refer to the explanation of the listening angle. In addition, if the reflective sound components are large, it may be difficult to achieve the desired result, so be sure to set up your system and listening position to minimize reflective sound.

41

Page 41
Image 41
Onkyo TX-DS898 instruction manual Audio Adjust