Connecting the remote zone (Zone 2) speakers
Outline
The
Main Room
PRE OUT
R L
FRONT
Remote Zone (Zone 2)
Zone 2 | Zone 2 |
Left | Right |
main zone. In addition, the IR IN/OUT allows you to control the
SUB
SURR
CENTER
speaker | speaker |
The diagram below shows how to make the proper connections for the remote zone.
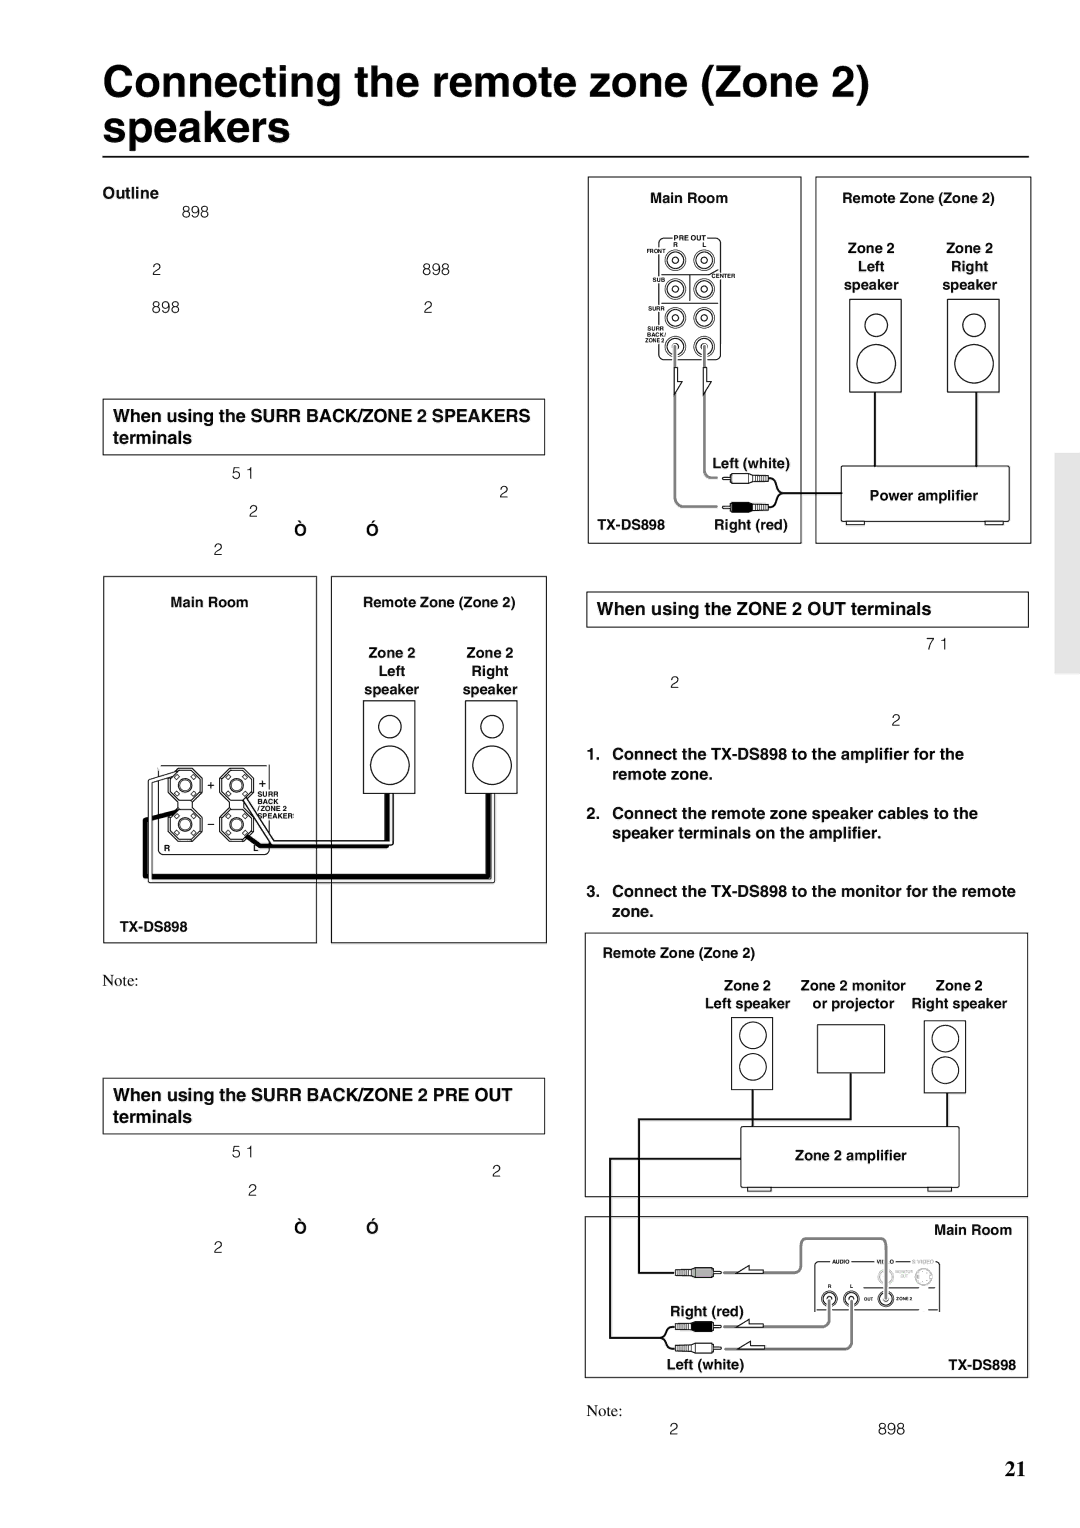
When using the SURR BACK/ZONE 2 SPEAKERS terminals
If you are using a
With this connection, select “Activated” for the Speaker Setup → Powered Zone 2 setting in the Setup menu.
SURR
BACK/
ZONE 2
Left (white)
Right (red) |
Power amplifier
Main Room
SURR
BACK
/ ZONE 2 SPEAKER
RL
Note:
Remote Zone (Zone 2)
Zone 2 |
| Zone 2 | |
Left |
| Right | |
speaker | speaker | ||
|
|
|
|
|
|
|
|
When using the ZONE 2 OUT terminals
When you have connected all the speakers for
The ZONE 2 OUT terminal is a constant output. Connect to the LINE input of the amplifier (CD, tape, etc.). Adjust the volume with the amplifier connected to the ZONE 2 OUT terminal.
1.Connect the
2.Connect the remote zone speaker cables to the speaker terminals on the amplifier.
Adjust the volume level at the amplifier.
3.Connect the TX-DS898 to the monitor for the remote zone.
Remote Zone (Zone 2)
Zone 2 | Zone 2 monitor | Zone 2 |
It is important to be aware of the speaker impedance (see previous page).
When using the SURR BACK/ZONE 2 PRE OUT terminals
If you are using a
With this connection, select “Activated” for the Speaker Setup → Powered Zone 2 setting in the Setup menu.
Left speaker or projector Right speaker |
Zone 2 amplifier | |||
|
|
| Main Room |
| AUDIO | VIDEO | S VIDEO |
|
|
| MONITOR |
|
|
| OUT |
R | L |
|
|
| OUT |
| ZONE 2 |
Right (red) |
|
|
|
Left (white) |
|
| |
Note:
The ZONE 2 out terminals of the
21