|
| Operating Instructions |
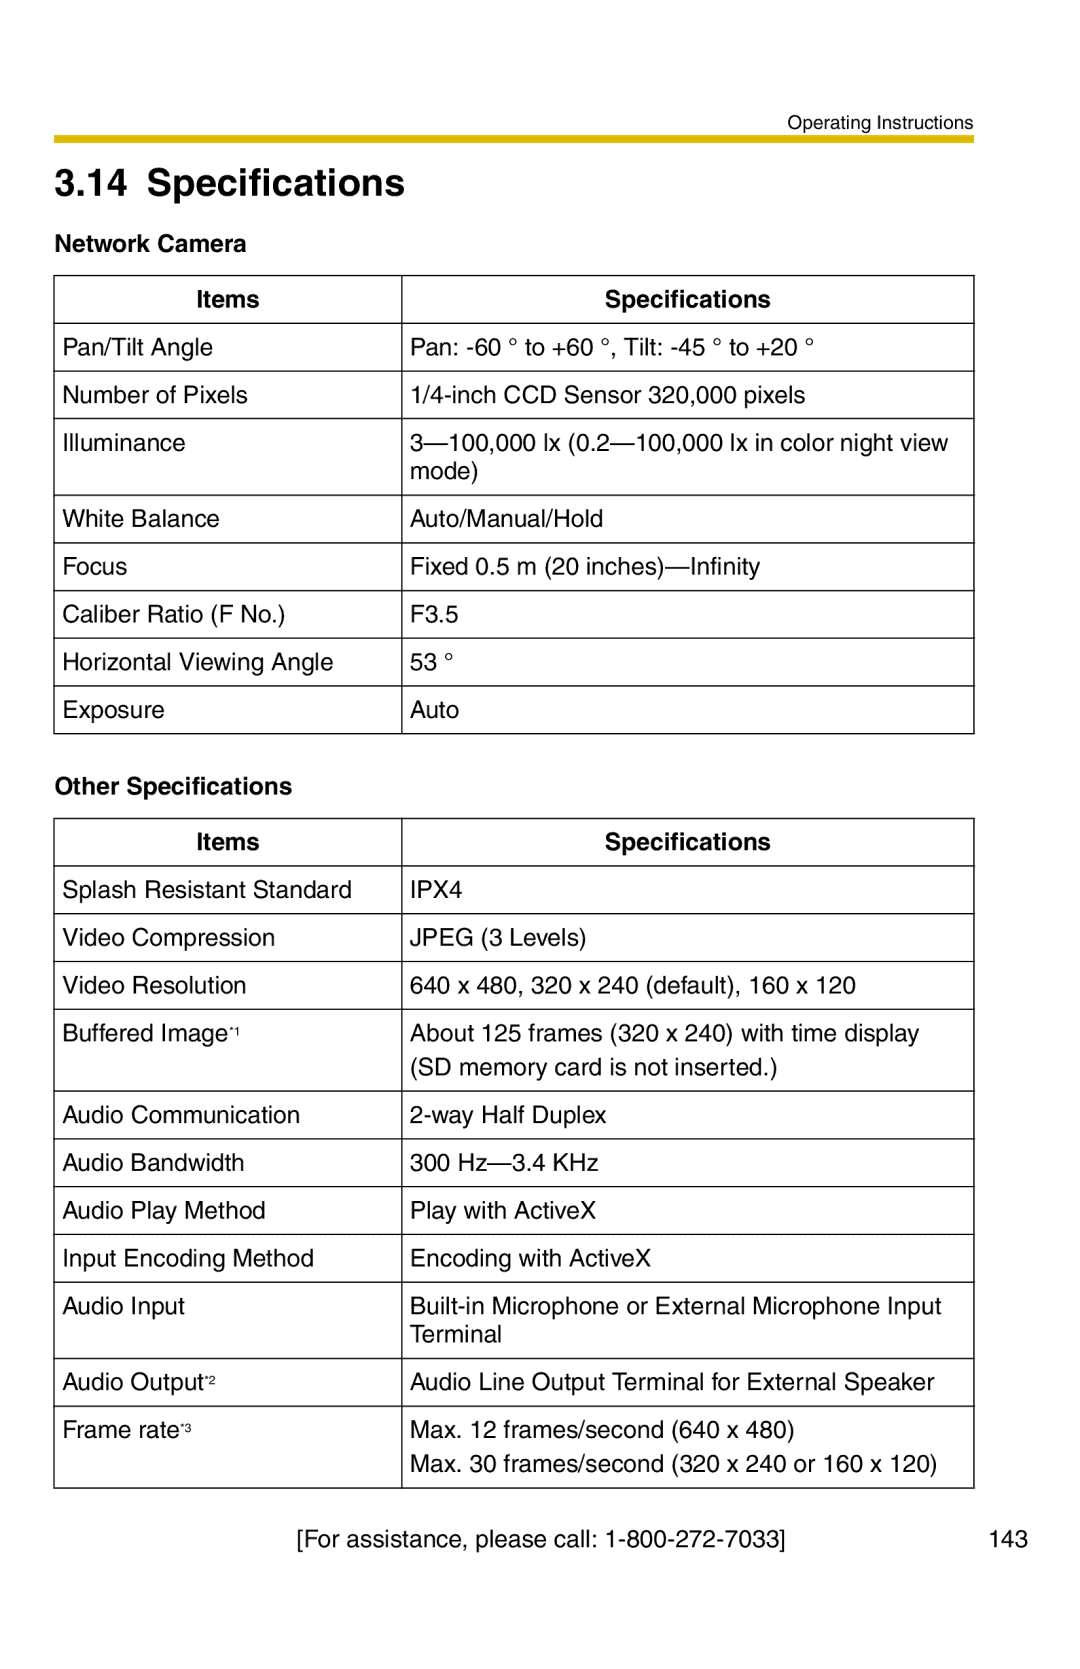
3.14 Specifications |
| |
Network Camera |
| |
|
|
|
Items |
| Specifications |
|
|
|
Pan/Tilt Angle |
| Pan: |
|
|
|
Number of Pixels |
| |
|
|
|
Illuminance |
| |
|
| mode) |
|
|
|
White Balance |
| Auto/Manual/Hold |
|
|
|
Focus |
| Fixed 0.5 m (20 |
|
|
|
Caliber Ratio (F No.) |
| F3.5 |
|
|
|
Horizontal Viewing Angle |
| 53 ° |
|
|
|
Exposure |
| Auto |
|
|
|
Other Specifications |
| |
|
| |
Items |
| Specifications |
|
|
|
Splash Resistant Standard |
| IPX4 |
|
|
|
Video Compression |
| JPEG (3 Levels) |
|
|
|
Video Resolution |
| 640 x 480, 320 x 240 (default), 160 x 120 |
|
|
|
Buffered Image*1 |
| About 125 frames (320 x 240) with time display |
|
| (SD memory card is not inserted.) |
|
|
|
Audio Communication |
| |
|
|
|
Audio Bandwidth |
| 300 |
|
|
|
Audio Play Method |
| Play with ActiveX |
|
|
|
Input Encoding Method |
| Encoding with ActiveX |
|
|
|
Audio Input |
| |
|
| Terminal |
|
|
|
Audio Output*2 |
| Audio Line Output Terminal for External Speaker |
|
|
|
Frame rate*3 |
| Max. 12 frames/second (640 x 480) |
|
| Max. 30 frames/second (320 x 240 or 160 x 120) |
|
|
|
[For assistance, please call: | 143 |