Operating Instructions
1.3Listening to Camera Audio—Talking to the Camera
1.Access the camera (see page 12).
• The Top page is displayed.
2.Click the [Single] tab at the top of the page.
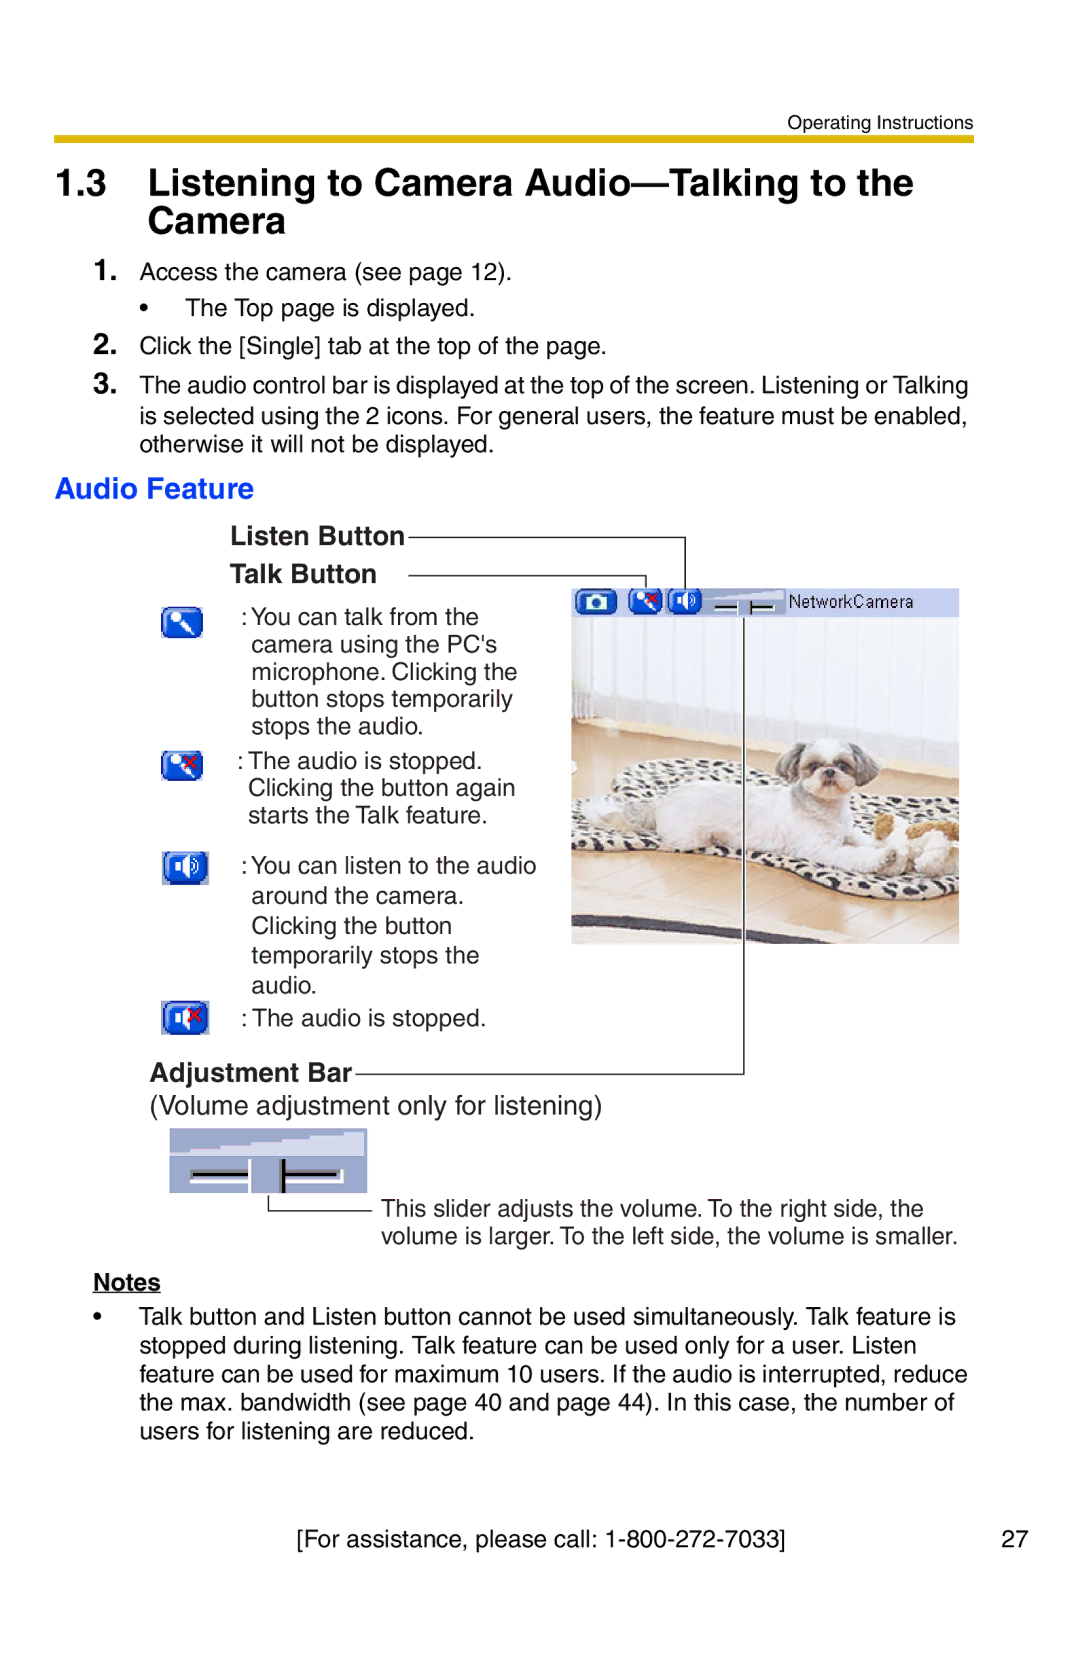
3.The audio control bar is displayed at the top of the screen. Listening or Talking is selected using the 2 icons. For general users, the feature must be enabled, otherwise it will not be displayed.
Audio Feature
Listen Button
Talk Button
:You can talk from the camera using the PC's microphone. Clicking the button stops temporarily stops the audio.
:The audio is stopped. Clicking the button again starts the Talk feature.
: You can listen to the audio around the camera. Clicking the button temporarily stops the audio.
: The audio is stopped.
Adjustment Bar
(Volume adjustment only for listening)
![]() This slider adjusts the volume. To the right side, the volume is larger. To the left side, the volume is smaller.
This slider adjusts the volume. To the right side, the volume is larger. To the left side, the volume is smaller.
Notes
•Talk button and Listen button cannot be used simultaneously. Talk feature is stopped during listening. Talk feature can be used only for a user. Listen feature can be used for maximum 10 users. If the audio is interrupted, reduce the max. bandwidth (see page 40 and page 44). In this case, the number of users for listening are reduced.
[For assistance, please call: | 27 |