English
9
Preparation
Settings
ID Code (a page 41)
Clock
Clock (a page 40)
Screen
Dimmer/Contrast/Bright/Color/Tint (a page 42)
Monitor
Tilt (a page 40)
DVD
Language (a page 46)
Aspect ratio (a page 50)
You may need to set the following depending on the
Remote Control Unit
Batteries Installation
(Inserting/Replacing the Battery)
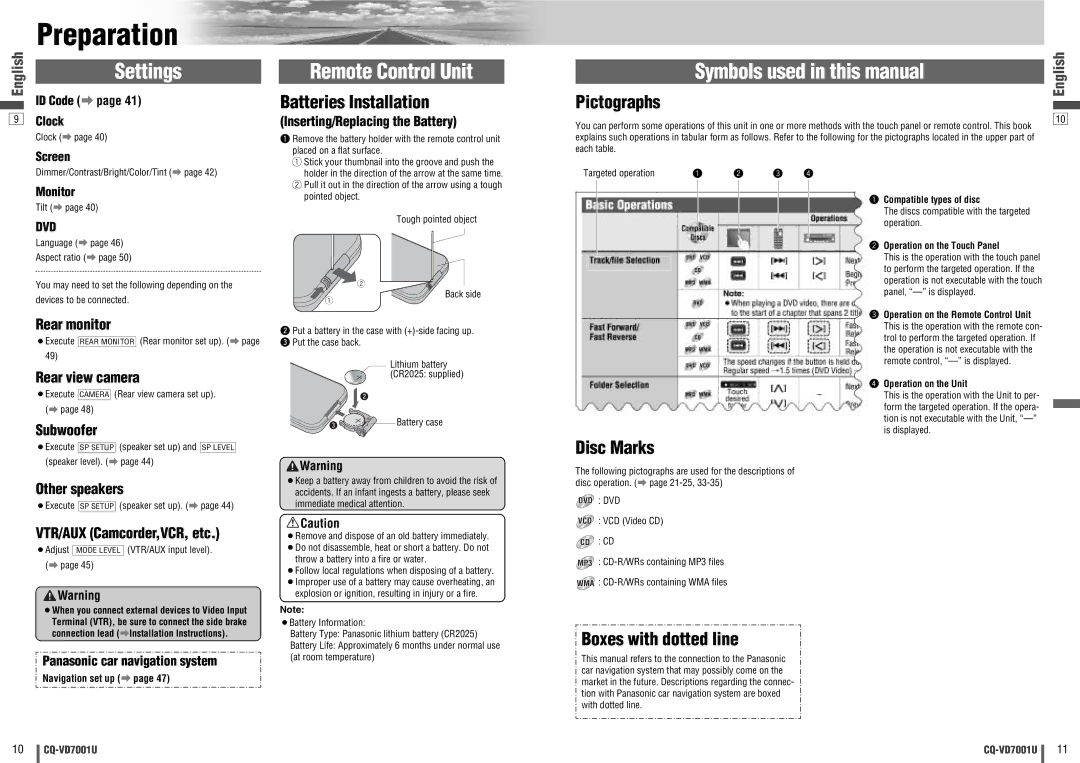
q Remove the battery holder with the remote control unit placed on a flat surface.
qStick your thumbnail into the groove and push the holder in the direction of the arrow at the same time.
wPull it out in the direction of the arrow using a tough pointed object.
Tough pointed object
w
|
|
| Symbols used in this manual |
| English | ||||||||
Pictographs |
|
|
|
|
|
|
|
|
| ||||
|
|
|
|
|
|
|
|
|
|
| |||
|
|
|
|
|
|
|
|
|
|
|
|
|
|
You can perform some operations of this unit in one or more methods with the touch panel or remote control. This book | 10 |
| |||||||||||
|
| ||||||||||||
explains such operations in tabular form as follows. Refer to the following for the pictographs located in the upper part of |
|
| |||||||||||
each table. |
|
|
|
|
|
|
|
|
|
|
| ||
Targeted operation | q | w | e | r |
|
| |||||||
|
|
|
|
|
|
|
|
|
| q Compatible types of disc |
|
| |
|
|
|
|
|
|
|
|
|
| The discs compatible with the targeted |
|
| |
|
|
|
|
|
|
|
|
|
| operation. |
|
| |
|
|
|
|
|
|
|
|
|
| w Operation on the Touch Panel |
|
| |
|
|
|
|
|
|
|
|
|
|
|
| ||
|
|
|
|
|
|
|
|
|
| This is the operation with the touch panel |
|
| |
|
|
|
|
|
|
|
|
|
|
| |||
|
|
|
|
|
|
|
|
|
| to perform the targeted operation. If the |
|
| |
|
|
|
|
|
|
|
|
|
|
| |||
|
|
|
|
|
|
|
|
|
| operation is not executable with the touch |
|
| |
devices to be connected.
q
Back side
panel, |
e Operation on the Remote Control Unit |
Rear monitor
¡Execute REAR MONITOR (Rear monitor set up). (a page 49)
Rear view camera
¡Execute CAMERA (Rear view camera set up). (a page 48)
Subwoofer
¡Execute SP SETUP (speaker set up) and SP LEVEL (speaker level). (a page 44)
Other speakers
¡Execute SP SETUP (speaker set up). (a page 44)
VTR/AUX (Camcorder,VCR, etc.)
¡Adjust MODE LEVEL (VTR/AUX input level). (a page 45)
![]() Warning
Warning
¡When you connect external devices to Video Input
Terminal (VTR), be sure to connect the side brake connection lead (aInstallation Instructions).
Panasonic car navigation system
Navigation set up (a page 47)
w Put a battery in the case with
Lithium battery (CR2025: supplied)
![]() w
w
e | Battery case |
![]() Warning
Warning
¡Keep a battery away from children to avoid the risk of accidents. If an infant ingests a battery, please seek immediate medical attention.
![]() Caution
Caution
¡Remove and dispose of an old battery immediately. ¡Do not disassemble, heat or short a battery. Do not
throw a battery into a fire or water.
¡Follow local regulations when disposing of a battery. ¡Improper use of a battery may cause overheating, an explosion or ignition, resulting in injury or a fire.
Note:
¡Battery Information:
Battery Type: Panasonic lithium battery (CR2025)
Battery Life: Approximately 6 months under normal use (at room temperature)
This is the operation with the remote con- |
trol to perform the targeted operation. If |
the operation is not executable with the |
remote control, |
r Operation on the Unit |
This is the operation with the Unit to per- |
form the targeted operation. If the opera- |
tion is not executable with the Unit, |
is displayed. |
Disc Marks |
The following pictographs are used for the descriptions of disc operation. (a page
DVD : DVD
VCD : VCD (Video CD)
CD : CD
MP3 :
WMA :
Boxes with dotted line
This manual refers to the connection to the Panasonic car navigation system that may possibly come on the market in the future. Descriptions regarding the connec- tion with Panasonic car navigation system are boxed with dotted line.
10
11