Preparation
Setting the Date/Time (Clock Set)
ªInitial Use
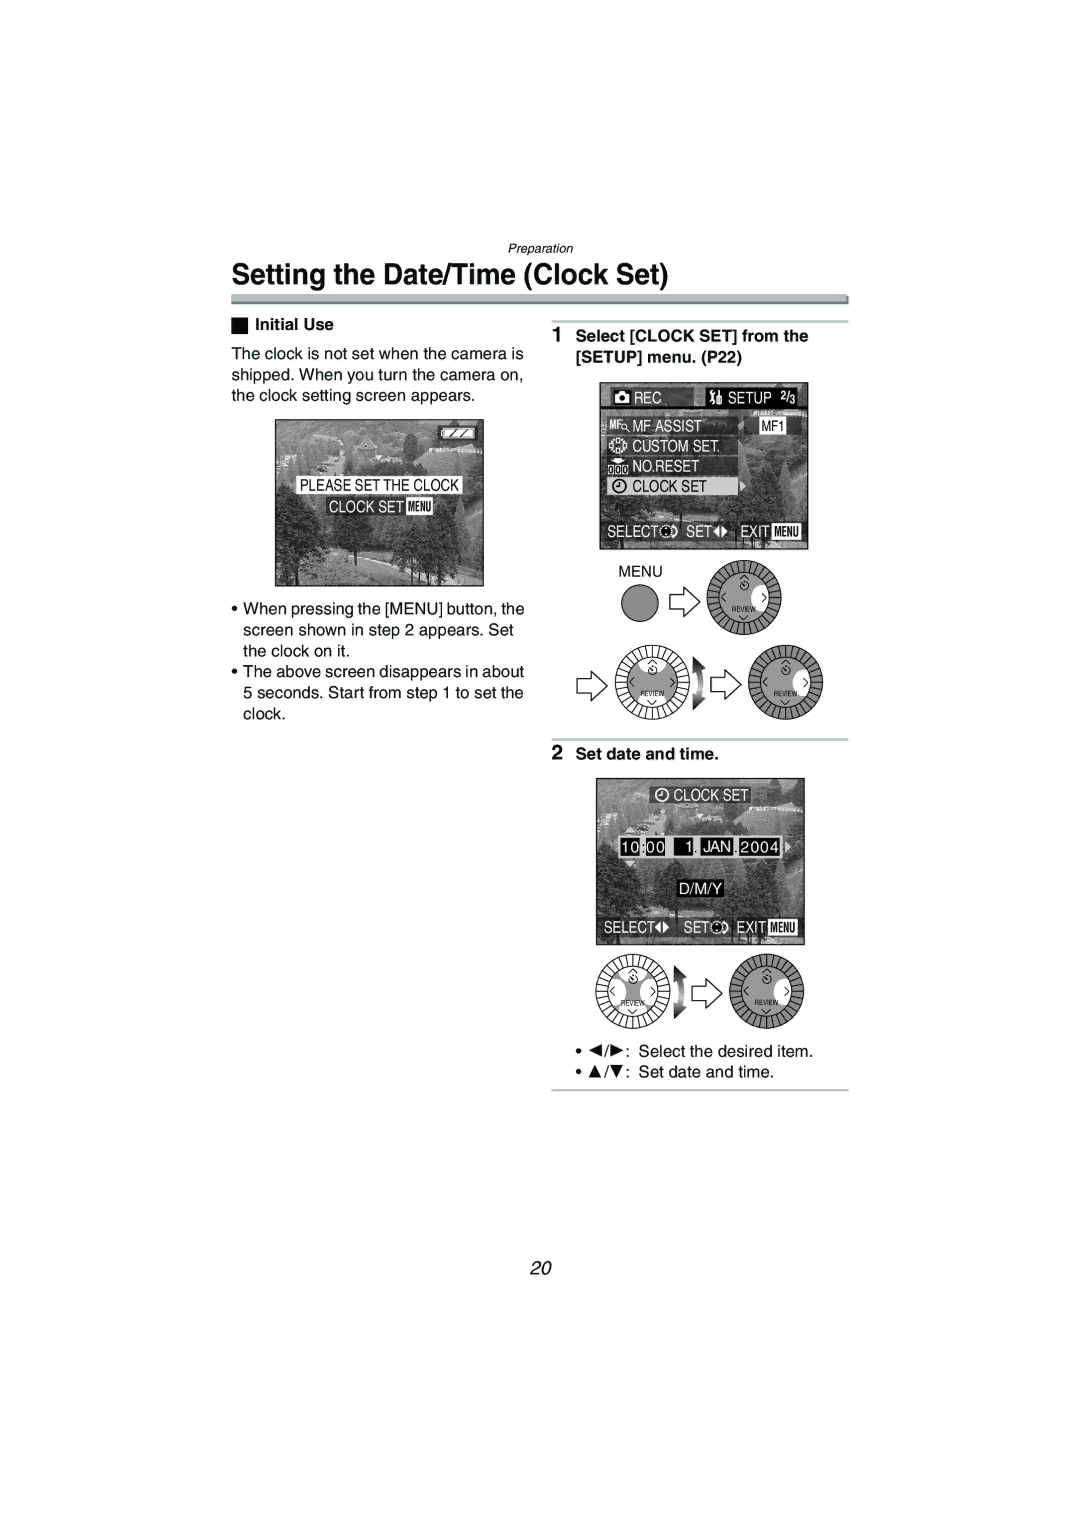
The clock is not set when the camera is shipped. When you turn the camera on, the clock setting screen appears.
PLEASE SET THE CLOCK
CLOCK SET MENU
•When pressing the [MENU] button, the screen shown in step 2 appears. Set the clock on it.
•The above screen disappears in about 5 seconds. Start from step 1 to set the clock.
1Select [CLOCK SET] from the [SETUP] menu. (P22)
|
|
| REC |
|
|
| SETU | P |
|
| 2 |
| / | 3 |
|
| ||||
|
|
|
|
| ||||||||||||||||
|
|
|
|
|
|
|
|
|
|
|
|
|
|
| ||||||
|
| MF ASSIST |
|
|
|
|
|
|
|
| ||||||||||
|
|
| MF1 | |||||||||||||||||
|
|
|
|
| ||||||||||||||||
|
|
| CUSTOM SET. |
|
|
|
|
|
|
|
|
|
|
|
|
| ||||
|
| NO.RESET |
|
|
|
|
|
|
|
|
|
|
|
|
| |||||
|
|
|
|
|
|
|
|
|
|
|
|
|
|
|
|
|
|
|
| |
|
|
| CLOCK SET |
|
|
|
|
|
|
|
|
|
|
|
|
| ||||
SELECT | SET | EXIT |
|
|
|
| ||||||||||||||
MENU | ||||||||||||||||||||
|
|
| ||||||||||||||||||
| MENU |
|
|
|
|
|
|
|
|
|
|
|
|
|
|
|
| |||
|
|
|
|
|
|
|
|
|
|
|
|
|
|
|
|
| ||||
|
|
| REVIEW | |||||||||||||||||
|
|
|
|
|
|
|
| |||||||||||||
|
|
|
|
|
|
|
| |||||||||||||
|
|
|
|
|
|
|
|
|
|
|
|
|
|
| ||||||
|
|
|
|
|
|
|
|
|
|
|
|
|
|
| ||||||
|
|
|
|
|
|
|
|
|
|
|
|
|
|
| ||||||
|
|
|
|
|
|
|
|
|
|
|
|
|
|
|
|
|
|
|
|
|
|
|
| REVIEW |
|
|
|
|
|
|
| REVIEW | |||||||||
|
|
|
|
|
|
|
|
|
| |||||||||||
2Set date and time.
![]() CLOCK SET
CLOCK SET
10 :00 11. JAN . 2004 ![]()
D/M/Y
SELECT![]() SET
SET![]() EXIT MENU
EXIT MENU
REVIEW | REVIEW |
•2/1: Select the desired item.
•3/4: Set date and time.
20
