Playback (advanced)
Connecting to a PC (Mass Storage)
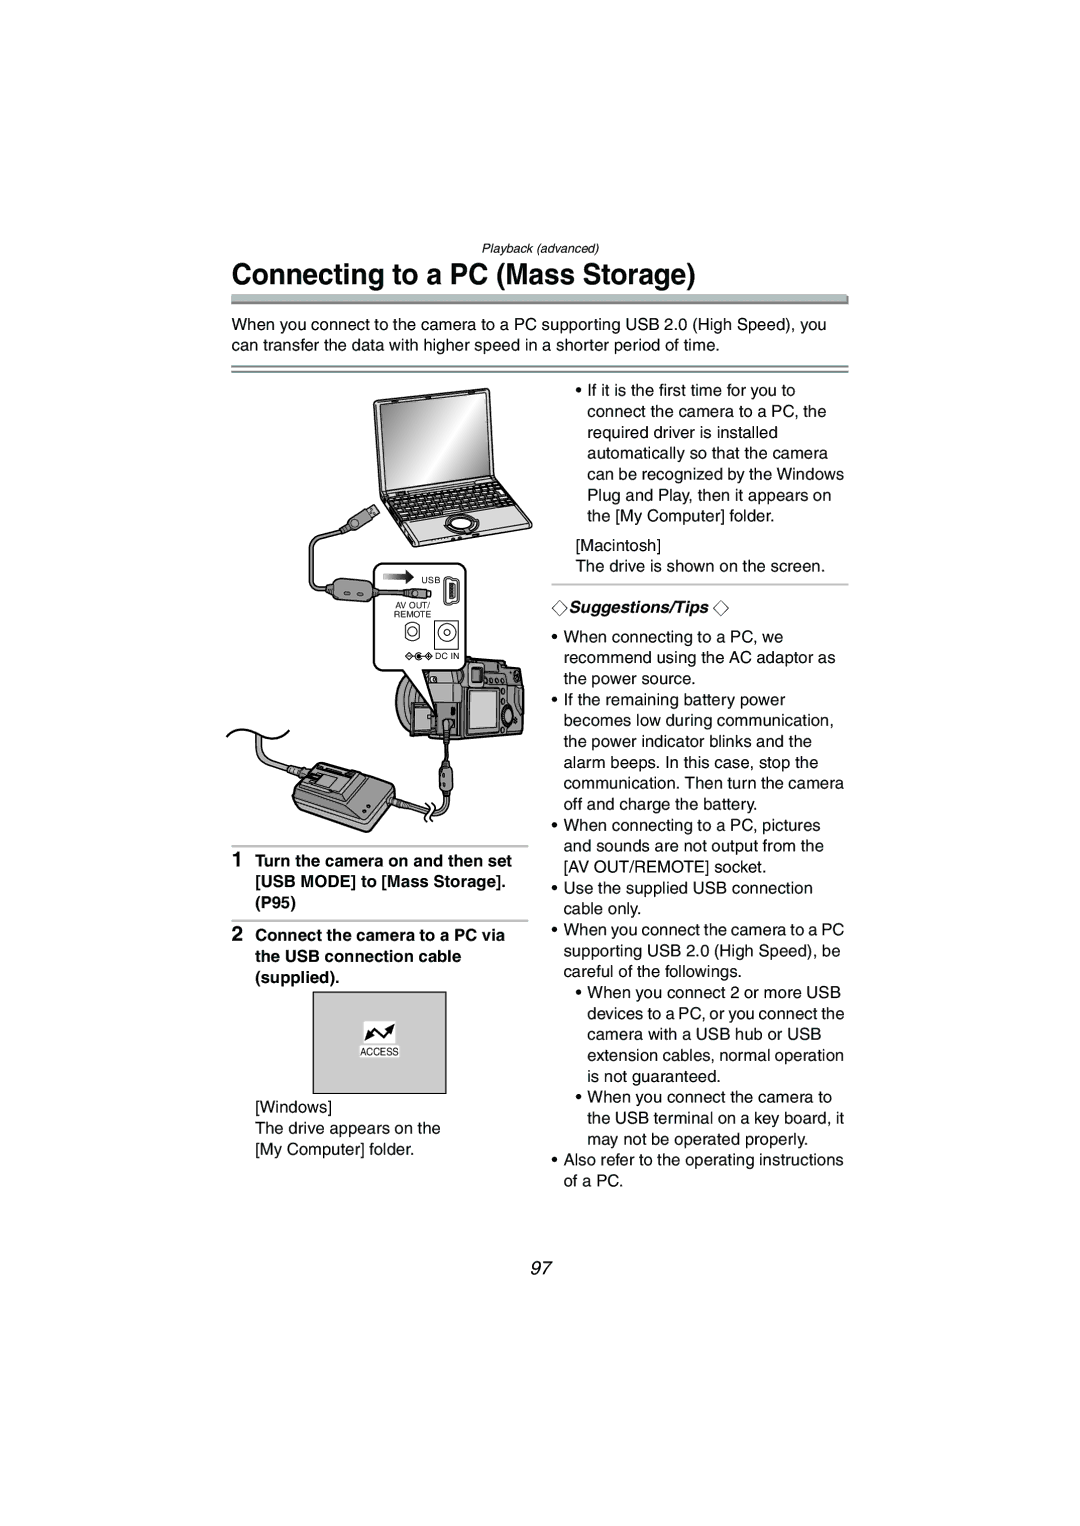
When you connect to the camera to a PC supporting USB 2.0 (High Speed), you can transfer the data with higher speed in a shorter period of time.
USB
AV OUT/
REMOTE
![]() DC IN
DC IN![]()
![]()
1Turn the camera on and then set [USB MODE] to [Mass Storage]. (P95)
2Connect the camera to a PC via the USB connection cable (supplied).
ACCESS
[Windows]
The drive appears on the [My Computer] folder.
•If it is the first time for you to connect the camera to a PC, the required driver is installed automatically so that the camera can be recognized by the Windows Plug and Play, then it appears on the [My Computer] folder.
[Macintosh]
The drive is shown on the screen.
¬Suggestions/Tips ¬
•When connecting to a PC, we recommend using the AC adaptor as the power source.
•If the remaining battery power becomes low during communication, the power indicator blinks and the alarm beeps. In this case, stop the communication. Then turn the camera off and charge the battery.
•When connecting to a PC, pictures and sounds are not output from the [AV OUT/REMOTE] socket.
•Use the supplied USB connection cable only.
•When you connect the camera to a PC supporting USB 2.0 (High Speed), be careful of the followings.
•When you connect 2 or more USB devices to a PC, or you connect the camera with a USB hub or USB extension cables, normal operation is not guaranteed.
•When you connect the camera to the USB terminal on a key board, it may not be operated properly.
•Also refer to the operating instructions of a PC.
97
