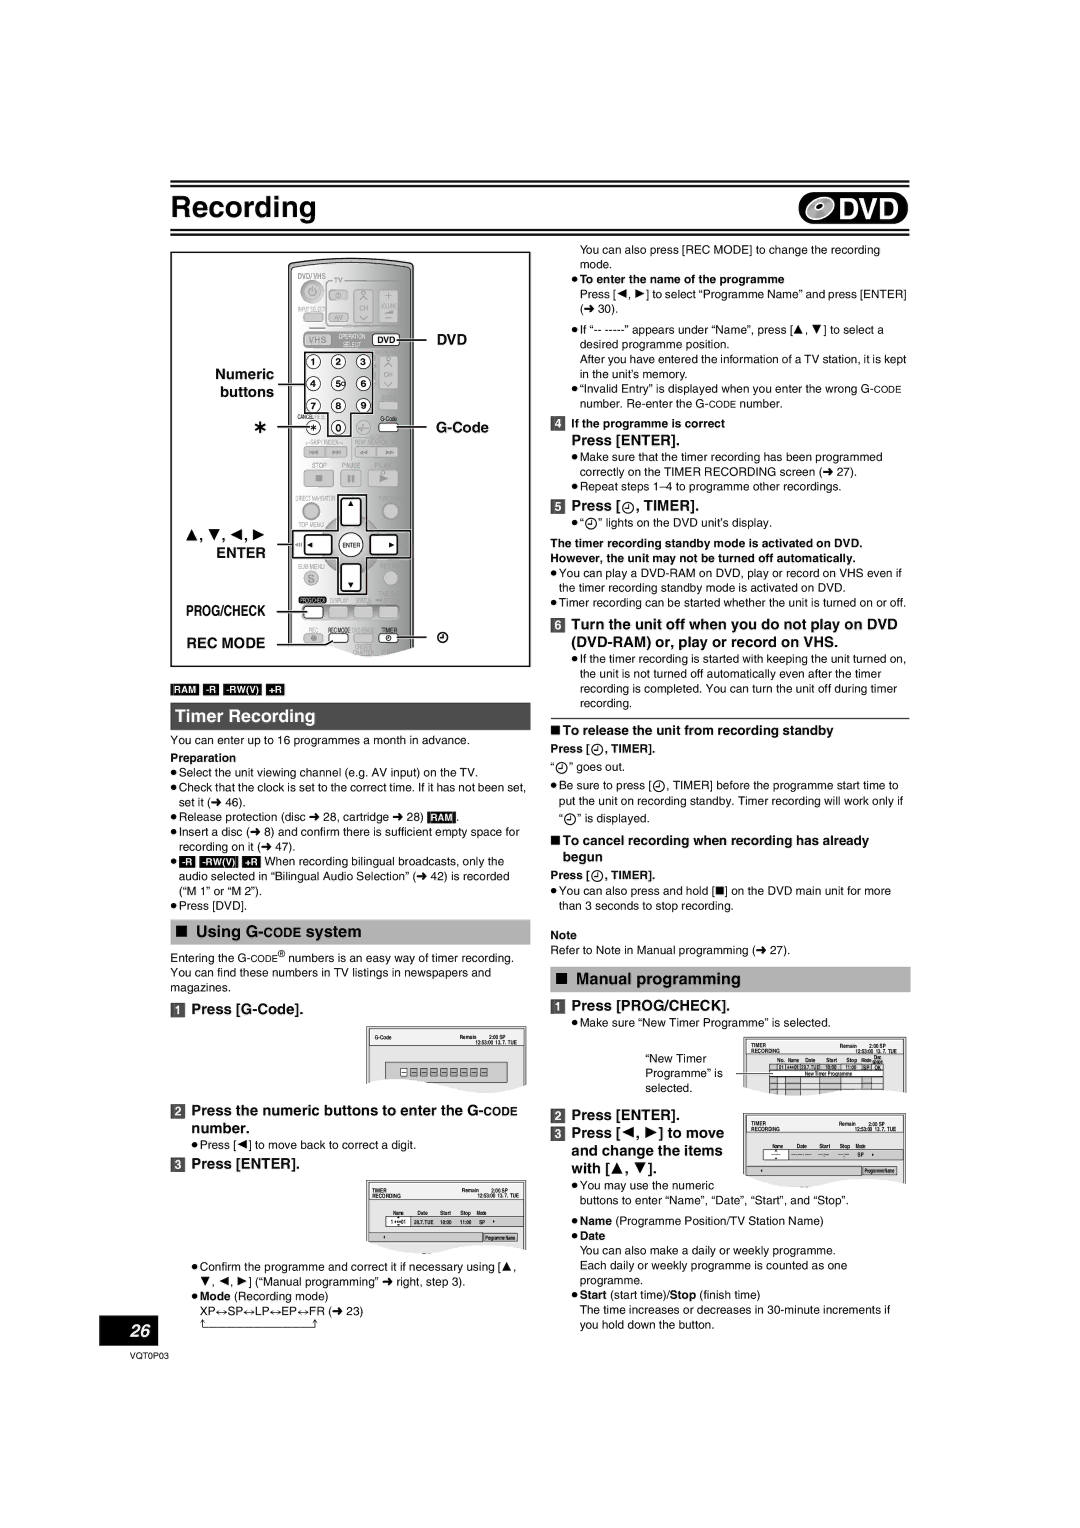
Recording | DVD |
|
|
26
DVD/ VHS | TV |
|
|
INPUT SELECT | CH | VOLUME |
|
|
| ||
| AV |
|
|
VHS | OPERATION | DVD | DVD |
SELECT | |||
|
|
| |
Numeric |
|
|
|
buttons |
| AUDIO |
|
CANCEL/RESET | |||
| SLOW/ | ||
SKIP/ INDEX | FF | ||
REW SEARCH | |||
| PLAY |
| |
DIRECT NAVIGATOR |
| FUNCTIONS | |
TOP MENU |
|
|
|
3, 4, 2, 1 |
|
|
|
ENTER |
|
|
|
SUB MENU |
|
| RETURN |
S |
|
|
|
PROG/CHECK DISPLAY |
| TIME SLIP | |
STATUS | JET REW | ||
PROG/CHECK |
|
|
|
REC | REC MODE DVD ERASE | TIMER | |
REC MODE |
| CREATE | F Rec |
DUBBING | CHAPTER | ||
VHS | DVD | C |
|
A | B |
| |
[RAM]
Timer Recording
You can enter up to 16 programmes a month in advance.
Preparation
≥Select the unit viewing channel (e.g. AV input) on the TV.
≥Check that the clock is set to the correct time. If it has not been set, set it (l 46).
≥Release protection (disc l 28, cartridge l 28) [RAM].
≥Insert a disc (l 8) and confirm there is sufficient empty space for recording on it (l 47).
(“M 1” or “M 2”). ≥Press [DVD].
∫Using G-CODE system
Entering the
[1]Press
Remain | 2:00 SP |
12:53:00 13. 7. TUE
[2]Press the numeric buttons to enter the
number.
≥Press [2] to move back to correct a digit.
[3]Press [ENTER].
TIMER |
|
|
| Remain | 2:00 SP | |
RECORDING |
|
|
|
| 12:53:00 13. 7. TUE | |
Name | Date | Start | Stop | Mode | ||
1 ***01 | 20.7.TUE | 10:00 | 11:00 |
| SP | |
|
|
|
|
|
| Programme Name |
P | ENTER t | t |
|
|
| |
≥Confirm the programme and correct it if necessary using [3, 4, 2, 1] (“Manual programming” l right, step 3).
≥Mode (Recording mode) XP,.SP,.LP,.EP,.FR (l 23)
You can also press [REC MODE] to change the recording mode.
≥To enter the name of the programme
Press [2, 1] to select “Programme Name” and press [ENTER] (l 30).
≥If
After you have entered the information of a TV station, it is kept in the unit’s memory.
≥“Invalid Entry” is displayed when you enter the wrong
[4]If the programme is correct
Press [ENTER].
≥Make sure that the timer recording has been programmed correctly on the TIMER RECORDING screen (l 27).
≥Repeat steps
[5]Press [ , TIMER].
≥“ ” lights on the DVD unit’s display.
The timer recording standby mode is activated on DVD. However, the unit may not be turned off automatically.
≥You can play a
≥Timer recording can be started whether the unit is turned on or off.
[6]Turn the unit off when you do not play on DVD
≥If the timer recording is started with keeping the unit turned on, the unit is not turned off automatically even after the timer recording is completed. You can turn the unit off during timer recording.
∫To release the unit from recording standby
Press [ , TIMER].
“![]() ” goes out.
” goes out.
≥Be sure to press [![]() , TIMER] before the programme start time to put the unit on recording standby. Timer recording will work only if “
, TIMER] before the programme start time to put the unit on recording standby. Timer recording will work only if “![]() ” is displayed.
” is displayed.
∫To cancel recording when recording has already begun
Press [![]() , TIMER].
, TIMER].
≥You can also press and hold [∫] on the DVD main unit for more than 3 seconds to stop recording.
Note
Refer to Note in Manual programming (l 27).
∫Manual programming
[1]Press [PROG/CHECK].
≥Make sure “New Timer Programme” is selected.
|
| TIMER |
|
| Remain | 2:00 SP | ||||
“New Timer | RECORDING |
|
| 12:53:00 13. 7. TUE | ||||||
| No. Name | Date | Start | Stop Mode spaceDisc | ||||||
Programme” is |
|
| 01 | ***01 | 20.7.TUE | 10:00 | 11:00 | SP | OK |
|
|
|
|
| New Timer Programme |
|
|
| |||
|
|
|
|
|
|
| ||||
selected. |
|
|
|
|
|
|
|
|
| |
|
|
|
|
|
|
|
|
|
|
|
[2]Press [ENTER].
[3] | Press [2, 1] to move | TIMER |
|
|
| Remain |
| 2:00 SP | ||
RECORDING |
|
|
| 12:53:00 13. 7. TUE | ||||||
| and change the items |
| Name |
| Date | Start | Stop Mode | |||
|
|
|
| . . | : | : | SP | |||
| with [3, 4]. |
|
|
|
|
|
|
|
|
|
|
|
|
|
|
|
|
| Programme Name |
| |
| ≥You may use the numeric |
|
| P ENTER t | t |
|
|
|
| |
| buttons to enter “Name”, “Date”, “Start”, and “Stop”. |
|
|
| ||||||
≥Name (Programme Position/TV Station Name) ≥Date
You can also make a daily or weekly programme. Each daily or weekly programme is counted as one programme.
≥Start (start time)/Stop (finish time)
The time increases or decreases in
VQT0P03
