DVD Recorder
This Unit is Intended for USE in Moderate Climates
RQLS0233 Inside of product
Precautions
Useful features
About descriptions in these operating instructions
Contents
Transferring Dubbing
Reference
Concerning discs
Discs you can use for recording and play 12 cm/8 cm
DVD Video Recording format
DVD-Video format
Play-only discs 12 cm/8 cm
Discs that cannot be played
Concerning logo marks
Optional accessories
Which Disc Types is Playable on What TV
Inserting discs
Press , OPEN/CLOSE on the main unit to Open the tray
Maintenance
Disc handling
Using DVD-R, DVD-RW and +R on this unit
Therefore, follow the steps below when you use DVD-R, etc
When recording a bilingual programme to DVD-R, etc
Restrictions with DVD-R, etc
Remote control
VHS and DVD button
Batteries and remote control
DVD/VHS drive indicator
Main unit
About batteries
Accessories
Unit’s display
Connecting a TV
Connection
Connection to the S Video terminal
Connection to the component video terminals
Connection to a stereo amplifier analog connection
DVD output and DVD/VHS output
Auto-Setup
Auto-Setup
Set up to match your TV and remote control
Selecting TV type
TV operation
Press Functions Select To Others with 3, 4 and press Enter
PAL system televisions
To enjoy progressive video
To return to the previous screen
≥If you have an LCD/plasma television or LCD projector
Starting play from where you stopped it Resume Function
Playing discs
Quick View Play t1.3
Fast forward and rewind Search
Direct play
Create chapters
Erasing a title that is being played
Using menus to play MP3 discs
Changing audio during play
Playing discs which contain both MP3 and still pictures
Using the tree screen to find a group
To show Jpeg Menu
Playing a still picture
Start Slide Show/Slide Interval
Recording procedures
Recording TV programmes
Recording modes and approximate recording times
Press CH, W, X to select the channel
Specifying the time when recording will stop
Flexible Recording mode FR
Watching the TV while recording
Playing while you are recording
Chasing play
Simultaneous recording and play
Playing/Recording VHS while recording
Timer Recording
Using G-CODEsystem
Manual programming
Press Enter when you have finished making Changes
Press ¢, Cancel to delete, or press Enter To change
Check, change or delete programmes
Press 3, 4 to select the programme
Disc Name
Disc Protection
Erase all titles
Select Disc Name with 3, 4 and press
Format Disc
Auto-Play Select
Finalize
To stop formatting RAM
Entering text
Show Enter Name screen
Using the Direct Navigator
Selecting recorded titles to play
Editing titles with SUB Menu button
Erase
Edit
Chapter View
Using playlist
Creating playlists
Select Playlists with 3, 4 and press
Press Return
Playing playlists
Editing playlists with SUB Menu button
Use 3, 4, 2, 1 to select a playlist and press Enter
Playlist
Use 3, 4, 2, 1 to select a playlist
Then select Edit
With 3, 4 and press
Use 3, 4 to select a
Press SUB MENU, and select Chapter View
With 3, 4 and press Enter
Add Chapter
Select Add Chapter with 3, 4 and press Erase Chapter
Using Display menus
Common procedures
Disc menu
Press Display
Play menu
Picture menu
Sound menu
Other menu
Changing the unit’s settings
Entering a password Ratings
Select Setup with 3, 4 and press Enter
≥Do not forget your password
Summary of settings
Sound Dynamic Range Compression
Bilingual Audio Selection
Digital Audio Output
PCM Down Conversion
Others / Remote Control l
Clock l Power Save
Default Settings
Language code list
Channel Settings
Selecting the manual tuning
Auto-Setup Restart
Select Auto-Setup Restart with 3, 4 Press Enter
Adding, deleting, and moving channels
List of TV Reception Channels Country
Clock Settings
Press 3, 4 to change the setting
≥You can also use the numeric buttons for setting
Child Lock
Functions window
Status displays
Display examples
Changing the information displayed
Setting Up
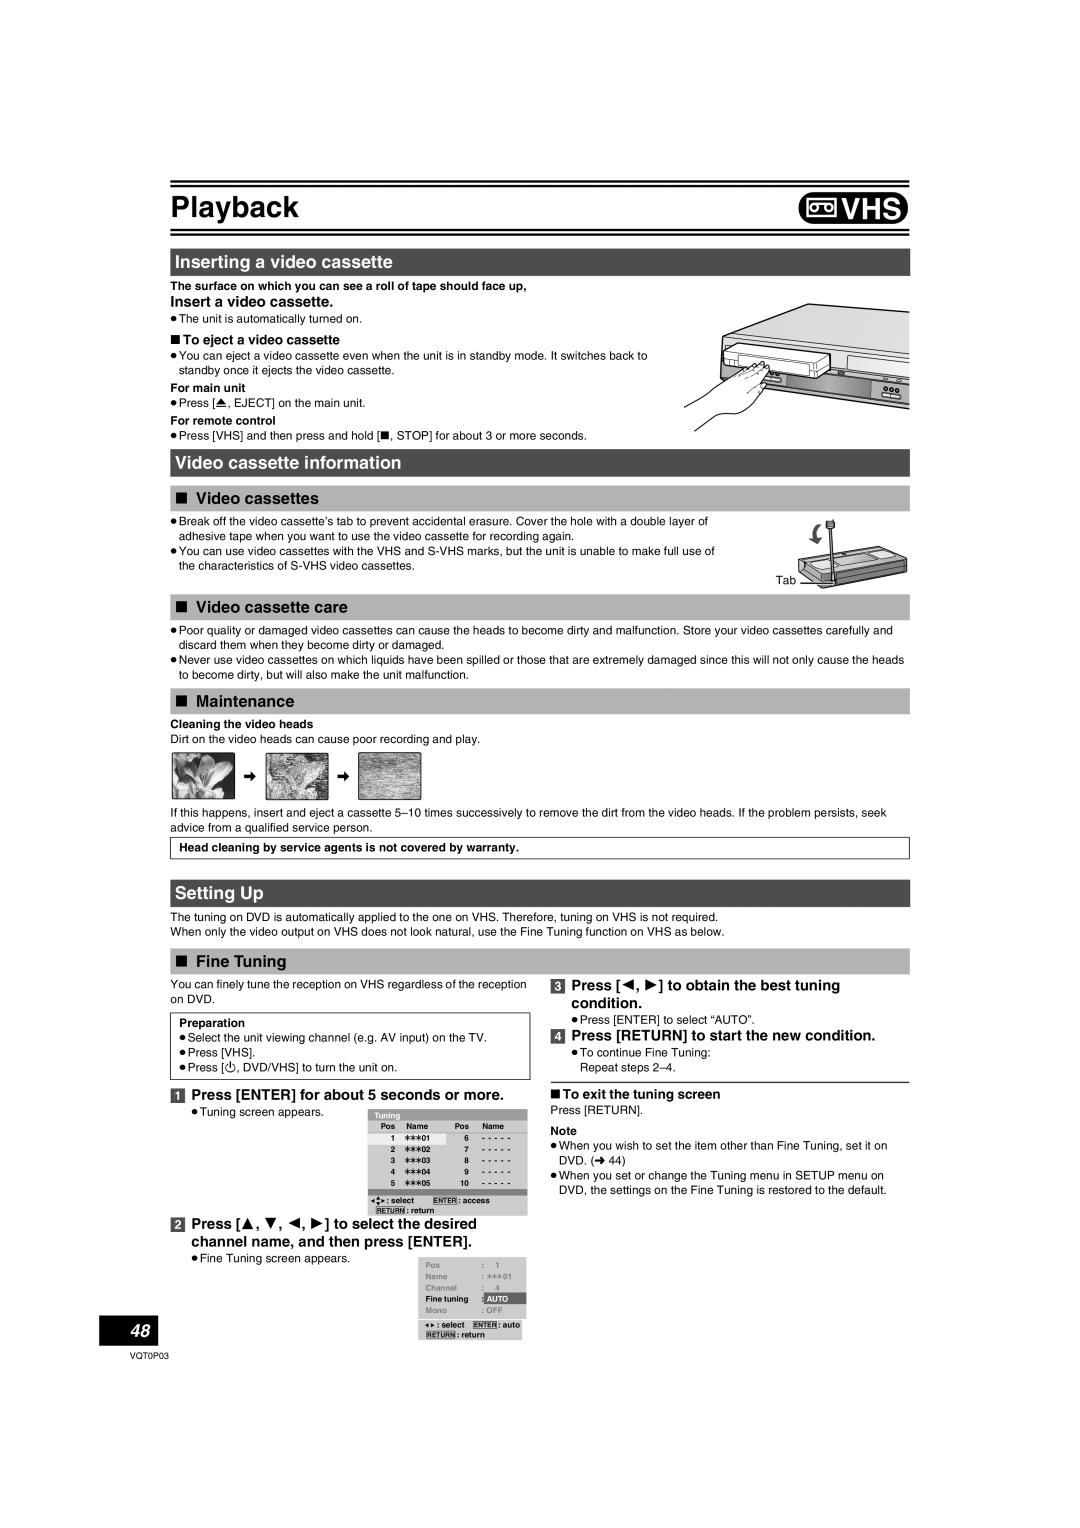
Inserting a video cassette
Video cassette information
Fast-forward/Rewind
Cue/Review
Jet Search
Playing a video cassette
Adjusting the playback picture
Playing a tape with high image quality
VHS Quasi Playback Sqpb
Repeat Playback
Specifying the time when recording will stop
Press REC Mode to select a recording mode
Watching the TV while recording
Playing/Recording DVD while VHS recording
Turn the unit off when you do not play or record on DVD
≥ lights on the VHS unit’s display
Recording mode Auto Change Function
Press 2, 1 to move and change the items with 3
Highlighted line is ready
For programming
Summary of settings
VHS Index Search System Viss
Press , Index or 9, Index
Various indications in on-screen display
Changing audio
Press Status
Transferring dubbing with detailed settings
Before transferring dubbing
Easy transferring dubbing with one button
Direction Type of transfer dubbing you want
Transfer Dubbing from VHS
One Touch Transfer Dubbing VHS l DVD
To stop transfer dubbing in the middle
Dividing a title to be transferred dubbed
GUI Graphical User Interface Transfer Dubbing VHS l DVD
Press REC Mode to select the recording mode. l Press ¥, REC
Manual Transfer Dubbing VHS l DVD
When you transfer dub a whole disc
Transfer Dubbing from DVD
One Touch Transfer dubbing DVD l VHS
VHS -/A
Transfer Dubbing DVD l VHS
Make sure to select Start Dubbing and press Enter
Register titles and playlists for transfer dubbing
To set for the registration
Setting the unit to
Set Dubbing Time
To edit the transferring dubbing list
Transfer dub according
When the top menu is displayed
Press Enter to start transfer
Dub
Disc top menu is displayed
Manual Transfer Dubbing DVD l VHS
Press DVD and press 1, Play
About DC channel
Recording from an external device
Press , PAUSE, then press ¥, REC
To skip unwanted parts
Cables, turn on both
Glossary
Frequently asked questions
Set up
Disc
Error messages
Common
On the unit’s display
On the TV
Troubleshooting guide
Power
Operation
Picture
DVD
DVD Picture
DVD Sound
DVD Play
VHS
Specifications
Power Consumption 36 W
DVD/VHS Common
Tuner system
F0405Nt1055